Content Governance

Content governance can help to create and publish high-quality content consistently and deliver a better ROI.

Content Governance

Learn how content governance can help you create and publish high-quality content consistently and deliver you a better return on investment.

Content Governance - Business meeting with laptops.Content governance is the process of establishing rules and guidelines for creating, editing, and publishing content.

This ensures that all content is consistent, accurate, and aligned with your organization’s overall messaging and goals.

In this lesson, we look at the importance of content governance and the role it plays in helping to maintain consistency and quality in all of your content.

***

What Is Content Governance?

Content governance is the process of establishing rules and guidelines for creating, editing, and publishing content in your organization. It is a framework for managing the overall strategy, production, distribution, and archiving of your content.

The goal of content governance is to ensure that all of your content is consistent, accurate, and aligned with your organization’s overall messaging and goals while addressing legal and compliance requirements, performance measurement, and retention policies.

Examples of content governance include:

  • Defining roles and responsibilities for content creation and editing helps to ensure that your content is created and edited by the appropriate individuals or teams and that the content review and approval process is followed and actioned by all the necessary parties. (See Content Team)
  • Setting guidelines for messaging, tone, and style of content ensures that your content is consistent in terms of language, tone, and style, which helps to maintain a strong and consistent brand message. (See Content Style Guide)
  • Setting guidelines for the use of images and videos ensures that all visual content is consistent in terms of style and quality, which helps to maintain a strong and consistent brand message.
  • Creating a process for reviewing and approving content ensures that your content is accurate and meets your organization’s standards before it is published. (See Content Workflow)
  • Implementing a content management system allows your organization to organize and streamline its content creation and publishing process, make it easier for multiple users to access and edit content, manage, track, and measure the effectiveness of the content, and control access and permissions for content creation and editing. (See CMS)
  • Establishing a content calendar and production workflow helps to ensure that your content is created and published on schedule and that it goes through the necessary review and approval steps before being published. (See Content Calendar)
  • Archiving and retention policies ensure that your content is kept safe and can be recovered in case of any loss. (See Content Documentation)
  • Legal and compliance requirements ensure that your content is compliant with legal and regulatory requirements.
  • Measuring performance and monitoring ensures that your organization is able to evaluate the performance of its content to identify what’s working and what’s not and make adjustments to the content and governance process accordingly. (See Content Tracking)
  • Regularly reviewing and updating guidelines helps to ensure that the guidelines remain relevant and effective and that they are followed consistently.
  • Having a legal compliance review process in place helps to ensure that your content is compliant with legal requirements such as copyright laws and advertising regulations.
  • Implementing a governance board or committee helps to ensure that the content governance process is followed consistently and that any issues or concerns are addressed in a timely manner.

Benefits Of Content Governance

The key benefits of having established rules and guidelines for creating and publishing content through content governance include the following:

  • Consistency: Establishing guidelines for tone, style, and messaging ensures that all content is consistent and helps build trust and credibility with the audience. Example: All press releases are to be written in a formal and professional tone, using the Chicago Manual of Style.
  • Efficiency: Guidelines streamline the content creation and approval process, reducing errors, and making the process more efficient. Example: Create a content review process with specific steps, roles, and time frames defined for each step, and make sure that the content is reviewed and approved in a timely manner.
  • Brand alignment: Guidelines help to ensure that all content aligns with the brand’s messaging and values. Example: All social media posts are to reflect the brand’s mission and values.
  • Legal compliance: Guidelines help to ensure that all content is compliant with legal requirements such as copyright laws and advertising regulations. Example: all images and videos used in content must be properly licensed and attributed.
  • Better ROI: Guidelines can help to ensure that all content is effective in achieving its goals and generating a positive return on investment (ROI). Example: Establish a clear set of guidelines and metrics to measure the success of our content marketing campaign so we can optimize the content to generate a better ROI.

Why Rules And Guidelines For Creating, Editing, And Publishing Content Are Important

Rules and guidelines for creating, editing, and publishing content are important because they ensure consistency and accuracy in all content and help to maintain a strong and consistent brand message, which is essential for building trust and credibility with audiences.

Additionally, they help to ensure that all content is of high quality, which is important for engaging and retaining audiences.

Here are some examples of rules and guidelines you can implement for creating, editing, and publishing content:

Tone And Style Guidelines

Specify the tone and style of different types of content, such as formal and professional for business proposals, and conversational and friendly for social media posts.

Example: All press releases should be written in a formal and professional tone and style.

Grammar And Formatting Guidelines

Define the rules of grammar, punctuation, capitalization, and formatting for your content.

Example: Use the Chicago Manual of Style as the primary guide for grammar, punctuation, capitalization, and formatting.

Branding And Messaging Guidelines

Specify how content should align with your brand’s messaging and values.

Example: All social media posts should reflect the company’s mission and values.

Legal Compliance Guidelines

Ensure that all content is compliant with legal requirements such as copyright laws and advertising regulations.

Example: All images and videos used in content must be properly licensed and attributed.

Content Creation Guidelines

Define who is responsible for creating different types of content, such as blog posts, social media posts, and marketing materials.

Example: The content creator is responsible for writing blog posts and social media posts.

Content Editing Guidelines

Define who is responsible for editing different types of content, such as proofreading, fact-checking, and legal review.

Example: The editor is responsible for proofreading and fact-checking all written content.

Content Approval Guidelines

Describe the approval process, including who is responsible for reviewing and approving content before it is published.

Example: All written content must be reviewed and approved by the editor before being submitted to the approver.

Content Archiving Guidelines

Specify guidelines for archiving or removing content that is no longer relevant or useful.

Example: All content that is more than 2 years old should be archived.

Metrics And Analytics Guidelines

Set guidelines for measuring and analyzing the performance of content, and using the data to make adjustments to the content and governance process accordingly.

Example: Use Google Analytics to track the performance of the website and adjust the content accordingly.

Review and Update Guidelines

Specify how your organization will ensure the guidelines themselves remain relevant and effective.

Example: Review guidelines every 6 months and update them as needed.

Additional Guidelines

Include additional guidelines in your documentation.

For example:

Forum / User-Generated Guidelines

Here are some widely acceptable guidelines you may want to include in your documentation for posting user-generated content on forums, membership sites, etc. :

  • Respectful Communication: Encourage members to communicate respectfully, avoiding personal attacks, harassment, or offensive language.
  • Supportive Environment: Foster a supportive and inclusive community where members feel safe and comfortable sharing their thoughts and experiences.
  • Content Relevance: Post content relevant to the forum’s purpose and categories to maintain a focused discussion.
  • No Spamming: Avoid excessive self-promotion, spam, or unrelated content. Prohibit the posting of repetitive, irrelevant, or promotional content to maintain the quality of discussions.
  • Membership Tiers: Align content with the appropriate membership tiers to maintain exclusivity and fairness.
  • Contribution Quality: Encourage high-quality contributions, such as long-form blog posts, videos, interviews, webinars, and relevant resource lists.
  • Sophistication: Acknowledge the sophistication of the community and adhere to higher standards of discussion.
  • Content Protection: Implement role-based content protection to ensure access aligns with membership privileges.
  • Copyright Compliance: Emphasize the importance of respecting copyright laws and not posting copyrighted material without proper authorization.
  • Constructive Criticism: Encourage constructive feedback and discussions while discouraging negative or unhelpful comments.
  • User Privacy: Respect members’ privacy by refraining from sharing personal information without consent and adhering to data protection regulations.
  • Updates and Amendments: Reserve the right to update or amend forum guidelines as necessary, with clear communication to all members.
  • Moderation Policies: Outline the consequences of violating forum guidelines, including warnings, temporary suspensions, or permanent bans, to ensure accountability.
  • Report Functionality: Encourage members to report inappropriate content or behavior to moderators for prompt action.

The Role of Content Governance

Content governance plays an important role in areas like:

  • Maintaining consistency in your brand messaging
  • Ensuring the quality of your content
  • Managing access and permissions for creating and editing content
  • Tracking and measuring the effectiveness of your content

Let’s take a look at each of these areas.

Maintaining Consistency In Brand Messaging

Content governance plays an essential role in maintaining consistency in your brand messaging by ensuring that all content is consistent in terms of language, tone, and style, and by providing guidelines for visual elements and a process for reviewing and approving content.

This helps to maintain a strong and consistent brand message, which is crucial for building trust and credibility with your audience.

Examples of how content governance helps to maintain consistency in your brand messaging include:

  • Defining a specific tone and style for all content ensures that all content is consistent in terms of language, tone, and style.
  • Setting guidelines for the use of images and videos ensures that all visual content is consistent in terms of style and quality.
  • Creating a brand style guide sets guidelines for the use of colors, typography, and other visual elements that are used across all content.
  • Implementing a content management system allows your organization to manage, track, and measure the effectiveness of your content, and to control access and permissions for content creation and editing.
  • Having a centralized team responsible for creating, editing, and publishing content ensures that all content is consistent and aligned with your organization’s overall messaging and goals.
  • Having a content review and approval process helps to ensure that all content is accurate and meets your organization’s standards before it is published, which is important for maintaining the credibility of your organization and the consistency of your brand message.

Ensuring Quality Of Content

Content governance plays a crucial role in ensuring the quality of your content by establishing rules and guidelines for creating, editing, and publishing content. These rules and guidelines help to ensure that all content you publish will be accurate, relevant, and of high quality.

Examples of how content governance helps to ensure the quality of your content include:

  • Creating a process for reviewing and approving content ensures that all content is accurate and meets your organization’s standards before it is published.
  • Establishing guidelines for research and fact-checking ensures that all content is based on accurate and credible sources, which helps to ensure the quality of your content.
  • Setting standards for the use of grammar, punctuation, and spelling ensures that all content you create will be free of errors, which helps to ensure the quality of your content.
  • Implementing a content management system allows your organization to manage, track, and measure the effectiveness of your content, and to control access and permissions for content creation and editing. This ensures that the content is of high quality and meets your standards.
  • Having a centralized team responsible for creating, editing, and publishing content ensures that all content is consistent and aligned with your organization’s overall messaging and goals and that the quality of your content is maintained.
  • Having a content review and approval process ensures that all content you produce is accurate, relevant, and of high quality before it is published, which is important for maintaining the credibility of your organization and the quality of your content.

Managing Access And Permissions For Content Creation And Editing

Content governance plays an important role in managing access and permissions for content creation and editing.

By establishing rules and guidelines for creating, editing, and publishing content, content governance ensures that only authorized individuals have access to create and edit content, and that content is reviewed and approved by the necessary parties.

Examples of how content governance helps to manage access and permissions for content creation and editing include:

  • Defining roles and responsibilities for content creation and editing ensures that all content is created by the appropriate individuals and is reviewed and approved by the necessary parties.
  • Creating a process for reviewing and approving content ensures that all content is accurate and meets your organization’s standards before it is published and that only authorized individuals have access to create and edit content.
  • Implementing a content management system allows your organization to manage, track, and measure the effectiveness of your content, and to control access and permissions for content creation and editing. This ensures that only authorized individuals have access to create and edit content.
  • Having a centralized team responsible for creating, editing, and publishing content ensures that all content is consistent and aligned with your organization’s overall messaging and goals and that only authorized individuals have access to create and edit this content.
  • Establishing an access control system ensures that only authorized individuals have access to create and edit content, and that content is reviewed and approved by the necessary parties.
  • Assigning different levels of permissions allows your organization to assign different levels of permissions to different users, such as content creators, editors, and reviewers, to ensure that only authorized individuals have access to create and edit content.

Tracking And Measuring The Effectiveness Of Content

Content governance plays a crucial role in tracking and measuring the effectiveness of your content by providing a framework for managing, analyzing, and reporting on the performance of your content.

This allows your organization to evaluate the performance of your content, make necessary changes, and improve the effectiveness of your content over time.

This also helps your organization to make data-driven decisions, which can lead to a more effective content marketing strategy and ultimately increase audience engagement.

Examples of how content governance helps in tracking and measuring the effectiveness of your content include:

  • Implementing a content management system allows your organization to manage, track, and measure the effectiveness of your content, including metrics such as views, shares, and engagement.
  • Establishing key performance indicators (KPIs) for content allows your organization to track and measure the effectiveness of your content by monitoring specific metrics that align with your goals and objectives.
  • Creating a process for analyzing and reporting on content performance allows your organization to evaluate the performance of your content and make necessary changes, such as adjusting the tone, style, or format of your content.
  • Having a centralized team responsible for creating, editing, and publishing content ensures that all content is consistent and aligned with your organization’s overall messaging and goals and that your team is able to track and measure the effectiveness of your content.
  • Using web analytics tools allows your organization to track and measure the effectiveness of your content by monitoring website traffic, bounce rates, and other metrics.
  • Conducting audience research allows your organization to understand your target audience, their preferences, and behaviors, and make necessary adjustments to your content to make it more effective.

Establishing Rules and Guidelines

Establishing content governance rules and guidelines cover areas like:

  • Defining roles and responsibilities for content creation and editing
  • Setting guidelines for tone and style of content
  • Creating a process for reviewing and approving content
  • Implementing a content management system

Let’s take a look at each of these areas.

Defining Roles And Responsibilities For Content Creation And Editing

By following the steps and suggestions below, your organization can define roles and responsibilities for content creation and editing effectively, which helps to ensure that all content is created by the appropriate individuals and is reviewed and approved by the necessary parties:

Step 1: Identify the key players involved in content creation and editing.

This includes individuals such as content creators, editors, marketers, designers, approvers, and legal or compliance teams.

Step 2: Assign specific roles and responsibilities to each member of the team.

Create guidelines for who is responsible for creating and editing different types of content.

For example:

  • Content Creator: Research, write, and produce high-quality and engaging content that aligns with the brand’s messaging and goals.
  • Editor: Review, proofread, fact-check, and edit content to ensure that it is accurate, grammatically correct, and consistent with the organization’s standards.
  • Marketer: Promote the content through various channels to reach the target audience and increase engagement.
  • Designer: Create visual elements for the content, such as images and infographics, to enhance the overall design and appeal of the content.
  • Compliance or Legal Team: Ensure that the content is compliant with legal and regulatory requirements and that the organization is protected from any legal liabilities.

Step 3: Create a process for reviewing and approving content.

This process should clearly outline the steps that need to be taken before content is published, including who is responsible for reviewing and approving the content.

Step 4: Establish a system for tracking and measuring the effectiveness of content.

This system should be used by the team to monitor the performance of your content and make necessary changes.

Step 5: Communicate the roles and responsibilities to the team.

Make sure that each member of your team understands their specific roles and responsibilities, and how they fit into the overall content creation and editing process.

Also, make sure that everyone involved in content creation and editing understands the approval process.

Some suggestions to make this process effective:

  • Make sure that the roles and responsibilities are clearly defined and communicated to your team members to avoid confusion and mistakes.
  • Assign roles and responsibilities based on the skills and expertise of each team member.
  • Review and update the roles and responsibilities regularly to ensure that they are aligned with your organization’s goals and objectives.
  • Encourage collaboration and teamwork among team members to ensure that your content is of high quality.

Here’s a template you can follow to define roles and responsibilities for content creation and editing in your organization (modify it to suit your own needs):

1. Assign roles:

  • Content creator: Writes and creates content
  • Editor: Review, edit, and proofread content for accuracy and style
  • Approver: Approves and publishes content

2. Establish clear guidelines:

  • The content creator is responsible for writing blog posts and social media posts
  • The editor is responsible for proofreading and fact-checking all written content
  • The approver is responsible for reviewing all content before it is published

3. Define the approval process:

  • All written content must be reviewed and approved by the editor before being submitted to the approver
  • The approver must review and approve all content before it is published

4. Communicate the process:

  • Send out an email to all team members outlining their roles and responsibilities in the content creation and editing process
  • Hold a team meeting to discuss the process and answer any questions
  • Review and communicate the process regularly to ensure that all team members are aware of changes.

Setting Guidelines For Tone And Style Of Content

Setting guidelines for the tone and style of content is an important aspect of content governance.

It ensures that all content is consistent in terms of language, tone, and style, which helps to maintain a strong and consistent brand message.

Here is a step-by-step guide on how to set guidelines for the tone and style of content:

Step 1: Define the tone and style of the brand.

This should align with your organization’s mission, values, and overall messaging.

Include guidelines for how the content should sound and feel.

For example, the content might be written in a friendly and conversational tone. Or, if your organization wants to present itself as professional, informative, and trustworthy, the tone of the content should be formal and informative, and the style should be clean and simple.

Also, clearly define the tone and style that should be used for different types of content. For example, a formal and professional tone for business proposals and a conversational and friendly tone for social media posts.

Step 2: Create a brand style guide.

This guide should include guidelines for language, tone, style, and visual elements such as typography, colors, imagery, and composition.

Provide examples of appropriate and inappropriate language: This can include a list of words or phrases that should be used or words or phrases that are considered offensive or insensitive and should be avoided in the content.

For example, the style guide could include examples of appropriate language and tone, such as the level of formality. Guidelines might specify that all content should use active voice and avoid jargon.

Step 3: Communicate the guidelines to the team.

Make sure that all members of your team understand and are familiar with the guidelines.

Create a checklist of items that need to be reviewed before content is published, such as grammar, tone, and style.

Share the style guide with the team, make it easily accessible, and provide training to the team members on how to use it effectively.

Step 4: Provide examples of content that align with the guidelines.

This will help team members to understand what is expected of them and make it easier for them to create content that aligns with the guidelines.

Step 5: Review and update the guidelines regularly.

As your organization and its audience evolve, the guidelines should be reviewed and updated to ensure that they align with your organization’s mission, values, and overall messaging.

Some suggestions to make this process effective:

  • Make sure that the guidelines are clear, concise, and easy to understand.
    Keep in mind the target audience and the purpose of the content while creating the guidelines.
  • Encourage team members to ask questions and provide feedback on the guidelines.
  • Use the guidelines to train new team members and as a reference for existing team members.

Here’s a template you can follow to set guidelines for the tone and style of content (modify it to suit your own needs):

1. Define the tone and style:

  • Business proposals: Formal and professional
  • Social media posts: Conversational and friendly
  • Blog posts: Informative and engaging

2. Use a style guide:

  • Use The Chicago Manual of Style as the primary guide for grammar, punctuation, capitalization, and formatting
  • All headings must be in Title Case
  • Use serial comma
  • Use American English

3. Be specific:

  • Use active voice in all written content
  • Avoid using jargon
  • Use subheadings to break up long paragraphs
  • Use bullet points when listing items

4. Review and update regularly:

  • Review guidelines every 6 months
  • Update guidelines as needed based on feedback from team members and the audience.

Creating A Process For Reviewing And Approving Content

Creating a process for reviewing and approving content is an important aspect of content governance.

This ensures that all content is accurate and meets your organization’s standards before it is published, which is important for maintaining your credibility.

Here is a step-by-step guide on how to create a process for reviewing and approving content:

Step 1: Identify the key players involved in content review and approval.

This includes individuals such as content creators, editors, managers, legal or compliance teams, and other stakeholders.

Step 2: Assign specific roles and responsibilities to each member of the team.

For example, content creators may be responsible for researching and writing content, editors may be responsible for reviewing and editing content, managers may be responsible for approving the content, and legal or compliance teams will be responsible for making sure that the content is compliant with legal and regulatory requirements.

Step 3: Create a checklist of items to be reviewed before content is published.

This checklist should include items such as grammar, tone, style, accuracy, relevance, and compliance with legal and regulatory requirements.

Step 4: Establish a timeline for the review and approval process.

This timeline should include deadlines for when each stage of the process should be completed.

Step 5: Communicate the process to the team.

Make sure that all members of your team understand the process and their specific roles and responsibilities.

Step 6: Implement a system for tracking and measuring the effectiveness of the process.

This system should be used to monitor the performance of the process and make necessary changes.

Here are some additional suggestions to make this process effective:

  • Use a content management system (CMS) to manage and track the review and approval process. This allows for easy access and collaboration among team members, and the ability to track the progress of the review and approval process.
  • Establish a workflow: Use a workflow management tool or create a content calendar to help track the progress of each piece of content and ensure that it is reviewed and approved on time.
  • Encourage collaboration and feedback among team members during the review and approval process. This allows for multiple perspectives on the content and can lead to a more accurate and high-quality final product.
  • Have a final approval step by senior management or a legal team before publishing the content. This ensures that the content is legally and ethically compliant, and aligns with the overall goals and messaging of the organization.
  • Review and update the process regularly. As the organization and its audience evolve, the process should be reviewed and updated to ensure that it is still effective and aligned with the organization’s goals and objectives.
  • Provide training to the team members on how to use the process effectively, and make sure that all team members are aware of the process and their specific roles and responsibilities.
  • Use data and analytics to track the progress of the content review and approval process, and make necessary changes to improve the process over time.

Here’s a template you can follow to create a process for reviewing and approving content (modify it to suit your own needs):

1. Define the content review process:

  • Step 1: Content creation
  • Step 2: Initial review by the content creator
  • Step 3: Peer review by a team member
  • Step 4: Final review by the manager
  • Step 5: Approval and publication

2. Assign roles and responsibilities:

  • Content creator: Writes and creates content
  • Peer reviewer: Reviews content for accuracy, grammar, and style
  • Manager: Approves and publishes content

3. Establish a workflow:

  • Use Trello to track the progress of each piece of content and ensure that it is reviewed and approved on time

4. Set up guidelines:

  • All marketing materials need to be reviewed and approved before publication
  • All blog posts need to be reviewed and approved by a peer before publication
  • All press releases need to be reviewed and approved by the manager before publication

5. Communicate the process:

  • Send out an email to all team members outlining the content review process
  • Hold a team meeting to discuss the process and answer any questions.

Implementing A Content Management System

Implementing a content management system (CMS) can help organize and streamline your content creation and publishing process.

Here is a step-by-step guide on how to implement a CMS:

1. Identify your needs

Determine what features and functionality you need in a CMS. For example, do you need a CMS that allows for multiple users and different levels of access, or one that integrates with other tools such as marketing automation software?

Example: Your company needs a CMS that can handle a high volume of content, allows for multiple users and different levels of access and integrates with the company’s marketing automation software.

2. Research and compare options

Research different CMS options and compare their features, pricing, and scalability. Some popular open-source CMS options include WordPress, Drupal, and Joomla.

Choose a CMS

Select a CMS that best fits your needs and budget.

Install and set up the CMS

Follow the instructions provided by the CMS to install and set up the system on your webhosting account.

Customize the CMS

Customize the CMS to fit your specific needs. This may include adding plugins, creating templates, and configuring settings.

Create and organize content

Create and organize your content within the CMS. This may include creating categories and tags to organize content and creating a workflow for content creation and approval.

Train users

Train users on how to use the CMS, including how to create, edit, and publish content.

Test and launch

Test the CMS to ensure it is functioning properly. Once you are satisfied with the CMS, launch it to your audience.

For example, your company may decide to use WordPress as its CMS.

Learn more about choosing a content management system.

Summary

Here are the key takeaway points of this lesson:

  • Content governance is an essential aspect of creating and publishing high-quality content.
  • Establishing rules and guidelines for creating, editing, and publishing content ensures consistency and accuracy in all content.
  • By implementing content governance, your business can maintain a strong and consistent brand message, ensure the quality of its content, comply with legal requirements, measure the effectiveness of its content, and achieve a better return on investment.
  • Follow the above steps to implement content governance and ensure that your content is aligned with your overall messaging and goals.

***

Image: Business Meeting


Content Style Guide

Best practices for creating a content style guide, including how to organize your guide, what to include, and how to keep it up-to-date.

How To Create A Content Style Guide

Best practices for creating a content style guide, including how to organize your guide, what to include, and how to keep it up-to-date.

Style Guide - Stylish Office with computer.Creating a content style guide can seem overwhelming, especially if you’re starting from scratch.

However, with a little planning and organization, you can create a style guide that reflects your brand and helps your team produce high-quality content.

In this lesson, we look at the difference between a style guide and a content style guide, explore best practices for creating a practical style/content style guide for your business, and provide guidelines for writing, designing, and formatting your web content to ensure consistency across your brand voice.

***

Style Guide vs Content Style Guide

A style guide and a content style guide are similar in that they both provide guidelines for creating and maintaining consistent visual and written brand elements.

However, there is a difference between the two.

A style guide, also known as a brand style guide or brand guidelines, typically focuses on visual elements such as colors, typography, logos, and imagery. It provides instructions on how to use these elements consistently across all marketing materials, including print and digital media.

A style guide helps to ensure that the visual presentation of your brand is consistent and recognizable to your audience.

On the other hand, a content style guide is more focused on the written elements of your brand. It provides guidelines for the tone, voice, grammar, punctuation, and other language-related aspects of your content.

A content style guide ensures that all written communications, whether it’s website copy, social media posts, or email newsletters, adhere to the same standards and present a consistent voice to your audience.

In summary, a style guide focuses on visual elements while a content style guide focuses on written elements. Both guides are essential tools for creating a consistent and recognizable brand identity.

This lesson provides instructions and practical examples for incorporating elements of both a style guide and a content style guide into your business.

Benefits Of Using A Style Guide

The benefits of having a style guide for your business, website, and content include:

  • Consistency: A style guide ensures consistency in the visual and verbal elements of your website, documentation, products, or brand, helping to create a cohesive image and message. This is particularly important if your business wants to maintain a professional and trustworthy image.
  • Branding: A style guide can help align your website, documentation, products, or brand with your organization’s overall branding and messaging. It can provide guidelines for the color palette, typography, and image usage, and ensure that your website presents a cohesive image that aligns with your overall brand.
  • Professionalism: A well-designed and consistent website is more likely to be perceived as professional and trustworthy by your visitors. A style guide can help ensure that your website presents a polished image to visitors.
  • Efficiency: A style guide can save time and effort by providing clear guidelines for creating and maintaining your website, documentation, products, or brand. Team members can refer to the guide when creating new content, rather than having to spend time trying to figure out the correct format or style.
  • Communication: A style guide can improve communication within your organization by establishing a common vocabulary, tone, and style for your website, documentation, products, or brand.
  • Training: A style guide can be used to train new team members, designers, or developers in your organization, on the specific guidelines and standards to be followed.
  • Flexibility: A style guide is a living document that can be updated and modified as needed, which allows for flexibility in the way your website, documentation, products, or brand are presented.
  • Maintenance: A style guide can help maintain consistency over time, even as your website, documentation, products, or brand evolve and new team members join your organization.

In short, a style guide:

  • Helps to maintain a consistent brand voice and messaging across all channels of your business,
  • Ensures that your content is easily recognizable and reflects the values and personality of your brand,
  • Helps to improve the user experience, making it easier for your audience to engage with your content and understand your message, and
  • Serves as a guide for maintaining consistency and ensuring that your website presents a professional and cohesive image.

Important Style Guide Elements For Your Content

Here are some examples of elements that you can include in your style guide:

  • Tone and voice for writing – for example, a friendly and approachable tone.
  • Guidelines for grammar, punctuation, and capitalization.
  • Color palette and typography for design.
  • Headings and subheadings formatting, bullet points, and links.
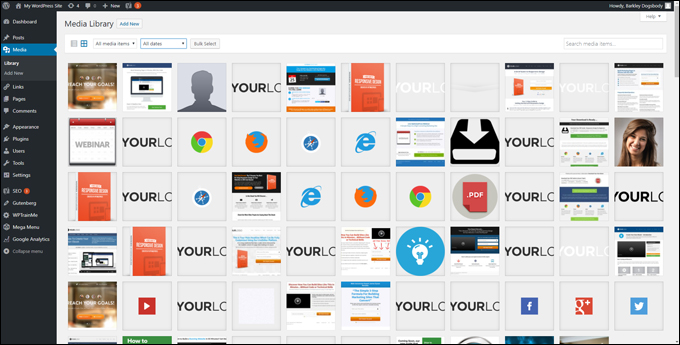
  • Image usage, layout, and spacing.
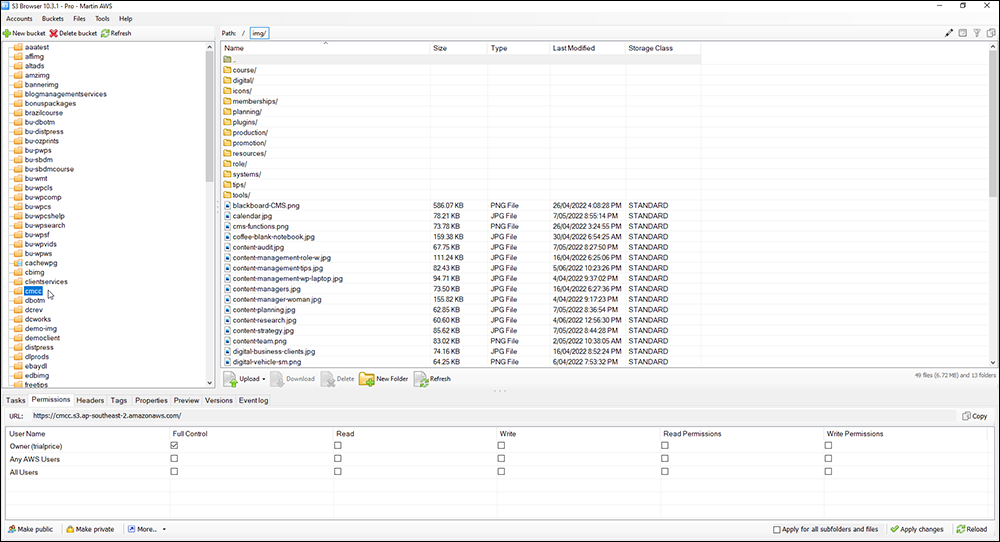
  • Naming convention for files and folders.
  • Providing training and resources for team members.

Let’s go through these style guide elements.

Guidelines for Writing

Tone And Voice

Tone and voice can greatly impact the effectiveness of a piece of content.

The tone refers to the attitude or emotion conveyed in the writing, such as formal, informal, serious, or humorous. The voice refers to the personality and style of the writing, such as conversational, informative, or persuasive.

Adding tone and voice guidelines for writing to your content style guide can help ensure that the content is consistent and aligns with your brand’s overall messaging and target audience.

Tone guidelines help to ensure that the content is written in a way that conveys a desired attitude or emotion.

For example, if your brand’s messaging is meant to be informative and serious, your tone guidelines would call for a formal and professional tone in the writing.

On the other hand, if your brand’s messaging is meant to be light-hearted and fun, your tone guidelines would call for a more casual and playful tone in the writing.

For example, a financial services company may have a more formal and serious tone, while a lifestyle brand may have a more casual and conversational tone.

Voice guidelines help to ensure that your content is written in a way that aligns with your brand’s overall style and personality.

For example, if your brand’s messaging is meant to be sophisticated and high-end, your voice guidelines would call for a more formal and sophisticated writing style.

On the other hand, if your brand’s messaging is meant to be relatable and down-to-earth, your voice guidelines would call for a more casual and conversational writing style.

Creating and adding tone and voice guidelines to your content style guide involves identifying the overall tone and voice of your brand, creating a list of adjectives to describe the tone and voice, writing examples of the tone and voice in different contexts, adding the guidelines to your content style guide, providing training and resources for team members and regularly reviewing and updating your guide.

Follow the steps below to ensure that your website and documentation present a consistent and cohesive image aligned with your brand’s mission, values, and target audience.

Suggested Process For Creating Tone And Voice Guidelines

  1. Identify the tone and voice of your brand: Before creating your tone and voice guidelines, it’s important to have a clear understanding of the overall tone and voice of your brand. This should align with your brand’s mission, values, and target audience. For example, if your brand is targeted at a younger audience, you may want to use a more casual and conversational tone and voice, whereas if your brand is targeting professionals, you may want to use a more formal and sophisticated tone and voice.
  2. Create a list of adjectives to describe the tone and voice: Once you have a clear understanding of your brand’s tone and voice, create a list of adjectives that accurately describe it. For example, if your brand has a casual and friendly tone, you might include adjectives like “approachable,” “informal,” and “friendly.”
  3. Write examples of the tone and voice in different contexts: To further clarify your brand’s tone and voice, provide examples of how it should be used in different contexts. For example, you might provide examples of how the tone and voice should be used in blog posts, product descriptions, and social media posts.
  4. Add the guidelines to your content style guide: Once you have a clear understanding of your brand’s tone and voice, and have provided examples of how it should be used, add the guidelines to your content style guide. You can include the list of adjectives, along with the examples you provided, to give team members a clear understanding of how the tone and voice should be used.
  5. Provide training and resources: To ensure that your team members understand and adhere to the tone and voice guidelines, provide training and resources to help them understand the guidelines and apply them to their work.
  6. Review and update the guide regularly: As your brand evolves, it’s important to review and update the tone and voice guidelines in your content style guide accordingly.

Examples of tone and voice guidelines:

  • Tone: Professional, informative, and friendly.
  • Voice: Clear, concise, and approachable.
  • Tone: Casual, friendly, and helpful.
  • Voice: Conversational and easy to understand
  • Tone: Formal, authoritative, and sophisticated.
  • Voice: Precise, accurate, and objective.

Suggestions:

  • Use a consistent tone and voice throughout the content.
  • Use a tone and voice that is appropriate for the brand and target audience.
  • Avoid using jargon or technical language that may be difficult for the target audience to understand.
  • Use a friendly and approachable tone to make the content more relatable and engaging.
  • Use active voice instead of passive voice, which makes the content more direct and clear.
  • Use a consistent point of view, either first or third person, throughout the content.
  • Use words that reflect the brand’s personality and values, for example, formal, casual, etc.

Feel free to use the example below as a starting point for adding voice and tone guidelines to your own content style guide.

Example Of Voice And Tone Guidelines For Your Content Style Guide

Overview

These tone and voice guidelines will help to ensure that our content is consistent and aligns with our brand’s overall messaging and target audience. It will also help to create a cohesive message across all our brand’s content and help our audience to recognize our brand’s voice easily.

These tone and voice guidelines can play a significant role in creating a strong and consistent brand voice that resonates with our target audience.

H1: Content Style Guide: Guidelines For Writing

H2: Tone and Voice

H3: Definition

  • Tone: Attitude or emotion conveyed in the writing
  • Voice: Personality and style of the writing

H3: Establishing the Tone and Voice

  • Formal and serious tone
  • Casual and conversational tone

H3: Examples

  1. Formal tone: “Our company has been providing financial services for over 50 years and has a proven track record of success.”
  2. Casual tone: “We’ve been helping people achieve their financial goals for over half a century and have the experience to back it up.”

H3: Suggestions

  • Use a consistent tone and voice throughout the content
  • Use a tone and voice that is appropriate for our brand and target audience
  • Avoid using jargon or technical language
  • Use a friendly and approachable tone
  • Use active voice instead of passive voice
  • Use a consistent point of view, either first or third person
  • Use words that reflect our brand’s personality and values (provide examples of these words here)

Grammar and Punctuation

Grammar and punctuation can greatly impact the clarity and effectiveness of a piece of content.

Adding grammar and punctuation guidelines for writing to your content style guide can help ensure that the content is consistent, accurate, and easy to understand.

Grammar guidelines can help to ensure that your content is written in a way that follows proper grammatical rules. This can include guidelines on sentence structure, verb tense, subject-verb agreement, and word usage.

Following proper grammar rules can help ensure that the content is clear and easy to understand and that the intended meaning is conveyed correctly.

Punctuation guidelines can help ensure that the content is written in a way that follows proper punctuation rules. This can include guidelines on the use of commas, semicolons, colons, and other punctuation marks.

Proper punctuation can help to clarify the meaning of sentences and make the content easier to read and understand.

Having clear grammar and punctuation guidelines can help to ensure that your content is accurate and easy to understand, which is particularly important for technical or informative content.

Creating and adding grammar and punctuation guidelines to a content style guide involves determining the preferred grammar and punctuation style, creating a list of common grammar and punctuation rules, providing examples and explanations, adding the guidelines to your content style guide, providing training and resources, and regularly reviewing and updating the guide.

Follow the steps below to ensure that your website and documentation present a consistent and professional image for your brand, with clear and precise language that follows established grammar and punctuation rules.

Suggested Process For Creating Grammar And Punctuation Guidelines

  1. Establish a style: Decide on a specific style for grammar and punctuation that should be used in your content style guide. This can be based on industry standards, such as AP style or Chicago Manual of Style, or on the preferences of your organization.
  2. Create a list of common grammar and punctuation rules: Once you have determined the preferred style, create a list of common grammar and punctuation rules that should be followed in your content. These could include rules for punctuation, capitalization, and spelling, verb tense, subject-verb agreement, punctuation usage (commas, semicolons, etc.), and other grammar rules, as well as guidelines for commonly misused words or phrases.
  3. Provide examples and explanations: To help your team members understand and apply the grammar and punctuation guidelines, provide examples and explanations of the rules. This can include examples of correct and incorrect usage, and explanations of why the rules are important.
  4. Add the guidelines to your content style guide: Once you have created your list of grammar and punctuation rules and provided examples and explanations, add them to your content style guide. This will serve as a reference for team members when creating and editing content.
  5. Provide training and resources: To ensure that your team members understand and adhere to the grammar and punctuation guidelines, provide training and resources, such as grammar and punctuation guides, for them to reference.
  6. Review and update the guide regularly: As the language evolves, it’s important to review and update the grammar and punctuation guidelines in your content style guide accordingly.

Examples of grammar and punctuation guidelines:

  • Use the Oxford comma
  • Use quotation marks for direct quotations
  • Use the active voice
  • Use “who” to refer to people and “that” to refer to things.

Suggestions:

  • Use a consistent style for grammar and punctuation throughout your content.
  • Avoid using complex sentence structures that may be difficult for your target audience to understand.
  • Use punctuation correctly and consistently, including commas, semicolons, and other punctuation marks.
  • Check for common grammar errors, such as subject-verb agreement, verb tense, and capitalization.
  • Use contractions when appropriate, to make your content more conversational and relatable.
  • Use a spell checker and proofread your content before publishing.
  • Have someone else review your content to ensure that the grammar and punctuation are correct.

Feel free to use the example below as a starting point for adding grammar and punctuation guidelines to your own content style guide.

Example Of Grammar And Punctuation Guidelines For Your Content Style Guide

Overview

Consistency in the use of grammar and punctuation will help to create a professional image for our brand and show that our company pays attention to detail. Clear and accurate grammar and punctuation can also help to improve the credibility of our brand’s content, and make it more likely to be taken seriously by our target audience.

Use the grammar and punctuation guidelines below.

H1: Content Style Guide: Guidelines For Writing

H2: Grammar and Punctuation

H3: Guidelines

  • Capitalization
  • Verb tense
  • Subject-verb agreement
  • Punctuation usage (commas, semicolons, etc.)
  • Other grammar rules

H3: Establishing a Style

  • The Chicago Manual of Style
  • The Associated Press Stylebook

H3: Examples

  1. Capitalization: “The company’s CEO, John Smith, announced the new product launch.”
  2. Punctuation usage: “We offer a wide range of products, including clothing, accessories, and home decor.”

H3: Suggestions

  • Use a consistent style for grammar and punctuation throughout the content
  • Avoid using complex sentence structures
  • Use punctuation correctly and consistently
  • Check for common grammar errors
  • Use contractions when appropriate
  • Use a spell checker and proofread the content before publishing
  • Have someone else review the content

Spelling And Capitalization

Spelling and capitalization can greatly impact the clarity and effectiveness of a piece of content.

Adding spelling and capitalization guidelines for writing to your content style guide can help to ensure that your content is consistent, accurate, and easy to understand.

Spelling guidelines help to ensure that the content is written in a way that follows proper spelling rules. This can include guidelines on the spelling of commonly misspelled words, as well as guidelines on the use of American or British spellings.

Proper spelling helps to ensure that your content is clear and easy to understand and that the intended meaning is conveyed correctly.

Capitalization guidelines help to ensure that your content is written in a way that follows proper capitalization rules. This can include guidelines on the use of capital letters for proper nouns, sentence beginnings, and acronyms, as well as guidelines on the use of lowercase letters for common nouns and titles.

Consistent capitalization helps to make the content more easily readable and improves the overall professionalism of the brand’s content.

Creating and adding spelling and capitalization guidelines to your content style guide involves determining the preferred spelling and capitalization style, creating a list of common spelling and capitalization rules, providing examples and explanations, adding the guidelines to your content style guide, providing training and resources, and regularly reviewing and updating the guide.

Follow the steps below to ensure that your website or documentation presents a consistent and professional image, with clear and precise language that follows established spelling and capitalization rules.

Suggested Process For Creating Spelling And Capitalization Guidelines

  1. Determine the preferred spelling and capitalization style: Before creating the spelling and capitalization guidelines, it’s important to determine the preferred style to be used in your content style guide. This can be based on industry standards, such as AP style or Chicago Manual of Style, or on the preferences of your organization.
  2. Create a list of common spelling and capitalization rules: Once you have determined the preferred style, create a list of common spelling and capitalization rules that should be followed in your content. This can include rules for capitalizing proper nouns, titles, and acronyms, the correct spelling of words, proper use of homophones, and guidelines for capitalizing proper nouns, as well as guidelines for commonly misspelled words or phrases.
  3. Provide examples and explanations: To help team members understand and apply the spelling and capitalization guidelines, provide examples and explanations of the rules. This can include examples of correct and incorrect usage, and explanations of why the rules are important.
  4. Add the guidelines to your content style guide: Once you have created your list of spelling and capitalization rules and provided examples and explanations, add them to your content style guide. This will serve as a reference for team members when creating and editing content.
  5. Provide training and resources: To ensure that your team members understand and adhere to the spelling and capitalization guidelines, provide training and resources, such as spelling and grammar checker tools, for them to reference.
  6. Review and update your guide regularly: As the language evolves, it’s important to review and update the spelling and capitalization guidelines in your content style guide accordingly.

Examples of spelling and capitalization guidelines:

  • Capitalize the first word of a sentence
  • Capitalize proper nouns
  • Capitalize titles when used before a name, lowercase when used after
  • Use American spelling instead of British spelling

Suggestions:

  • Use a consistent style for spelling and capitalization throughout your content.
  • Use a spell checker to check for spelling errors, but also proofread your content to catch any errors that may not be caught by the spell checker.
  • Capitalize proper nouns, titles, and other words as per the style guide.
  • Use consistent capitalization for brand names and product names.
  • Avoid using unnecessary capitalization, like capitalizing every word in a title or sentence.
  • When in doubt, consult a dictionary or style guide for the correct spelling or capitalization of a word.
  • Have someone else review the content, to ensure that the spelling and capitalization are correct.

Feel free to use the example below as a starting point for adding spelling and capitalization guidelines to your own content style guide.

Example Of Spelling And Capitalization Guidelines For Your Content Style Guide

Overview

These spelling and capitalization guidelines will help to ensure that our content is accurate and easy to understand. This is important for technical or informative content.

Consistency in the use of spelling and capitalization also helps to create a professional image for our brand and shows that our company pays attention to detail. Clear and accurate spelling and capitalization will also help to improve the credibility of our brand’s content and make us more likely to be taken seriously by our target audience.

H1: Content Style Guide: Guidelines For Writing

H2: Spelling and Capitalization

H3: Guidelines

  • Correct spelling of words
  • Proper use of homophones
  • Capitalization of proper nouns, titles, and other words

H3: Establishing a Style

  • The Chicago Manual of Style
  • The Associated Press Stylebook

H3: Examples

  1. Spelling: “The company’s CEO, John Smith, announced the new product launch.”
  2. Capitalization: “The company is named XYZ Inc.”

H3: Suggestions

  • Use a consistent style for spelling and capitalization throughout the content
  • Use a spell checker to check for spelling errors and proofread the content
  • Capitalize proper nouns, titles, and other words as per the style guide
  • Use consistent capitalization for brand names and product names
  • Avoid using unnecessary capitalization, like capitalizing every word in a title or sentence
  • When in doubt, consult a dictionary or style guide for the correct spelling or capitalization of a word
  • Have someone else review the content, to ensure that the spelling and capitalization are correct

Abbreviations And Acronyms

Abbreviations and acronyms are shortened forms of words or phrases that can be used in writing to save space or for convenience.

Adding abbreviations and acronyms guidelines for writing to your content style guide can help ensure that your content is consistent, accurate, and easy to understand.

Abbreviations guidelines help to ensure that your content is written in a way that follows proper abbreviation rules. This can include guidelines on the use of commonly used abbreviations such as “etc.” or “e.g.”, as well as guidelines on when to use periods or not in abbreviations.

Clear and consistent use of abbreviations helps to make your content more easily readable and improves the overall professionalism of your brand’s content.

Acronyms guidelines help to ensure that your content is written in a way that follows proper acronym rules. This can include guidelines on the use of commonly used acronyms, as well as guidelines on when to spell out an acronym or when to use the acronym form.

Clear and consistent use of acronyms helps to make your content more easily readable and improves the overall professionalism of your brand’s content.

Creating and adding abbreviations and acronyms guidelines to a content style guide involves determining the preferred style, creating a list of common abbreviations and acronyms, providing examples and explanations, adding the guidelines to your content style guide, providing training and resources, and regularly reviewing and updating the guide.

Follow the steps below to ensure that your website or documentation presents a consistent and professional image, with clear and precise language that follows established abbreviations and acronyms guidelines.

Suggested Process For Creating Abbreviations And Acronyms Guidelines

  1. Determine the preferred style for abbreviations and acronyms: Before creating the abbreviations and acronyms guidelines, it’s important to determine the preferred style to be used in your content style guide. This can be based on industry standards, such as AP style or Chicago Manual of Style, or on the preferences of your organization.
  2. Create a list of common abbreviations and acronyms: Once you have determined the preferred style, create a list of common abbreviations and acronyms that should be used in your content. This can include both standard and industry-specific abbreviations and acronyms. Include rules for when to use full forms, when to use abbreviations or acronyms, and how to format them in the text.
  3. Provide examples and explanations: To help team members understand and apply the abbreviations and acronyms guidelines, provide examples and explanations of the rules. This can include examples of correct and incorrect usage, and explanations of why the rules are important.
  4. Add the guidelines to your content style guide: Once you have created your list of abbreviations and acronyms and provided examples and explanations, add them to your content style guide. This will serve as a reference for team members when creating and editing content.
  5. Provide training and resources: To ensure that your team members understand and adhere to the abbreviations and acronyms guidelines, provide training and resources, such as a glossary of common abbreviations and acronyms.
  6. Review and update the guide regularly: As the language evolves, it’s important to review and update the abbreviations and acronyms guidelines in your content style guide accordingly.

Examples of abbreviations and acronyms guidelines:

  • Spell out the full name of an abbreviation or acronym when first introducing it, followed by the abbreviation or acronym in parentheses
  • Use the abbreviation or acronym consistently throughout the text, afterward.
  • Use a period after each letter in an acronym, unless the acronym is more commonly known without it.

It’s important to have a clear and consistent format for using abbreviations and acronyms in the content, as it can make your content easier to read and understand for the target audience.

It is also important to keep in mind that not all acronyms and abbreviations will be widely understood and used in your industry or by your audience so it’s important to have examples and explanations for them in your content style guide.

Here, for example, is a list of well-known abbreviations and acronyms and their expanded forms:

  • NASA – National Aeronautics and Space Administration
  • AIDS – Acquired Immune Deficiency Syndrome
  • ASAP – As Soon As Possible
  • CEO – Chief Executive Officer
  • FBI – Federal Bureau of Investigation
  • NATO – North Atlantic Treaty Organization

Suggestions:

  • Use a consistent style for abbreviations and acronyms throughout your content.
  • Use full forms when first introducing an abbreviation or acronym, and then use the shortened form in subsequent references.
  • Use parentheses to indicate the full form of an abbreviation or acronym when first used in the text.
  • Use capitalization consistently, per the style guide, for abbreviations and acronyms.
  • Avoid using too many abbreviations or acronyms in the text, as it can make the content difficult to understand.
  • Use commonly understood abbreviations and acronyms, such as “NASA” or “IKEA”.
  • Have someone else review the content, to ensure that the abbreviations and acronyms are used correctly.

Feel free to use the example below as a starting point for adding abbreviations and acronyms guidelines to your own content style guide.

Example Of Abbreviations And Acronyms Guidelines For Your Content Style Guide

Overview

These abbreviations and acronyms guidelines will ensure that our content is accurate and easy to understand. Consistency in the use of abbreviations and acronyms will also help to create a professional image for our brand and show that our company pays attention to detail.

Clear and accurate use of abbreviations and acronyms will also help to improve the credibility of our brand’s content and make it more likely to be taken seriously by our target audience, particularly in technical or specialized fields where the use of acronyms is more commonly used.

Note: Keep in mind that not all acronyms and abbreviations will be widely understood and used in our industry or by our audience.

H1: Content Style Guide: Guidelines For Writing

H2: Abbreviations and Acronyms

H3: Guidelines

  • Use of full forms
  • Use of abbreviations or acronyms
  • Formatting in the text

H3: Establishing a Style

  • The Chicago Manual of Style
  • The Associated Press Stylebook

H3: Examples

  1. Abbreviation: The Federal Bureau of Investigation (FBI) is a national security organization.
  2. Acronym: The North Atlantic Treaty Organization (NATO) is an international military alliance.

Here are well-known abbreviations and acronyms used in our industry and their expanded forms:

[insert list of abbreviations and acronyms used in your industry and their expanded forms here]

H3: Suggestions

  • Use a consistent style for abbreviations and acronyms throughout the content
  • Use full forms when first introducing an abbreviation or acronym, and then use the shortened form in subsequent references
  • Use parentheses to indicate the full form of an abbreviation or acronym when first used in the text
  • Use capitalization consistently, per the style guide, for abbreviations and acronyms
  • Avoid using too many abbreviations or acronyms in the text, as it can make the content difficult to understand
  • Use commonly understood abbreviations and acronyms
  • Have someone else review the content, to ensure that the abbreviations and acronyms are used correctly

Guidelines For Design

Color Palette

A color palette is a set of colors used in design to create a cohesive and visually appealing look and feel for your brand.

Colors can evoke different emotions and meanings, so it’s essential to choose colors that align with your brand’s message and your target audience.

Adding color palette guidelines for design to your content style guide can help ensure that your design uses a consistent set of colors that is visually pleasing, and align with your brand’s overall visual identity, messaging, and target audience.

This can include guidelines on the use of specific colors, such as your brand’s primary and secondary colors, as well as guidelines on how to use color in different contexts, such as for headings, body text, and background elements.

For example, if your brand’s messaging is meant to be sophisticated and high-end, your color palette guidelines may call for a more sophisticated color scheme, such as using darker and muted colors.

On the other hand, if your brand’s messaging is meant to be relatable and down-to-earth, the color palette guidelines may call for a more casual and bright color scheme.

Creating and adding color palette guidelines for design to a content style guide involves identifying the primary and secondary colors, creating a color palette, providing examples and explanations, adding the guidelines to your content style guide, providing training and resources, and regularly reviewing and updating the guide.

Follow the steps below to create color palette guidelines that will help to improve your brand’s recognition with your target audience and create a cohesive message across all of your brand’s design.

Suggested Process For Creating Color Palette Guidelines

  • Identify the primary and secondary colors: Before creating the color palette guidelines, it’s important to identify the primary, secondary, and accent colors that will be used in your design as well as any specific shades or tints of those colors. These colors should align with your brand’s overall aesthetic and message. Choose a limited number of colors based on your brand and your intended audience, typically 3-5, to ensure consistency and cohesiveness in the design.
  • Create a color palette: Once you have identified the primary and secondary colors, create a color palette document that includes these colors, along with any additional colors that will be used in the design. The color palette should include the color codes or values for each color (e.g. RGB, HEX, CMYK) and the color name so that it can be easily referenced and used. Also, include examples of how the colors are used, such as on a website, in a brochure, on social media, or in print materials.
  • Establish a style: Decide on a specific style for the color palette that should be used in the content. This could be based on your brand’s existing color scheme or be created from scratch. It’s important to ensure that the color palette is consistent with your brand’s visual identity and target audience.
  • Provide examples and explanations: To help team members understand and apply the color palette guidelines, provide examples and explanations of how the colors should be used. This can include examples of color combinations, ways to use the colors in different design elements (e.g. backgrounds, headlines, buttons, etc.), how to use the colors to create contrast or hierarchy, and explanations of why certain colors were chosen and how they align with the brand’s overall aesthetic and message. For example, the primary color could be used for headings, the secondary color for subheadings, and the accent color for calls to action.
  • Add the guidelines to your content style guide: Once you have created your color palette and provided examples and explanations, add the guidelines to your content style guide. This will serve as a reference for team members when creating and editing design elements.
  • Provide training and resources: To ensure that your team members understand and adhere to the color palette guidelines, provide training and resources, such as color theory tutorials or design software tutorials.
  • Review and update the guide regularly: As your brand evolves, it’s important to review and update the color palette guidelines in your content style guide accordingly.

Examples of color palette guidelines:

  • Use the primary color palette (Blue, Green, and Yellow) in the header and the secondary color palette (Red, Purple, and Orange) in the body text
  • Use a maximum of three colors in any design element
  • Use a neutral color (black or white) as a background

Tips:

  • Use tools like CanvaAdobe Color, Palette Generator, or Coolors to create and edit your color palette.
  • Use a color palette that is easy to use, easy to read, easy on the eyes, and easy to update and maintain.
  • Use the color palette for all branding materials, including logos, business cards, and marketing materials.
  • Create variations of the colors, like a light and dark version of the primary color, to use in different contexts.
  • Make sure that the colors look good together, and that they are legible on both light and dark backgrounds.
  • Test the color palette on different devices and browsers to ensure that the colors look consistent across different platforms and mediums.
  • Use the color palette as a starting point, but don’t be afraid to use other colors as well, as long as they complement the overall color scheme.

Feel free to use the example below as a starting point for adding color palette guidelines to your own content style guide.

Example Of Color Palette Guidelines For Your Content Style Guide

Overview

These color palette guidelines will help to ensure that our design is consistent, visually pleasing, and aligns with our brand’s overall messaging and target audience.

Consistency in the use of color will also help to create a cohesive and visually appealing look and feel for our brand, which will help to improve our brand’s recognition and memorability. It will also help to create a cohesive message across all of our brand’s design.

H1: Content Style Guide: Guidelines For Design

H2: Color Palette

H3: Definition

  • Primary color: Blue #0071C5
  • Secondary color: Grey #868686
  • Accent color: Yellow #FFCC33

H3: Examples

  1. Background: Blue #0071C5
  2. Headlines: Yellow #FFCC33
  3. Buttons: Blue #0071C5 with Yellow #FFCC33 hover effect

H3: Suggestions

  • Use a color palette that includes a primary, secondary, and accent color
  • Use a color palette that is consistent with our brand’s visual identity
  • Use a color palette that is appropriate for the target audience
  • Use a color palette that is easy to read and easy on the eyes
  • Use a color palette that is consistent with the overall design of the content
  • Use a color palette that is easy to implement across different platforms and mediums
  • Use a color palette that is easy to update and maintain
  • Use a color palette that is easy to use effectively

Typography

Typography is the art and technique of arranging type in order to make written language legible, readable and appealing when displayed.

Font choices can evoke different emotions and meanings and typography can affect the readability of your content.

Adding typography guidelines to your content style guide, therefore, can help to ensure that your content design is consistent, visually pleasing, easy to read, and aligns with your brand’s overall messaging and target audience.

Typography guidelines help to ensure that your design uses a consistent set of typefaces, font sizes, spacing, and other elements that align with your brand’s overall visual identity. This can include guidelines on the use of specific typefaces, such as your brand’s primary and secondary typefaces, as well as guidelines on how to use typography in different contexts, such as for headings, body text, and call-to-action elements.

If your brand’s messaging is meant to be sophisticated and high-end, your typography guidelines may call for a more sophisticated typeface, such as a serif font.

On the other hand, if your brand’s messaging is meant to be relatable and down-to-earth, your typography guidelines may call for a more casual and legible typeface, such as a sans-serif font.

Creating and adding typography guidelines for design to your content style guide involves identifying the preferred typography style, creating a list of font families and sizes, providing examples and explanations, adding the guidelines to your content style guide, providing training and resources, and regularly reviewing and updating the guide.

Follow the steps below to create typography guidelines that will ensure that your website, content, and documentation present a consistent and professional image that aligns with your brand’s overall aesthetic and message.

Suggested Process For Creating Typography Guidelines

  1. Identify the preferred typography style: Before creating your typography guidelines, it’s important to determine the preferred style to be used in your content style guide. This can be based on industry standards, such as web-safe fonts or specific font families, or on the preferences of your organization. Include the primary, secondary, and accent fonts, font sizes, line spacing, letter spacing, and other typographic elements.
  2. Create a list of font families and sizes: Once you have determined the preferred style, create a list of font families and sizes that should be used in your design. This can include the font families and sizes for headings, body text, and other design elements.
  3. Provide examples and explanations: To help team members understand and apply your typography guidelines, provide examples and explanations of how the fonts and sizes should be used. This can include examples of how to use font combinations, ways to use the fonts in different design elements (e.g. headlines, body text, captions, etc.), how to use the fonts to create contrast or hierarchy, and explanations of why certain font families and sizes were chosen and how they align with your brand’s overall aesthetic and message.
  4. Add the guidelines to your content style guide: Once you have created your list of font families and sizes and provided examples and explanations, add the guidelines to your content style guide. This will serve as a reference for team members when creating and editing design elements.
  5. Provide training and resources: To ensure that your team members understand and adhere to the typography guidelines, provide training and resources such as font pairing tutorials, web typography best practices, and design software tutorials.
  6. Review and update your guide regularly: As your brand evolves, it’s important to review and update the typography guidelines in your content style guide accordingly.

Examples of typography guidelines:

  • Use the font family ‘Open Sans’ for headings and ‘Arial’ for body text
  • Use a minimum font size of 14pt for body text
  • Use bold and italic formatting sparingly to add emphasis
  • Use a consistent line spacing (1.5 or 2) throughout the design
  • Use uppercase for headings and title case for subheadings

Suggestions:

  • Use a limited number of fonts. A limited number of fonts will help create a consistent visual identity and make it easy to use typography effectively.
  • Use typography that is appropriate for the brand and target audience.
  • Use typography that is easy to read and easy on the eyes.
  • Use typography that is consistent with the overall design of the content.
  • Use typography that is easy to implement across different platforms and mediums.
  • Use typography that is easy to update and maintain.

Feel free to use the example below as a starting point for adding typography guidelines to your own content style guide.

Example Of Typography Guidelines For Your Content Style Guide

Overview

These typography guidelines will help to ensure that our design is consistent, visually pleasing, easy to read, and aligns with our brand’s overall messaging and target audience.

Consistency in the use of typography can also help to create a cohesive and visually appealing look and feel for our brand, which helps to improve our brand’s recognition and memorability. It also helps to create a cohesive message across all of our brand’s designs and helps our audience read our brand’s content more easily.

H1: Content Style Guide: Guidelines For Design

H2: Typography

H3: Definition

  • Primary font: Arial
  • Secondary font: Times New Roman
  • Accent font: Futura
  • Body text font size: 14px
  • Headline font size: 18px
  • Line spacing: 1.5
  • Letter spacing: 0.1em

H3: Examples

  1. Headlines: Arial 18px, bold
  2. Body text: Times New Roman 14px, regular
  3. Captions: Futura 12px, italic

H3: Suggestions

  • Use a limited number of fonts
  • Use typography that is appropriate for our brand and target audience
  • Use typography that is easy to read and easy on the eyes
  • Use typography that is consistent with the overall design of the content
  • Use typography that is easy to implement across different platforms and mediums
  • Use typography that is easy to update and maintain

Image Usage

Images can greatly impact the effectiveness of a piece of content.

Images can evoke different emotions and meanings, so it’s essential to choose images that align with your brand’s message and target audience. It’s also important to make sure that your images are properly sized and optimized for the web as well as labeled and attributed to avoid any copyright issues.

Adding image usage guidelines for design to your content style guide, then, helps to ensure that the images are consistent, visually pleasing, and aligned with your brand’s overall messaging and target audience.

Image usage guidelines help to ensure that your design uses a consistent set of images that align with your brand’s overall visual identity. This can include guidelines on the use of specific types of images, such as product images, lifestyle images, or illustrations, as well as guidelines on how to use images in different contexts, such as for headers, body content, and background elements. Consistency in the use of images can help to create a cohesive and visually appealing look and feel for your brand.

If your brand’s messaging is meant to be sophisticated and high-end, your image usage guidelines may call for a more sophisticated and professional set of images, such as high-quality product shots or professionally shot lifestyle images.

On the other hand, if your brand’s messaging is meant to be relatable and down-to-earth, your image usage guidelines may call for a more casual and relatable set of images, such as candid lifestyle shots or illustrations.

Creating and adding image usage guidelines for design to a content style guide involves determining the preferred image usage style, creating a list of image usage rules, providing examples and explanations, adding the guidelines to your content style guide, providing training and resources, and regularly reviewing and updating the guide.

Follow the steps below to create image usage guidelines that will help to make your content design more cohesive, visually pleasing, and easy to understand for your target audience.

Suggested Process For Creating Image Use Guidelines

  1. Determine the preferred image usage style: Before creating your image usage guidelines, it’s important to determine the preferred style to be used in your content style guide. This can be based on industry standards, such as image resolutions and file types, or on your organization’s preferences.
  2. Create a list of image usage rules: Once you have determined the preferred style, create a list of image usage rules that should be followed in your design. This can include rules for image sizes, image resolution, file types, and image placement within the content.
  3. Provide examples and explanations: To help team members understand and apply the image usage guidelines, provide examples and explanations of how images should be used. This can include examples of image placement, and explanations of why certain image usage rules were chosen and how they align with the brand’s overall aesthetic and message.
  4. Add the guidelines to your content style guide: Once you have created your list of image usage rules and provided examples and explanations, add them to your content style guide. This will serve as a reference for team members when creating and editing design elements.
  5. Provide training and resources: To ensure that your team members understand and adhere to the image usage guidelines, provide training and resources, such as image editing software tutorials and image compression best practices.
  6. Review and update the guide regularly: As your brand evolves, it’s important to review and update the image usage guidelines in your content style guide accordingly.

Examples of image usage guidelines:

  • Use images with a resolution of at least 72 dpi and a minimum size of 800 x 600 pixels
  • Use JPEG file format for photographs and PNG for graphics and icons
  • Use images that are relevant and add value to the content
  • Use alt tags for images for accessibility
  • Use a consistent image style throughout the design

Suggestions:

  • Use high-quality images that are appropriate for your brand and target audience.
  • Use images that are consistent with the overall design of your content.
  • Use images that are easy to implement across different platforms and mediums.
  • Use images that are easy to update and maintain.
  • Use images that are easy to use effectively.
  • Use images that are relevant to the content.
  • Use images that are properly sized and optimized for the web.
  • Use images that are properly labeled and attributed.

Feel free to use the example below as a starting point for adding image usage guidelines to your own content style guide.

Example Of Image Usage Guidelines For Your Content Style Guide

Overview

These image usage guidelines will help to ensure that our content design is consistent, visually pleasing, and aligns with our brand’s overall messaging and target audience.

Consistency in the use of images can also help to create a cohesive and visually appealing look and feel for our brand, which helps to improve our brand’s recognition and memorability and helps our audience to understand our brand’s message more easily.

H1: Content Style Guide: Guidelines For Design

H2: Image Usage

H3: Guidelines

  • Image sizes: 1200x800px
  • Image resolutions: 72 dpi
  • File types: JPEG, PNG
  • Image placement: Above the fold

H3: Examples

  1. Hero image: 1200x800px, JPEG, 72 dpi
  2. Product image: 800x600px, PNG, 72 dpi
  3. Infographic: 1200x800px, JPEG, 72 dpi

H3: Suggestions

  • Use high-quality images that are appropriate for the brand and target audience
  • Use images that are consistent with the overall design of the content
  • Use images that are easy to implement across different platforms and mediums
  • Use images that are easy to update and maintain
  • Use images that are easy to use effectively
  • Use images that are relevant to the content
  • Use images that are properly sized and optimized for the web
  • Use images that are properly labeled and attributed

Layout And Spacing

Layout and spacing are important elements of design that can greatly impact the effectiveness and readability of a piece of content.

Adding layout and spacing guidelines for design to your content style guide helps to ensure that the design is consistent, visually pleasing, easy to read, and aligns with your brand’s overall messaging and target audience.

Layout guidelines help to ensure that your content design uses a consistent layout structure that aligns with your brand’s overall visual identity.

This can include guidelines on the use of specific layout elements, such as grids, white space, and typography hierarchy, as well as guidelines on how to use layout in different contexts, such as for different types of content, such as blog posts, landing pages, or e-commerce pages.

Consistency in the use of layout can help to create a cohesive and visually appealing look and feel for your brand.

Spacing guidelines help to ensure that your design uses a consistent amount of space between elements, such as typography, images, and other design elements.

This can include guidelines on the use of specific spacing measurements, such as line height, margins, and padding, as well as guidelines on how to use spacing in different contexts, such as for different types of content, such as blog posts, landing pages, or e-commerce pages.

Consistent use of spacing can help to create a cohesive and visually appealing look and feel for your brand and also improve the readability of the content.

Creating and adding layout and spacing guidelines for design to your content style guide involves determining the preferred layout and spacing style, creating a list of layout and spacing rules, providing examples and explanations, adding the guidelines to your content style guide, providing training and resources, and regularly reviewing and updating the guide.

Follow the steps below to create effective layout and spacing guidelines for your content style guide.

Suggested Process For Creating Layout And spacing Guidelines

  1. Determine the preferred layout and spacing style: Before creating the layout and spacing guidelines, it’s important to determine the preferred style to be used in your content style guide. This can be based on industry standards or your organization’s preferences.
  2. Create a list of layout and spacing rules: Once you have determined the preferred style, create a list of layout and spacing rules that should be followed in your design. This can include rules for the placement of elements, margins, padding, the use of white space, and the use of grid systems.
  3. Provide examples and explanations: To help team members understand and apply the layout and spacing guidelines, provide examples and explanations of how elements should be placed and spaced. This can include examples of different layout options and explanations of why certain layout and spacing rules were chosen and how they align with your brand’s overall aesthetic and message.
  4. Add the guidelines to your content style guide: Once you have created your list of layout and spacing rules and provided examples and explanations, add them to your content style guide. This will serve as a reference for team members when creating and editing design elements.
  5. Provide training and resources: To ensure that your team members understand and adhere to the layout and spacing guidelines, provide training and resources, such as design software tutorials and layout best practices.
  6. Review and update the guide regularly: As your brand evolves, it’s important to review and update the layout and spacing guidelines in your content style guide accordingly.

Examples of layout and spacing guidelines:

  • Use a consistent grid system throughout the design
  • Use a minimum of 2-3 units of white space between elements
  • Use a maximum of 2 font sizes per page
  • Use a consistent alignment of elements
  • Use a consistent use of headings and subheadings

Tips:

  • A grid system can help create a consistent layout and make it easy to arrange elements within your content.
  • Margins and padding can be used to create white space and balance in your layout.
  • Alignment of elements can also be used to create a visually pleasing layout and make it easy to read and understand.
  • It’s also important to keep in mind that the layout and spacing should be consistent with the overall design of the content and be easy to implement across different platforms and mediums, and also easy to update and maintain.

Feel free to use the example below as a starting point for adding layout and spacing guidelines to your own content style guide.

Example Of Layout And Spacing Guidelines For Your Content Style Guide

Overview

These layout and spacing guidelines will help to ensure that our design is consistent, visually pleasing, and easy to read, and aligns with our brand’s overall messaging and target audience.

Consistency in the use of layout and spacing will also help to create a cohesive and visually appealing look and feel for our brand, improve our brand’s recognition and memorability, create a cohesive message across all of our brand’s design, and helps our audience to understand our brand’s message more easily.

H1: Content Style Guide: Guidelines For Design

H2: Layout and Spacing

H3: Guidelines

  • Grid system: 12-column
  • Margins: 16px
  • Padding: 8px
  • Alignment: Left-aligned

H3: Examples

  1. Grid system: 12-column grid system
  2. Margins: 16px on all sides
  3. Padding: 8px on all sides
  4. Alignment: Left-aligned headlines, centered body text

H3: Suggestions

  • Use a grid system to create a consistent layout
  • Use appropriate margins and padding to create white space and balance
  • Align elements consistently to create a visually pleasing layout
  • Use a layout that is easy to read and easy on the eyes
  • Use a layout that is consistent with the overall design of the content
  • Use a layout that is easy to implement across different platforms and mediums
  • Use a layout that is easy to update and maintain

Guidelines for Formatting

Headings And Subheadings

Headings and subheadings are important elements of formatting that can greatly impact the readability and organization of a piece of content.

Adding headings and subheadings guidelines for formatting to your content style guide can help ensure that your content is organized and easy to read, and aligns with your brand’s overall messaging and target audience.

Headings and subheadings guidelines help to ensure that your content uses a consistent structure for organizing information.

This can include guidelines on the use of specific heading levels, such as H1, H2, and H3, as well as guidelines on how to use headings and subheadings in different contexts, such as for different types of content, such as blog posts, landing pages, or e-commerce pages.

Consistency in the use of headings and subheadings can help to create a cohesive and easily readable structure for the content.

Headings and subheadings guidelines can also help to ensure that the content is easy to read and aligns with your brand’s overall messaging and target audience.

For example, if your brand’s messaging is meant to be sophisticated and high-end, your headings and subheadings guidelines could call for a more sophisticated and professional structure, such as using larger and bolder font sizes for headings.

On the other hand, if your brand’s messaging is meant to be relatable and down-to-earth, your headings and subheadings guidelines could call for a more casual and relatable structure, such as using smaller and less bold font sizes for headings.

Follow the steps below to create effective headings and subheadings guidelines for your content style guide.

Suggested Process For Creating Headings And Subheadings Guidelines

  • Define the heading levels: Start by defining the different levels of headings that will be used in the content. Typically, there are three main levels: H1 (main heading), H2 (subheading), and H3 (sub-subheading).
  • Establish a hierarchy: Decide on a hierarchical structure for the headings. For example, H1 should be used for the main title of the content, H2 for the main sections, and H3 for sub-sections.
  • Choose a formatting style: Decide on a formatting style for the headings, such as font size, color, and weight. For example, H1 could be 24pt, bold, and a different color than the body text; H2 could be 18pt, bold, and a different color than the body text; and H3 could be 16pt, bold, and the same color as the body text.
  • Provide examples: Provide examples of how headings and subheadings should be formatted in the content style guide.

Suggestions:

  • Use headings and subheadings to structure the content and make it easy to scan and understand.
  • Use headings and subheadings consistently throughout the content.
  • Avoid overuse of headings and subheadings, as this can make the content difficult to read.
  • Use keywords in headings and subheadings, as this can help improve the SEO of the content.
  • Use headings and subheadings in a logical and hierarchical manner, so that the content flows well and is easy to understand.

Feel free to use the example below as a starting point for adding headings and subheadings guidelines to your own content style guide.

Example Of Headings And Subheadings Guidelines For Your Content Style Guide

Overview

These headings and subheadings guidelines will help to ensure that our content is organized and easy to read, and aligns with our brand’s overall messaging and target audience.

Consistency in the use of headings and subheadings will also help to create a cohesive and easily readable structure for our content, which can help to improve our audience’s understanding of the content and help with SEO.

H1: Content Style Guide: Guidelines For Formatting

H2: Defining the Heading Levels

  • H3: Main Heading (H1)
  • H3: Subheading (H2)
  • H3: Sub-subheading (H3)

H2: Establishing a Hierarchy

  • H3: Main Title
  • H3: Main Sections
  • H3: Sub-sections

H2: Choosing a Formatting Style

  • H3: Font Size, Color, and Weight
  • H3: Examples

H2: Suggestions

  • H3: Use headings and subheadings to structure the content
  • H3: Use headings and subheadings consistently
  • H3: Avoid overuse of headings and subheadings
  • H3: Use keywords in headings and subheadings
  • H3: Use headings and subheadings in a logical and hierarchical manner

Lists And Bullet Points

Lists and bullet points are important elements of formatting that can greatly impact the readability and organization of a piece of content.

Adding lists and bullet points guidelines for formatting to your content style guide can help ensure that the content is organized, easy to read, and aligns with your brand’s overall messaging and target audience.

Lists and bullet points guidelines help to ensure that your content uses a consistent structure for organizing information.

This can include guidelines on the use of specific types of lists, such as numbered lists or bullet lists, as well as guidelines on how to use lists and bullet points in different contexts, such as for different types of content, such as blog posts, landing pages, or e-commerce pages.

Consistency in the use of lists and bullet points can help to create a cohesive and easily readable structure for your content.

Lists and bullet points guidelines also help to ensure that the content is easy to read and aligns with your brand’s overall messaging and target audience.

For example, if your brand’s messaging is meant to be sophisticated and high-end, your lists and bullet points guidelines could call for a more sophisticated and professional structure, such as using larger and bolder font sizes for bullet points.

On the other hand, if your brand’s messaging is meant to be relatable and down-to-earth, your lists and bullet points guidelines could call for a more casual and relatable structure, such as using smaller and less bold font sizes for bullet points.

Follow the steps below to create effective lists and bullet points guidelines for your content style guide.

Suggested Process For Creating Lists And Bullet Points Guidelines

  1. Define the types of lists: Start by defining the different types of lists that will be used in the content, such as numbered lists, bullet points, and definition lists.
  2. Establish a formatting style: Decide on a formatting style for the lists, such as font size, color, and bullet or number style. For example, lists could be 14pt font size, the same color as the body text, and with round bullet points.
  3. Provide examples: Provide examples of how lists should be formatted in the content style guide.

Suggestions:

  • Use lists to make the content easy to scan and understand.
  • Use lists consistently throughout the content.
  • Avoid overuse of lists, as this can make the content difficult to read.
  • Use lists in a logical and hierarchical manner, so that the content flows well and is easy to understand.
  • Try to limit each list to a maximum of 8-10 items.
  • When using numbered lists, make sure the numbers are in order and correspond to the items in the list.
  • Use bullet points for short, simple lists and numbered lists for longer, more complex lists.

Feel free to use the example below as a starting point for adding lists and bullet points guidelines to your own content style guide.

Example Of Lists And Bullet Points Guidelines For Your Content Style Guide

Overview

These lists and bullet points guidelines will ensure that our content is organized, easy to read, and aligned with our brand’s overall messaging and target audience.

Consistency in the use of lists and bullet points will also help to create a cohesive and easily readable structure for the content, which can help to improve our audience’s understanding of the content and improve our SEO.

Additionally, it can break down complex information and make it more scannable and easily digestible for our audience.

H1: Content Style Guide: Guidelines For Formatting

H2: Lists and Bullet Points

H3: Types of Lists

  • Bullet points
  • Numbered lists
  • Definition lists

H3: Formatting Style

  • Font size: 14pt
  • Color: Same as body text
  • Bullet or Number style: Round bullet points

H3: Examples

Bullet point list

  • Item 1
  • Item 2
  • Item 3

Numbered list

  1. First item
  2. Second item
  3. Third item

H3: Suggestions

  • Use lists to make the content easy to scan and understand
  • Use lists consistently throughout the content
  • Avoid overuse of lists
  • Use lists in a logical and hierarchical manner
  • Try to limit each list to a maximum of 8-10 items
  • When using numbered lists, make sure the numbers are in order and correspond to the items in the list
  • Use bullet points for short, simple lists and numbered lists for longer, more complex lists

Links And Buttons

Links and buttons are important elements of formatting that can greatly impact the usability and user experience of a piece of content.

Adding links and buttons guidelines for formatting to your content style guide helps to ensure that your content is easy to navigate, clear and consistent, and aligns with your brand’s overall messaging and target audience.

Links and buttons guidelines help to ensure that your content uses a consistent design for links and buttons throughout the website or app.

This can include guidelines on the use of specific design elements, such as color, typography, and spacing, as well as guidelines on how to use links and buttons in different contexts, such as for different types of content, such as blog posts, landing pages, or e-commerce pages.

Consistency in the use of links and buttons can help to create a cohesive and easily usable structure for your content.

Links and buttons guidelines can also help to ensure that the content is easy to navigate, clear and consistent, and aligns with your brand’s overall messaging and target audience.

For example, if your brand’s messaging is meant to be sophisticated and high-end, your links and buttons guidelines could call for a more sophisticated and professional design, such as using a larger and bolder font size, or a more prominent color.

On the other hand, if your brand’s messaging is meant to be relatable and down-to-earth, your links and buttons guidelines could call for a more casual and relatable design, such as using a smaller and less bold font size or a more subtle color.

Follow the steps below to create effective links and buttons guidelines for your content style guide.

Suggested Process For Creating Links And Buttons Guidelines

  1. Define the types of links and buttons: Start by defining the different types of links and buttons that will be used in the content, such as internal links, external links, download links, and call-to-action buttons.
  2. Establish a formatting style: Decide on a formatting style for the links and buttons, such as font size, color, and underlining. For example, links could be 14pt font size, blue color and underlined, and call-to-action buttons could be bold and a different color than the body text.
  3. Provide examples: Provide examples of how links and buttons should be formatted in your content style guide.

Suggestions:

  • Use links and buttons to make the content interactive and easy to navigate.
  • Use descriptive and meaningful link text, and avoid using “click here” or “read more” as link text.
  • Make sure links and buttons are clearly visible and easy to find.
  • Use underlining and different colors to distinguish links and buttons from the body text.
  • Use call-to-action buttons to encourage engagement and conversions.
  • Make sure links are working and buttons are properly linked to the right destination.
  • Test the links and buttons on different devices and browsers to ensure that they are working properly

Feel free to use the example below as a starting point for adding links and buttons guidelines to your own content style guide.

Example Of Links And Buttons Guidelines For Your Content Style Guide

Overview

These links and buttons guidelines will ensure that our content is easy to navigate, clear and consistent, and aligned with our brand’s overall messaging and target audience.

Consistency in the use of links and buttons will also help to create a cohesive and easily usable structure for the content, which can help to improve our audience’s experience of the content and lead to better user engagement and conversion.

H1: Content Style Guide: Guidelines For Formatting

H2: Links and Buttons

H3: Types of Links and Buttons

  • Internal links
  • External links
  • Download links
  • Call-to-action buttons

H3: Formatting Style

  • Links: 14pt font size, blue color, underlined
  • Call-to-action buttons: bold, different color than body text

H3: Examples

  • Internal link: Learn more about our company [https://www.example.com/about-us]
  • External link: Check out this resource [https://www.example.com/resources]
  • Download link: Download our brochure [https://www.example.com/brochure.pdf]
  • Call-to-action button: Sign up for our newsletter [https://www.example.com/newsletter-signup]

H3: Suggestions

  • Use links and buttons to make the content interactive and easy to navigate
  • Use descriptive and meaningful link text
  • Make sure links and buttons are clearly visible and easy to find
  • Use underlining and different colors to distinguish links and buttons from the body text
  • Use call-to-action buttons to encourage engagement and conversions
  • Make sure links are working and buttons are properly linked to the right destination
  • Test the links and buttons on different devices and browsers to ensure that they are working properly

Tables And Charts

Tables and charts are important elements of formatting that can greatly impact the readability and understanding of complex data in a piece of content.

Adding tables and charts guidelines for formatting to your content style guide help to ensure that the data is presented in a clear, consistent, and visually appealing way, and aligns with your brand’s overall messaging and target audience.

Tables and charts guidelines help to ensure that your content uses a consistent design for tables and charts throughout the website or app.

This can include guidelines on the use of specific design elements, such as color, typography, and spacing, as well as guidelines on how to use tables and charts in different contexts, such as for different types of content, such as blog posts, landing pages, or e-commerce pages.

Consistency in the use of tables and charts can help to create a cohesive and easily understandable structure for the data presented.

Tables and charts guidelines also help to ensure that the data is presented in a clear, consistent, and visually appealing way, and aligns with your brand’s overall messaging and target audience.

For example, if your brand’s messaging is meant to be sophisticated and high-end, your tables and charts guidelines could call for a more sophisticated and professional design, such as using a more elegant typeface, or using more prominent colors to highlight important data.

On the other hand, if your brand’s messaging is meant to be relatable and down-to-earth, your tables and charts guidelines could call for a more casual and relatable design, such as using a more friendly typeface, or using more subdued colors to present the data.

Follow the steps below to create effective tables and charts guidelines for your content style guide.

Suggested Process For Creating Tables And Charts Guidelines

  • Define the types of tables and charts: Start by defining the different types of tables and charts that will be used in your content, such as simple tables, data tables, and different types of charts (line charts, bar charts, pie charts, etc.).
  • Establish a formatting style: Decide on a formatting style for the tables and charts, such as font size, color, and table or chart design. For example, tables could have a clean and simple design, with alternating row colors and a bold font for the headings, and charts could use a color palette that is consistent with the overall design of the content.
  • Provide examples: Provide examples of how tables and charts should be formatted in the content style guide.

Suggestions:

  • Use tables and charts to make data and information easy to understand and visually appealing.
  • Use tables and charts consistently throughout the content.
  • Use a clean and simple design for tables, with clear headings, and alternating row colors.
  • Use charts that are appropriate for the data and information being presented, and make sure they are clearly labeled.
  • Use a consistent color palette for charts, that is consistent with the overall design of the content.
  • Make sure tables and charts are easy to read and understand, by including clear and concise captions and labels.
  • Keep the tables and charts simple, and avoid over-decorating or over-complicating the design.

Feel free to use the example below as a starting point for adding tables and charts guidelines to your own content style guide.

Example Of Tables And Charts Guidelines For Your Content Style Guide

Overview

These tables and charts guidelines will ensure that our data is presented in a clear, consistent, and visually appealing way, and aligns with our brand’s overall messaging and target audience.

Consistency in the use of tables and charts will also help to create a cohesive and easily understandable structure for the data presented, which can help to improve our audience’s understanding and retention of the information.

This will also make it easier to compare, contrast and understand the data, which is especially important when our audience needs to make decisions based on the information provided.

H1: Content Style Guide: Guidelines For Formatting

H2: Tables and Charts

H3: Types of Tables and Charts

  • Simple tables
  • Data tables
  • Line charts
  • Bar charts
  • Pie charts

H3: Formatting Style

  • Tables: Clean and simple design, alternating row colors, bold font for headings
  • Charts: Consistent color palette with the overall design of the content

H3: Examples

  • Simple table:

| Month | Sales |
|——-|——-|
| Jan | 1000 |
| Feb | 2000 |
| Mar | 3000 |

  • Data table:

| Product | Price | Quantity | Total |
|———|——-|———-|——-|
| A | $10 | 10 | $100 |
| B | $20 | 20 | $400 |
| C | $30 | 30 | $900 |

  • Line chart:

[Line chart showing the growth in sales over a period of time, with labeled x and y axis, and a clear caption describing the data]

H3: Suggestions

  • Use tables and charts to make data and information easy to understand and visually appealing
  • Use tables and charts consistently throughout the content
  • Use a clean and simple design for tables, with clear headings and alternating row colors
  • Use charts that are appropriate for the data and information being presented, and make sure they are clearly labeled
  • Use a consistent color palette for charts, that is consistent with the overall design of the content
  • Make sure tables and charts are easy to read and understand, by including clear and concise captions and labels
  • Keep the tables and charts simple, and avoid over-decorating or over-complicating the design

Best Practices for Maintaining Consistency In Your Content Style Guide

1. Create A Central Repository For Your Style Guide

  1. Choose a platform: Choose a platform to use as the central repository for your content style guide. Some options include:
  • A shared Google Drive or Dropbox folder.
  • A shared document management system such as Microsoft SharePoint or Google Docs.
  • A dedicated content management system such as WordPress, Confluence, or Notion.
  1. Organize the content: Once a platform has been chosen, organize the content of the style guide into sections and sub-sections, making it easy for team members to find the information they need.
  2. Create a table of contents: Create a table of contents that lists the sections and sub-sections of the style guide, making it easy for team members to navigate the guide.
  3. Add permissions and access: Add permissions and access to the content style guide for the relevant team members, so that they can access, edit, and update the guide as needed.
  4. Update regularly: Keep your content style guide updated regularly, and make sure that team members are aware of any changes that have been made.

Tips:

  • Keep your content style guide simple and easy to use
  • Use headings and sub-headings to organize the content
  • Use examples and screenshots to help team members understand the guidelines
  • Make the content style guide searchable
  • Use a consistent format and layout throughout the guide
  • Make sure the guide is accessible to all team members

Examples:

  • Confluence: A popular example of a dedicated content management system that can be used as a central repository for a content style guide. It allows for easy organization of content, collaboration among team members, and the ability to add permissions and access control.
  • Google Docs: Another example of a shared document management system that can be used as a central repository for a content style guide. It allows for easy organization of content, collaboration among team members, and the ability to add permissions and access control.

Suggestions:

  • Have a designated person or team in charge of maintaining and updating your content style guide.
  • Provide training and resources for team members to help them understand and follow the guidelines in the content style guide.
  • Encourage team members to provide feedback and suggestions on the content style guide to improve its usability and effectiveness.
  • Have a system in place for reviewing and approving changes to the content style guide, to ensure consistency and accuracy.

A central repository for a content style guide can help to ensure consistency and accuracy in the content produced by your team. Choose a platform that is easy to use, accessible to all team members, and easy to keep the guide updated and organized. Regularly review, update, and approve the content style guide to maintain consistency and accuracy in your content.

2. Establish A Review And Approval Process

  1. Identify stakeholders: Identify the stakeholders who will be involved in the review and approval process of your content style guide. This could include members of the marketing, content, and design teams, as well as any relevant executives or managers.
  2. Define roles and responsibilities: Define the roles and responsibilities of each stakeholder in the review and approval process. This could include who will be responsible for reviewing the guide, who will be responsible for making changes and updates, and who will be responsible for final approval.
  3. Establish a schedule: Establish a schedule for reviewing and updating your content style guide. This could include regular meetings or check-ins to review and update the guide, as well as a schedule for major updates or revisions.
  4. Use a checklist: Use a checklist to ensure that all aspects of your content style guide are reviewed and approved. This could include items such as grammar, punctuation, tone, and design elements.
  5. Provide feedback: Allow stakeholders to provide feedback and suggestions on your content style guide. Encourage open communication and collaboration throughout the review and approval process.

Tips:

  • Use a consistent format and layout throughout the guide to make it easy to review
  • Have a designated person or team in charge of maintaining and updating your content style guide.
  • Provide training and resources for team members to help them understand and follow the guidelines in your content style guide.
  • Encourage team members to provide feedback and suggestions on your content style guide to improve its usability and effectiveness.

Examples:

  • A weekly meeting with your marketing, content, and design teams to review and update the content style guide.
  • A quarterly review of your content style guide by the executive team to ensure that it aligns with the company’s overall branding and messaging.
  • An annual review of your content style guide by an outside agency or consultant to ensure that it aligns with industry best practices and standards.

A review and approval process for a content style guide is an important step to maintain the consistency and accuracy of your content. It’s essential to identify the stakeholders, define roles and responsibilities, establish a schedule, and use a checklist to ensure that all aspects of the content style guide are reviewed and approved. Encourage open communication and collaboration throughout the process, and have a designated person or team in charge of maintaining and updating the content style guide.

3. Provide Training And Resources For Team Members

  1. Create a training program: Create a training program that provides team members with the knowledge and skills they need to understand and use the content style guide. This could include an overview of the guide, examples of how to use the guide, and hands-on practice exercises.
  2. Use different formats: Use different formats to provide training and resources, such as videos, tutorials, webinars, and in-person training sessions. This will make it accessible to different learning styles and preferences of team members.
  3. Make it mandatory: Make the training program mandatory for all team members who will be using the content style guide. This will ensure that everyone has a solid understanding of the guidelines and how to use them.
  4. Provide ongoing support: Provide ongoing support and resources for team members to help them implement the guidelines in the content style guide. This could include a FAQ section, a helpdesk, or a resource library.
  5. Encourage feedback: Encourage team members to provide feedback on the training program and resources. Use their feedback to improve the program and resources, and make them more effective.

Tips:

  • Keep the training program simple and easy to understand
  • Use examples and real-world scenarios to help team members understand the guidelines
  • Make the training interactive and engaging
  • Use a consistent format and layout throughout the training program
  • Make sure the training program is accessible to all team members

Examples:

  • A webinar that provides an overview of the content style guide and how to use it, with a Q&A session at the end.
  • A series of short tutorial videos that cover different aspects of the content style guide.
  • An in-person training session that provides hands-on practice exercises for team members to work on.

Providing training and resources for team members is important to ensure that they understand and use the guidelines in the content style guide

4. Regularly Review And Update Your Style Guide

  1. Establish a review schedule: Establish a regular schedule for reviewing and updating your content style guide. This could include monthly, quarterly, or annual reviews, depending on the needs of your organization.
  2. Assign a review team: Assign a team or individual responsible for reviewing and updating the content style guide. This team should include members from different departments, such as marketing, content, and design.
  3. Use a checklist: Use a checklist to ensure that all aspects of the content style guide are reviewed and updated. This could include items such as grammar, punctuation, tone, and design elements.
  4. Update guidelines: Update the guidelines in the content style guide as needed, based on feedback from team members, changes in industry standards, or updates to the brand’s visual identity.
  5. Communicate changes: Communicate any changes or updates to the content style guide to all team members, and provide them with the necessary training and resources to implement the changes.

Tips:

  • Use a consistent format and layout throughout the guide to make it easy to review
  • Keep the content style guide simple and easy to use
  • Use examples and screenshots to help team members understand the guidelines
  • Make the content style guide searchable
  • Encourage team members to provide feedback and suggestions on the content style guide to improve its usability and effectiveness.

Examples:

  • A quarterly review of the content style guide with the marketing and content teams, with updates made as needed.
  • An annual review of the content style guide by an outside agency or consultant to ensure that it aligns with industry best practices and standards.
  • A continuous review process that allows team members to provide feedback and suggestions on an ongoing basis, with regular updates made to the guide.

Regularly reviewing and updating a content style guide is important to ensure that it remains accurate and up-to-date. A review schedule should be established, a team or individual should be assigned for the review, and a checklist should be used to ensure that all aspects of the content style guide are reviewed and updated.

Communicate any changes to your team members. Provide them with the necessary training and resources to implement the changes. Encouraging team members to provide feedback and suggestions on your content style guide will help to improve its usability and effectiveness.

Summary

A content style guide is a crucial tool for your business. It provides guidelines for writing, designing, and formatting your content, and establishes best practices for maintaining consistency.

Implementing a style guide may require some initial effort, but it will pay off in the long run, saving your organization time, improving your brand recognition and customer trust, and increasing the effectiveness of your content, website, and documentation.

***

Image: Computer Desk

Document Library

Learn how to use a document library to manage and organize your documents and digital content more effectively.

Document Library

Learn how to use a document library to manage and organize your documents and digital content more effectively.

Document Library

As businesses, organizations, and individuals generate and handle vast amounts of information every day, document libraries have become an essential tool for effective content management.

In this lesson, we explore what a document library is, discuss the benefits of having a document library, provide practical tips on how to create one, and list tools to help make creating a resource library for your users easy.

What Is A Document Library?

A document library is a collection of files, documents, or records that are systematically organized and stored in a digital format.

Your business can create different types of document libraries to manage and organize your documents.

A document can be:

  • A downloadable file stored in your site’s media library – e.g. a PDF, image, or PowerPoint presentation.
  • Any downloadable file stored on a third-party platform like Dropbox, Google Drive, Microsoft SharePoint, or Box.
  • A resource that is available for people to read directly on your website, without having to download anything.
  • Any resource that you embed directly into your website – e.g. a flipbook or an embedded Google Drive document.
  • A link to a web page, either on your own website or on a different website.

Common types of document libraries include the following:

  • Employee Document Library – This library is for storing and managing employee-related documents, such as employment contracts, performance evaluations, time off requests, and HR policies. An employee document library is usually only accessible to HR staff and the individual employee.
  • Marketing Document Library – This library is for storing and managing marketing-related documents, such as marketing plans, branding guidelines, social media templates, and case studies. The marketing document library is usually accessible by the marketing team and other relevant staff members.
  • Sales Document Library – This library is for storing and managing sales-related documents, such as product information, pricing sheets, sales scripts, and customer case studies. The sales document library is usually accessible by the sales team and other relevant staff members.
  • Finance Document Library – This library is for storing and managing financial documents, such as invoices, receipts, tax records, and financial reports. The finance document library is usually only accessible to the finance team and upper management.
  • Legal Document Library – This library is for storing and managing legal documents, such as contracts, patents, trademarks, and regulatory compliance documents. The legal document library is usually only accessible to the legal team and upper management.
  • Project Document Library – This library is for storing and managing project-related documents, such as project plans, timelines, budgets, and status reports. The project document library is usually accessible by the project team and other relevant staff members.
  • Knowledge Base – A knowledge base is a document library that stores information, resources, and documentation to help employees or customers find the information they need quickly and efficiently. A knowledge base can include articles, how-to guides, FAQs, and troubleshooting guides.
  • Training Library – A training library is a document library that provides employees with access to training materials, videos, and other resources to help them develop new skills and improve their job performance.
  • Proposal Library – A proposal library is a document library that stores proposals, pitches, and presentations that can be used as templates for future projects.
  • Policy and Procedure Library – A policy and procedure library is a document library that stores the policies and procedures of an organization, making them accessible to all employees.
  • PDF Library – A PDF library is a document library that stores PDF files, making them easily accessible to employees or customers. A PDF library can include manuals, user guides, reports, and other documents in PDF format.
  • Newsletter Directory – A newsletter directory is a document library that stores past issues of company newsletters. It can be useful for employees who want to refer to previous newsletters or for new employees who want to get up to speed on the company’s news and culture.

The type of document library you create will depend on the specific needs of your business and the type of documents your business wants to manage.

Each type of library can have its own access restrictions, allowing only relevant staff members to access and manage the documents.

Document Library Uses

Here are just some examples of ways businesses can use a document library:

  • An IT support company creates a knowledge base with articles and guides to help its clients troubleshoot common technical issues.
  • An engineering firm creates a project library for a new building construction project, storing all relevant documents including architectural designs, blueprints, and progress reports.
  • A sales team creates a training library with videos and online courses to help new hires develop their sales skills and learn about the company’s products and services.
  • A marketing agency creates a proposal library with sample proposals, pitches, and presentations that can be customized and reused for future clients.
  • An HR department creates a policy and procedure library with the company’s code of conduct, HR policies, and benefits information.
  • A software development company creates a PDF library with user manuals and technical documentation for their software products.
  • A marketing team creates a newsletter directory with past issues of their monthly newsletter, which contains updates on company events and projects, employee spotlights, and industry news.

Benefits Of Having A Document Library

A well-organized document library can provide many benefits, including:

  • Easy access to critical information: With a document library, you can quickly retrieve the documents you need, reducing the time and effort required to locate critical information.
  • Collaboration: Document libraries provide a centralized location where team members can collaborate, share ideas, and work together on projects.
  • Increased productivity: Document libraries help to eliminate duplication of efforts, reduce errors and redundancies, and streamline workflows, resulting in increased productivity.
  • Enhanced security: Document libraries can provide secure access control, limiting access to sensitive information to only authorized personnel.
  • Improved regulatory compliance: By using a document library to organize and store records, organizations can demonstrate compliance with legal, regulatory, and industry standards.

How to Store Information About Your Documents

Organizing your documents in a systematic and efficient way is essential to maximize the benefits of having a document library.

Here are some tips on how to store information about your documents to make them easier to find and manage:

Create A Naming Convention

Developing a naming convention for your documents is an essential first step in organizing them.

A consistent naming convention helps to ensure that all documents are named logically and that files can be easily located.

For example, using a standard format like “YYYYMMDD_Title” (Year, Month, Day, Title) can be a helpful way to create meaningful filenames.

Organize Documents Into Categories

Organizing documents into categories can make them easier to locate and manage.

Categories could include clients, projects, products, departments, or any other logical grouping that makes sense for your organization.

Make sure to keep the categories manageable and not too broad or too specific.

Use Metadata To Tag Documents

Metadata provides additional information about a document beyond its filename. It can include author, date created, keywords, description, and more.

Tagging your documents with metadata makes them easier to find and retrieve later on.

Many file types allow metadata to be added to the file itself, making it easier to manage.

By developing a consistent naming convention, organizing your documents into categories, and using metadata to tag them, you can make it easier to locate and manage your documents.

The more organized and accessible your document library is, the more efficient and productive you can be.

For more ways to organize your documentation, see our lesson on Content Organization

Common File Types For Document Libraries

When building a document library, it is essential to consider what file types you want to include and how you plan to handle them.

Document libraries can contain a wide variety of file types, including:

  • Word processing documents (e.g., .docx, .doc)
  • Spreadsheets (e.g., .xlsx, .xls)
  • Presentations (e.g., .pptx, .ppt)
  • PDF files
  • Images (e.g., .jpeg, .png, .gif)
  • Audio and video files (e.g., .mp3, .mp4)

Handling Different File Types

Different file types require different handling.

For example, images and videos may require thumbnail previews, while text documents may require a search function.

Consider using a document library tool that can handle different file types, such as Document Library Pro, which supports a wide variety of file types and provides advanced features for managing and organizing them (see further below).

Another consideration when dealing with file types is the size of the files.

Large files can be more challenging to manage and store, so it is essential to have a plan for managing larger files. This could include compressing files or using cloud storage solutions to manage and store larger files.

It is also essential to consider the level of security required for different file types. Sensitive files should be stored in a secure location and access should be restricted to authorized personnel.

Consider using a document library tool that supports access control features, so you can ensure that sensitive files are protected.

By using a tool that can manage a wide variety of file types and support advanced features, you can ensure that your document library is easy to use, secure, and efficient.

How To Build A Document Library

Organizations of all shapes and sizes use WordPress for their company websites. Many need to share documents, newsletters, or other resources online with the general public or for internal use.

If your site runs on WordPress and you’re looking to build a document library that lets you add or import documents of any file type and list them in a searchable, filterable document library on the front end, consider using a plugin like Document Library Pro.

Document Library Pro

Document Library Pro
Document Library Pro is a professional document library plugin for WordPress users.

While there are many WordPress file management and media library plugins for the WordPress admin, few can create a searchable front-end document library.

Document Library Pro is a professional document library plugin for WordPress that allows businesses and organizations to create a robust document management system or document directory in minutes and display these in an easy-to-find format without any technical knowledge.

The plugin makes document library management easy, helping to keep your documentation organized, create a resources hub or a publications database, share these resources, and present your documents in a searchable front-end document library.

Screenshot of Document Library Pro WordPress document library plugin.
Document Library Pro lets you display any type of document or resource on your WordPress website. (Image sourced from plugin website.)

Let’s briefly cover the following areas of using this plugin to build your document library in WordPress:

  • Overview of plugin features
  • Installation and configuration steps
  • Adding or importing documents of any file type
  • Listing documents in a searchable, filterable document library on the front end
Document Library Pro
Click the banner for more info on the Document Library Pro plugin.

Overview of Document Library Pro Features

Document Library Pro is a powerful tool for building a document library and offers several features for quickly adding and managing documents on a WordPress site, including:

  • Support for multiple file types
  • Front-end document submission and import
  • Customizable document templates
  • Search, sort, and filter options
  • Access control and user roles
  • Detailed documentation and support

A key feature of the plugin is its ability to instantly list documents in a searchable, sortable table with filters, or alternatively in a tiled grid layout, making it easy for users to find the documents they need quickly.

Document Library Pro - Document Library
Document Library Pro makes it easy for users to find the documents they need quickly. (Image sourced from plugin website.)

Installation And Configuration Steps

To install and configure Document Library Pro, follow these steps:

  • Install and activate the Document Library Pro plugin on your WordPress site. (If you need help with this step, see this WordPress plugin installation tutorial).
  • Configure your document library settings, including document categories, access control, and user roles.
  • Add or import documents to your document library. Document Library Pro supports a wide range of file types, including PDFs, images, videos, and more.
  • Customize your document library display by selecting a document template and customizing the front-end layout.
  • Use the search, sort, and filter options to make it easy for users to find the documents they need.

Adding Or Importing Documents Of Any File Type

Document Library Pro literally supports any file type that can be stored in the WordPress Media Library. It even allows users to link to documents hosted externally on third-party websites like Dropbox, Office 365, or YouTube.

Moreover, Document Library Pro allows you to embed documents, audio, and video directly on your website. This lets you display documents on your site instead of just providing download links. The plugin even provides embedded music and video players which your site users can play on the main document library page.

Additionally, the plugin offers flexible download links that allow users to choose whether to show download buttons, text links, or file-type icons on the main document library page. You can choose whether to provide instant downloads or a separate page for each document.

Having the ability to display any type of document on a WordPress website (including a wide range of document file types such as PDFs, DOCs, XLS, PPTs, EPUBs, Google Docs & Sheets, videos, and more) can add a lot of value and functionality to your site.

You can add documents in several ways, including manual uploading, bulk CSV uploads, or using drag and drop to add multiple files to the WordPress Media Library.

The plugin also allows you to add extra information about each document, such as a title, excerpt, full description, and image, to make the document library more accessible.

Additionally, it can calculate and display other important details automatically, such as the file size, file type, date, and last modified date.

List Documents In A Searchable, Filterable Document Library

You can organize and display corporate documents such as contact lists, data sets, financial spreadsheets, forms, how-to guides, handbooks, instructions, legal documents, license agreements, lists, manuals, policies and procedures, reports, stationery, templates, terms and conditions, white papers, and worksheets.

Additionally, you can display promotional documents like case studies, flyers, leaflets, and marketing materials on your website.

An added benefit of using WordPress with this plugin is the versatility of displaying industry-specific documents such as blueprints, manuscripts, sheet music, maps, signage, and personal documents like flipbooks, downloadable kids activities, leisure guides, nutrition guides, recipes, and even treasure hunts. You can even create a WordPress audio or video gallery to display photos, music, and videos, which can act as a resource or document gallery for your site.

Using The Plugin

To get started with Document Library Pro, all you need to do is add your documents to the plugin’s ‘Documents’ section in the WordPress admin area.

Once you’ve added your documents, the plugin will automatically display them in a searchable document library on the front end of your website.

The plugin offers several ways to add documents to your library, including manual uploading, selecting files from the Media Library, drag-and-drop, and bulk import from CSV.

It supports any file type, including PDF, JPG, DOCx, and more. You can choose what information to display in the document library, such as summaries, file types, file sizes, categories, and more.

Organizing your documents in a document library is essential for efficient document management.

The plugin offers two ways to categorize your documents: categories and tags. You can create a hierarchical structure of categories and sub-categories or add labels or tags to each document.

You can even create custom taxonomies to use as well as tags if you require multiple types of labels.

Document Library Pro
Document Library Pro lets you add categories, tags, descriptions, and more to each file in your document library. (Image sourced from plugin website.)

With a well-organized document library, users can easily find the documents they need, read them online or download them, and share them with others.

You can even embed multimedia content, such as a page-turning flip book or an embedded Google Drive document.

The plugin’s documentation section provides tutorials on how to get the most out of using the plugin, including :

  • Creating a document library page
  • Customizing the display of documents
  • Using search, sort, and filter features to make the library easy to navigate
  • Making your document library private
  • Using access control to restrict access to the document library
  • Configuring user roles and permissions
  • Setting up a staff intranet document library

With a wide range of features, including support for multiple file types, front-end document submission and import, advanced search, sort, and filter options, customizable display options, and embedded media players, the Document Library Pro plugin makes it easy to build a powerful document library.

Document Library Pro
Create a searchable document library with Document Library Pro (click the banner to visit the plugin site for more info).

More info: Document Library Pro

***

Image: Library Books

Effective Content Management: Documenting Procedures

Learn how to improve your content management practices by documenting procedures effectively.

Documenting Procedures For Effective Content Management

Learn how to improve your content management practices by documenting procedures effectively.

Documenting Procedures - Binders
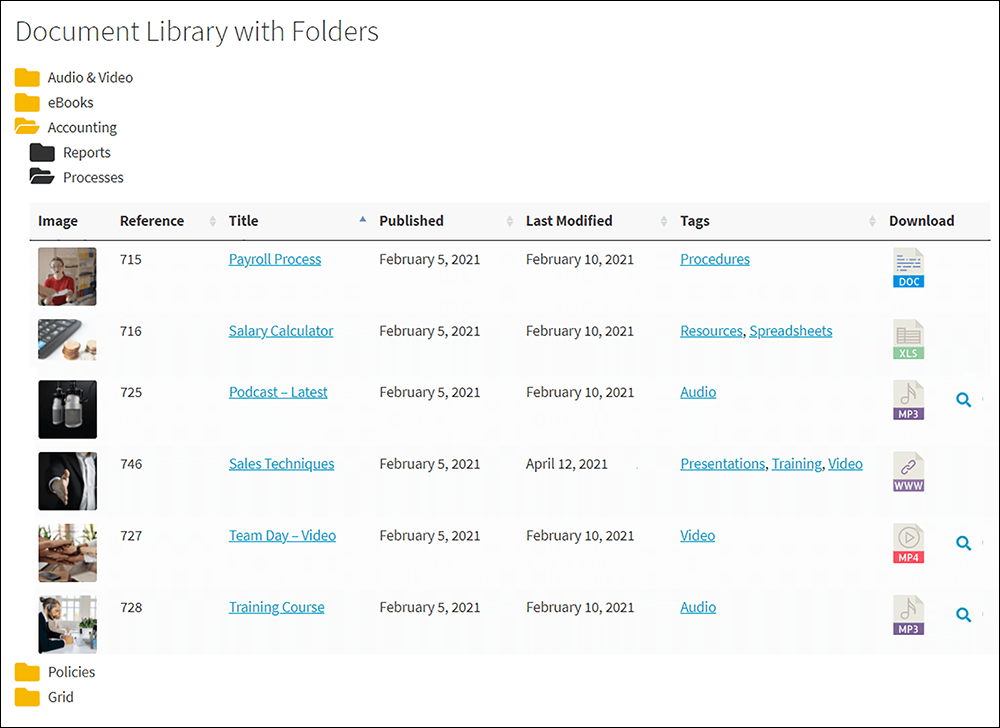
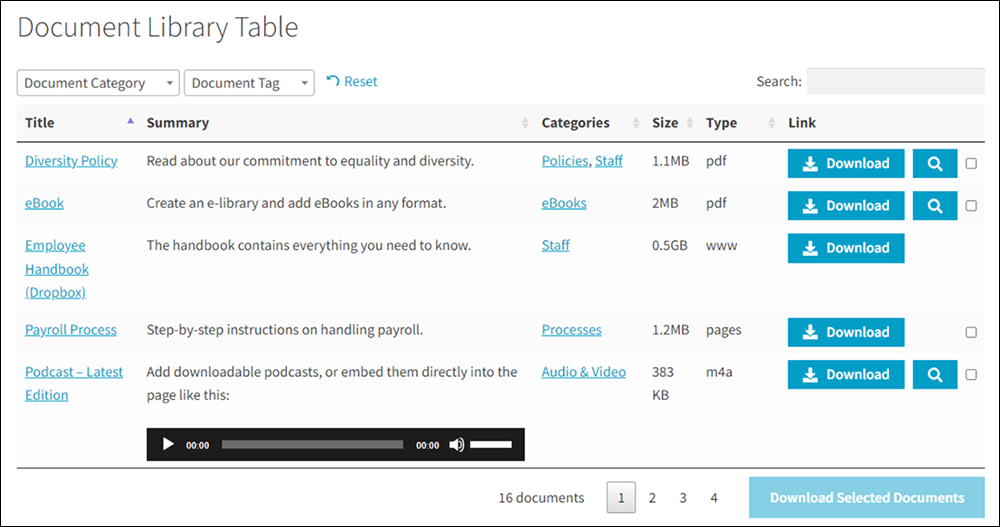
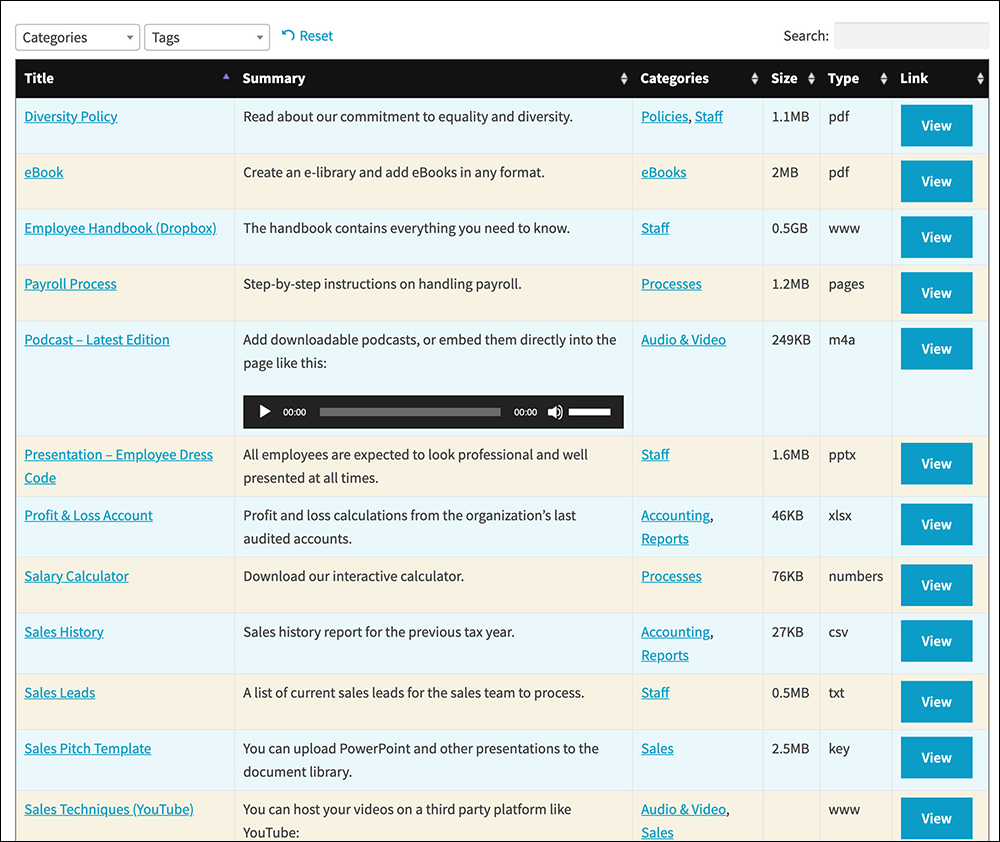
In this article, we will explore the importance of documenting procedures and how to effectively create and maintain them.

We’ll also walk you step-by-step through an example of documenting a procedure when creating content documentation for your business.

***

Why Document Procedures?

Writing clear and comprehensive procedures is crucial for the smooth operation of your organization.

Not only do well-documented procedures provide a roadmap for your employees and team members to follow, but they also provide a record of the steps taken to complete a task, serve as a useful reference for new hires, set standards of quality and ensure consistency in work processes, and improve your overall content management practices.

What Is The Best Way To Document A Procedure?

There are a few key steps to documenting a procedure effectively:

  1. Identify the purpose of the procedure: Clearly stating the purpose of the procedure will help ensure that it is followed correctly and will be useful for those who need to follow it.
  2. Outline the steps involved: List the steps involved in the procedure in a logical order, using numbered or bullet points. Make sure to include any necessary details, such as specific tools or equipment that will be needed.
  3. Use clear and concise language: Use language that is easy to understand and avoid using jargon or technical terms that may not be familiar to all readers.
  4. Include any necessary warnings or precautions: If there are any potential hazards or risks associated with the procedure, make sure to include them in the documentation.
  5. Include any necessary illustrations or diagrams: If a visual aid would help to explain the procedure more effectively, consider including a diagram or illustration.
  6. Test the procedure: Before finalizing the documentation, it can be helpful to test the procedure to ensure that it is clear and easy to follow.
  7. Review and update the documentation regularly: Procedures may change over time, so it is important to review and update the documentation as needed to ensure that it remains accurate and up-to-date.

An Example Of Documenting A Procedure

While the summarized steps shown above are helpful, the actual process of documenting a procedure effectively can sometimes be challenging.

To illustrate this, we’ll go through an actual example and show you how we add new videos to our training sites.

In addition to ContentManagementCourse.com, we also run two online training sites:

As part of our content management processes for these sites, any time WordPress releases a new version of its core software, we add information about the new version features and improvements, including video tutorials covering these features to the above sites as follows:

  • WPMasterclasses.com – Add the videos to our video course on building a WordPress site, and update the product information page, the site’s video lesson counters, and the page listing recently added videos.
  • WPTrainingManual.com – Publish a post about the latest WordPress version.

Note: We write our own content for those sites but we outsource the creation of the WordPress update videos to an external supplier.

So, when our video supplier notifies us that new videos covering the new WordPress version release are available, we then add these videos to our video training site and create a post about it on our WordPress training site.

Simple chart outlining process of updating training sites with new content.
When new videos are released, we update the content on our training sites.

Adding videos to a couple of sites and creating a post about it sounds simple and straightforward enough.

However, suppose we want to assign these tasks to a newly-hired team member or outsource it to a third-party service provider.

How would we communicate this process effectively to ensure that whoever does the work will perform all tasks consistently to the standards of quality that we ourselves maintain and expect?

Obviously, this involves creating some form of documentation, but how detailed does this documentation have to be?

Let’s walk through the actual process and see.

Documenting Processes vs Documenting Procedures

The simple diagram shown above explains what we want to do whenever a new version of WordPress is released (i.e. add videos to our training sites and create a post about it).

Here is the diagram again:

Simple chart outlining process of updating training sites with new content.
This is what we want done.

This diagram shows what we want done, but doesn’t explain any of the processes involved in adding video content to the training sites, creating a post about it, and making sure that all relevant information is included for our users and formatted correctly.

So let’s expand the diagram and include these processes as shown in the flowchart below:

Documenting Procedures: Flowchart - Adding new video content to training sites.
These are the main processes we need to be done to add new video content to our training sites.

In a nutshell, these are the processes we need done:

  1. When our video supplier notifies us that a new set of videos is available, we then…
  2. Log into the supplier’s website and download a zip file containing the videos and any additional information included with those files to our computer.
  3. Extract the video files, rename these to match our course website requirements, and prepare the videos for uploading.
  4. Upload the videos to our video course site via Amazon S3.
  5. Create new course pages for our members and embed the video file URLs into the course content.
  6. Update the product information page that non-members see when they visit the site, including the video lesson counters on the site’s home page and the All Access Pass Membership pages.
  7. Update the Video Updates Log page that informs users about the latest videos added to the site.
  8. Update the video site’s content production documentation (so we can track what content is added to the site).

Once the above is done, we then also…

  1. Source content about the new WordPress release from the official WordPress site.
  2. Create a new post for the updated WordPress version on the WordPress Updates section of WPTrainingManual.com
  3. Embed the video content into the post and publish.
  4. Promote the new post.

The above lists the processes we need to go through every time WordPress releases a new version.

It is, however, still only an “overview.” While it can serve as a guide to help our newly-hired team member or outsourced person understand what we need them to do, it doesn’t specify “how” we want all of these processes to be effectively carried out.

This can lead to confusion, errors, and time-wasting delays due to the lack of detailed instructions, and low-quality output.

So, the next step is to turn all of the above processes into documented step-by-step procedures that anyone can follow to ensure that all of the required tasks are carried out effectively to consistently high standards and performed correctly and efficiently.

Documenting Procedures: Creating Step-By-Step Documentation

In addition to the steps provided earlier, here is the process we suggest following to create step-by-step procedures for your team or for outsourcing:

  1. As you go through the process yourself, initially record the steps involved in the process (tip: record these in a plain text file using simple bullet-point lists).
  2. The next time you repeat the process, follow the steps on your bullet-point list and fill in any “missing gaps” you identify as you work through the processes.
  3. Transfer the contents of your list to a shareable format (e.g. a Word or Google Doc document, an online page on a private section of your site reserved for staff training, etc.)
  4. The next time the task needs to be done, give your list to someone else and ask them to follow the documented instructions. Note down any areas of difficulty experienced by the other person, particularly areas like not knowing where to access login details, not knowing how to use certain software or tools, or not knowing how to perform certain tasks (e.g. how to create a post in WordPress).
  5. Use the information obtained from the previous step to expand your documentation (e.g. add links to other documents containing login details, link to software tutorials or other training sites, add screenshots or video screencasts to illustrate certain steps, etc.)
  6. Give your expanded document to someone else and repeat Step 3, i.e. ask them to complete the task following the documentation. Repeat this process until someone else can perform all of the required tasks successfully on their own by simply following the documentation.
  7. Add the documented procedure to your main content documentation and periodically review and update the information to keep it current, relevant, and accurate.

Let’s show you what “Steps 1 to 3” above would look like as a documented procedure using the example in the section below…

===  START EXAMPLE DOCUMENTATION  ===

[Note: Begin this document by providing an “Overview” of the 12 processes involved in performing and completing the task, as described earlier.]

WordPress Videos – New Version Releases

This section explains how to:

Tools And Resources Required To Perform This Task

The following resources, sites, services, tools, etc. are required to complete this task (contact your manager for access to all login details, software licenses, etc.):

  • Login details to PLR4WP.com  (video supplier website).
  • Access to hard drive folders: C:\Business\Businesses\A - WPMasterclasses\01-Vids Various\PLR4WP and C:\Business\Businesses\A - WPMasterclasses\00-Production\WPMC-0019 - BuildWP\00-videos
  • Access to Amazon AWS S3 account: Bucket = “wpmasterclasses” https://wpmasterclasses.s3.us-east-1.amazonaws.com/vids/0019
  • Admin access to sites: https://wpmasterclasses.com and https://wptrainingmanual.com (if you are a site administrator, see “Assets” spreadsheet for login details. If you are not a site administrator, then contact your manager for login details).
  • S3 Browser
  • S3 Media Maestro plugin for WordPress (use the supplied shortcode shown in the documentation).
  • NoteTab Pro text editor.
  • Photoshop image editing application.
  • WPMasterclasses Video Course Production Documentation master spreadsheet (Excel).

1 – Adding New Videos to WPMasterclasses.com

Destination Video Course

Add the WordPress version update videos to the following video course:

NEW WORDPRESS VERSION Videos – Procedures

1) Download And Prepare Video Source Files

When an email notification is sent from the video supplier informing us that videos for a new WordPress version or video updates are available, do the following:

  • Log into https://members.plr4wp.com/vol-01sn4/
  • Create a new folder with the WP version number (note: ignore periods, so “WP61” not “WP6.1, “WP62” not “WP6.2”, etc.) inside hard drive folders C:\Business\Businesses\A - WPMasterclasses\01-Vids Various\PLR4WP and C:\Business\Businesses\A - WPMasterclasses\00-Production\WPMC-0019 - BuildWP\00-videos
  • Download video zip files from the supplier website into the hard drive folder C:\Business\Businesses\A - WPMasterclasses\01-Vids Various\PLR4WP
  • Extract all videos into the above-created folder. Note: the extracted files contain various folders (transcripts, raw video files, audio files, etc.). The video files we need to upload are the finished .mp4 files (not the whitelabel version with the included source files).
  • Duplicate the extracted .mp4 video folder and add “renamed” to the file name.
  • Rename .mp4 videos to the filename format wp-version-videonumber-concisefilename (e.g. from “vol1-vid3.18d-whats-new-in-wp-6.1-document-settings-changes” to “wp-61-d-document-settings-changes”).
  • Move renamed .MP4 videos to the WP version folder created in C:\Business\Businesses\A - WPMasterclasses\00-Production\WPMC-0019 - BuildWP\00-videos
  • Notes: some videos include accompanying notes (e.g. scripts, checklists, or templates). Add these to this hard drive folder: C:\Business\Businesses\A - WPMasterclasses\00-Production\WPMC-0019 - BuildWP\02-dl

2) Upload Video Files To S3 Bucket

After downloading the video files from the video supplier’s website and preparing the video source files for uploading, the next step is to upload all the video files to the correct S3 bucket on our Amazon S3 account.

To do this, follow the steps below:

  • Launch S3 Browser
  • Go to Amazon S3 bucket = wpmasterclasses > vids > 0019
  • Create a new folder in S3 with the same name as the video download folder (e.g.: wp61) inside the course folder 0019
  • Upload all videos to the above bucket.
  • After all video files are uploaded, select all files and set permissions as follows:
    • Owner = Full Control
    • Any AWS Users = Read
    • All Users = Read
  • After setting permissions for files inside the S3 bucket, select all files and copy their URLs to your clipboard.

3) Prepare Content For Video Course

Once all the video files have been uploaded to our S3 account, file permissions have been set correctly, and video file URLs have been copied to your clipboard, the next step is to create a text file containing all the information we will need to update our course content and product pages.

To do this, follow the steps below:

  • Open up NoteTab Pro text editor, create a new text file, and paste all video URLs into the text file. All videos should have the following format: https://wpmasterclasses.s3.us-east-1.amazonaws.com/vids/0019/foldername/filename
  • Save this text file as wpversion-notes (e.g. “wp61-notes”) into the WP version folder created in C:\Business\Businesses\A - WPMasterclasses\00-Production\WPMC-0019 - BuildWP\00-videos
  • Open up the folder containing the renamed video files inside C:\Business\Businesses\A - WPMasterclasses\00-Production\WPMC-0019 - BuildWP\00-videos. Switch the folder view to “details.” Below the list of video URLs add the following details about each video:
    • Video Title – Use the format WP Version: Part X - Short Title
    • Video Description – You can obtain this by watching the first few seconds of each video or opening the video transcripts that accompany the videos.
    • Video Duration – Use the format (XX:XX) for the duration in minutes and seconds.
  • Also, add the following information to the text file (to be added to WPMasterclasses Video Production master spreadsheet):
    • Total number of new videos
    • Total duration of new videos
  • Proof all of the content (spelling, punctuation, accurate descriptions, video duration, etc.), as this description will be used in various locations (video course, product page, and video update post).
  • Save the text file when done.

4) Add Video Content To Video Course

After uploading all the video files to Amazon S3 and preparing all the information you will need to describe the content of these videos, the next step is to add this information to the video course.

To do this, follow the steps below:

  • Log into WPMasterclasses.com and select the WP Courseware > Courses menu option from the main menu to bring up the Courses screen.
  • Locate the How To Build A WordPress Site Fast course and click Edit.
  • Scroll down to the Course Builder section and expand Module 3 - New WordPress Features.
  • Right-click on the top entry and select ‘Open link in new tab’ from the menu. This will load the entry into the post editor.
  • Switch to the ‘Text’ tab, then select all the content and copy it to your clipboard.
  • Create a new text file in your text editor and paste the content from your clipboard into this file. You will use this as your template for adding new videos to the course module.
  • Close the existing course unit window after copying and pasting the item’s contents into your text file.
  • Return to the Course Builder section, scroll down to the bottom of the section and click on the “+Add Unit” button to create a new lesson page.
  • Select and copy all the contents from your text file. In the course unit post, switch to the ‘Text’ tab and paste in the content from your clipboard.
  • Switch to the Visual tab and do the following:
    • Copy and paste the video description from your ‘WPXX-Notes’ text file into the course unit’s content section. Make whatever adjustments are necessary to the body section of the content.
    • Change the highlighted section of the video’s filename in this line to match the correct location of the uploaded video (see list of video URLs copied into your text file): [s3mm type="video" files="vids/0019/wp60/wp-60-a-intro.mp4" /]
    • Copy and paste the video title into the course unit’s Title field. Make it as short as possible (this title will appear on the Course Lessons menu for users.
    • Switch the course unit post to ‘Text’ tab, then select and copy all the content to your clipboard and click ‘Add Unit’.
    • This will load another course unit black post into your window. Paste in the contents of your clipboard, make the same adjustments described above, and repeat this process until you have added all the videos to the course.
    • Drag the newly-added video lessons into their correct positions on the Course Builder module section to arrange course lessons so that newer videos display at the top of the course module.
    • Click the Update button when done to save your course settings.
    • Click on the View Course link at the top of the page to bring up the video course module as users will see it.
    • Click on each of the new video lessons and check that the correct video has been added and plays fine. If you spot any errors (i.e. wrong video, video not playing, typos in content, etc.), fix these by editing the course units and resaving, then test again.

5) Updating Video Course Product Page

After adding the videos to the course, the next step is to update the product page with information about the additional videos.

To do this, follow the steps below:

  • While logged into WPMasterclasses.com, navigate to the video course page (How to Build A WordPress Site Fast) and click on the Edit product link in the WordPress admin dashboard menu to edit the product page.
  • Copy all of the video description information from the “WPXX-Notes” file to your clipboard.
  • Scroll down to the ‘Module 3 – New WordPress Features & Updates’ section of the page and paste in the video description list from your clipboard.
  • Make sure the content is formatted correctly:
    • WordPress – Version X.X – Add an H4 heading tag
    • Titles – Bold
  • Proof content and formatting.
  • Scroll down to the Course Duration and Video Lessons fields. Update these fields with the additional number of videos and new total duration (hours and minutes).
    • Notes: Calculate video course duration by dividing the total minutes by 60 (to get the hours), then multiplying the whole integer by 60 and subtracting this number from the total to get the minutes. For example, 397 minutes = (397/60=6.61 = 6 hours. 6 x 60 = 360. 397-360 = 37 minutes. Total video course duration = 6 hours, 37 minutes).
    • You can get the total number of minutes from the video course production spreadsheet after completing the next step below.
  • Save to update the product page with the new information.
  • Click on the View Product link and open the link in a new tab to visit the product page. Perform a visual check to make sure that everything looks ok, i.e.:
    • Video content
    • Updated number of video lessons
    • Updated course duration

6) Update Video Course Production Documentation

After updating the video course and product page, the next step is to update the number of videos and video duration in the video course production documentation so we have an accurate inventory of the site’s content.

To do this, follow the steps below:

  • Open the Video Course Production Documentation spreadsheet.
  • Scroll to Row 21 (WPMC-0019).
  • Add the number of new videos to the number shown in the Lessons cell (Column G).
  • Add the additional number of minutes to the number shown in the Durations cell (Column H).
  • Scroll to the top of the spreadsheet. Note the following (you will need these numbers for the next step below):
    • Column G, Row 1 = New total number of video lessons.
    • Column Z, Row 1 = New total number of hours of video content.
  • Save the spreadsheet.

7) Update Video Counters

After updating the product page, the next step is to update the number of “Video Lessons” and “Hours of video” details on the home page and the ‘All Membership Access’ product page.

To do this, follow the steps below:

  • While logged into WPMasterclasses.com, click on the logo on the top left corner of the site to visit the home page.
  • Click on the Edit with WPBakery Page Builder link in the dashboard admin menu.
  • Scroll down to the Pie Charts. Edit the following:
    • Video Lessons – Click Edit Pie Chart and update the number of video lessons with the number shown in Column G, Row 1 of the Video Course Production Documentation spreadsheet. Click Save to update the pie chart.
    • Hours of video – Click Edit Pie Chart and update the number of video hours (whole integers only) with the number shown in Column Z, Row 1 of the Video Course Production Documentation spreadsheet. Click Save to update the pie chart then Close to exit the edit screen.
    • Click Update when done to save your new page contents.
  • Repeat the above process to update the pie charts on the All Access Pass Membership product page.

8) Update The Video Updates Log Page

After updating the video counters on the home page and the ‘All Membership Access’ product page, the last step is to add an entry about the newly-added videos to the content to the Video Updates Log page of this site.

To do this, follow the steps below:

  • While logged into WPMasterclasses.com, go to the Video Updates Log page and click on the Edit Page link to edit the page.
  • The easiest way to create a new entry for this page is to select and copy an existing entry from this page (preferably one where updates were made to the same course).
  • Paste this at the top of the content. Update the date and information (i.e. number of videos added and video topic).
  • Update the page to save the new content.
  • Click on the View Page link to inspect the page and make sure that all the information is correct.

This completes the update tasks for new WordPress version release videos on WPMasterclasses.com.

The last step is to create a new post about the updated WordPress version on WPTrainingManual.com.

2 – Create A New WordPress Release Post On WPTrainingManual.com

Create a post for every new major WordPress version release and publish it under the WordPress Updates section of WPTrainingManual.com.

1) Content Planning & Research 

  • Use the following sources to perform content research for the new post:
  • Create a new folder in your hard drive called wp-xx (where xx=version number. For example, WordPress 6.0 = wp-60) inside this directory: C:\Business\Businesses\A - WPTrainingManual\Content\Updates.
  • Right-click and save any new version release images and videos to be used in the post content to the newly-created folder.
  • In Amazon S3, create a new folder inside the wp-versions bucket located here https://wptrainingmanual.s3.us-east-1.amazonaws.com/elite/tut/wp-versions/. Name the bucket wp-xx (where xx=version number. For example, WordPress 6.0 = wp-60).
  • Upload media content to be used in the post to this bucket. Set the correct permissions, then select all file URLs and copy these to your clipboard.
  • Open the text file created earlier containing notes about the new version and paste the file URLs from your clipboard into the text file. Save the file.

2) Create A Featured Image

Each new version release post requires a featured image with the new version number.

To do this, follow the steps below:

  • Launch Photoshop and open the file WPTM-VideoUpdates.psd in this folder: C:\Business\Businesses\A - WPTrainingManual\Images\FeaturedImages-WPUpdates
  • Edit the text layer and add the correct version number to the slide.
  • Name the file wpxx (where xx=version number without periods or dashes. For example, WordPress 6.0 = wp60) and save the image file to the same folder.
  • Upload this image as the Featured Image of the post (see next section).

3) Create A New Post In WordPress

The easiest way to create a new post for WordPress version updates is to duplicate an existing post, keep the post content structure intact and edit the content to match the new version number.

To do this, follow the steps below:

  • Log into WPTrainingManual.com. From the WordPress Dashboard, select Posts > All Posts and then filter the table of posts by Category > WordPress Updates.
  • Hover over an existing post entry and click Clone to duplicate the post.
  • Click Edit to open the duplicate post in the WordPress Editor.
  • Edit the post as follows:
    • Change the Post Title
    • Change the Post Slug
    • Change the Post Tags
    • Upload the Featured Image created in the previous step.
    • Update the Post Content.
    • Add all media files saved earlier to the Post Content.
    • Add links from the post to relevant tutorials (e.g. if the post mentions a new feature of the WordPress Block Editor, then link the content to the WordPress Block Editor tutorial).
    • Fix the post’s meta description.
    • Save and publish the post.
  • After publishing the post, visit the WordPress Updates section and make sure that the new entry displays correctly in the grid list, then click through and check to make sure that all the post content is ok.
  • Promote the post.

===  FINISH EXAMPLE DOCUMENTATION  ===

Creating Hands-Free Step-By-Step Documentation: Benefits & Challenges

The above example illustrates the kind of basic documentation your business should aim to create before handing the responsibility for performing the task to someone else, whether in-house or outsourced.

In addition to text instructions, you can add screenshots, videos, etc. to the above documentation and publish it as an online tutorial inside a private or password-protected area of your site (e.g. give staff-only access to the training and documentation).

After documenting the above steps, make sure that the process can be run repeatedly to deliver consistent results, and periodically review and update the content.

info

Creating detailed documented procedures helps you to see what challenges you will need to address when choosing to outsource the task.

With the above, for example, some of the challenges to work out before outsourcing the task include:

  • Storing media files, notes, content production logs, etc. on a hard drive: In terms of document storage, it would probably be better to move these to the cloud and use collaborative/shared applications with separate user logins.
  • Access to tools and applications and competency in using these: The above process requires using licensed tools like Photoshop and S3 Browser, having basic skills in Photoshop, WordPress, etc., and having admin access to your website in order to perform certain functions.
  • Managing/sharing logins and passwords. For services that require access to credentials (e.g. Amazon S3), it’s important to set things up so that the security of important business accounts is never compromised.
  • Workflow processes. It’s important to work out beforehand how processes fit into your overall workflow.
  • Related processes and procedures also need documentation. Processes often involve additional or related processes and subprocesses, and these also need to be documented. For example, the last task in our example (“Promote the post”) is a whole separate process in itself, as documented in our Content Promotion training module.

Documenting Procedures: Final Thoughts

Creating detailed documented procedures can be very time-consuming but it’s vitally important for the sustainability, growth, and long-term success of your business.

Hopefully, you can see from the above that documenting procedures allows your business to:

  • Create “hands-free” step-by-step documentation that can be used to train new team members and outsource work effectively,
  • Track and measure the progress of its content strategy.
  • Improve content management practices.

***

Image: Binders

Web Content Accessibility

Learn about the importance of making your web content more accessible and inclusive for all of your website’s users.

Web Content Accessibility

Learn about the importance of making your web content more accessible and inclusive for all of your website’s users.

Web Content Accessibility - Man reading braille in front of a computer.The web has become so central to our lives that many people around the world today spend hours each day on average looking at screens on their digital devices searching for information, for work, or for entertainment.

According to WHO, around 15% of the world’s population lives with some form of disability. So, it’s important to ensure that both your website and your content allow people with disabilities or impairments to access and benefit from the same kind of user experiences that people without disabilities enjoy.

Making your website and web content accessible not only has ethical and commercial justifications but in some countries, there are also legal implications for not complying, especially if you are a nonprofit organization.

In this lesson, we look at:

  • What Are Web Content Accessibility Guidelines?
  • Ways To Make Your Web Content Accessible

***

Before You Begin

Please review the sections below before starting this lesson:

What Are Web Content Accessibility Guidelines?

Web Content Accessibility Guidelines (WCAG) is an internationally recognized standard for making web content more accessible to people with disabilities. It was developed by the World Wide Web Consortium (W3C), an organization that works to develop web standards and technologies.

The importance of content accessibility cannot be overstated. With over 1 billion people living with disabilities worldwide, ensuring that web content is accessible to everyone is not only a moral imperative, but it also makes good business sense.

When web content is not accessible, it can exclude people with disabilities from accessing important information, services, and opportunities. This can lead to social isolation and discrimination, and can also result in lost business and revenue for companies that fail to make their content accessible.

On the other hand, when web content is made accessible, it benefits everyone. People with disabilities can fully participate in society and access the same information and opportunities as everyone else. It also helps businesses reach a wider audience and can improve search engine optimization (SEO).

WCAG covers a wide range of recommendations for making web content more accessible to a wider range of people with disabilities on desktops, laptops, tablets, mobile devices, wearable devices, and other web of things devices.

This includes accommodating people with blindness, low vision, and other vision impairments; deafness and hearing loss; limited movement and dexterity; speech disabilities; sensory disorders; cognitive and learning disabilities; and combinations of these.

There are three levels of conformance to WCAG: A, AA, and AAA.

  • Level A is the most basic level and covers the minimum requirements for accessibility.
  • Level AA is the next level and covers a higher level of accessibility.
  • Level AAA is the highest level and covers the highest level of accessibility.

Following the guidelines can make your web content more usable to users in general. In some countries and jurisdictions, website owners can also be fined or sued for discrimination if their websites are found to be non-accessible to all users.

Different WCAG Versions

Just as the web is continually evolving, so too will the Web Content Accessibility Guidelines.

WCAG 2.1 is the most recent and relevant accessibility standard. Website owners are advised to start with WCAG 2.0 when allocating resources then step up to WCAG 2.1 to help more people with disabilities and reduce their future legal risk

WCAG 3 is currently a work in progress and will aim to address various types of web content including static content, interactive content, visual and auditory media, and virtual and augmented reality. The guidelines also address related web tools such as user agents (browsers and assistive technologies), content management systems, authoring tools, and testing tools.

WCAG 3 also introduces a new color contrast guide, called Advanced Perceptual Contrast Algorithm (APCA), and aims to replace the older WCAG 2.0 method, while providing a wider range of recommendations for making web content more accessible.

WCAG – Four Principles

Note: The section below was sourced from this article: Understanding The Web Content Accessibility Guidelines 

WCAG is comprehensive and detailed, but difficult to understand quickly.

WCAG consists of four broad principles with recommendations that website owners must take practical steps to satisfy in order for their web content to be considered accessible:

  • Perceivable: Users must be able to perceive it in some way, using one or more of their senses.
  • Operable: Users must be able to control UI elements (e.g. buttons must be clickable in some way — mouse, keyboard, voice command, etc.).
  • Understandable: The content must be understandable to its users.
  • Robust: The content must be developed using well-adopted web standards that will work across different browsers, now and in the future.

Web Content Accessibility Goals And Objectives

As mentioned above, Web Content Accessibility Guidelines (WCAG) 2.1 provides a set of guidelines for making web content more accessible to individuals with disabilities organized into four principles.

These principles have the following goals and objectives:

  • Perceivable: Information and user interface components must be presentable to users in ways they can perceive.
    • Provide text alternatives for non-text content, such as images and audio.
    • Provide captions and other alternatives for multimedia.
  • Operable: User interface components and navigation must be operable.
    • Make all functionality available from a keyboard.
    • Provide users enough time to read and use the content.
  • Understandable: Information and the operation of the user interface must be understandable.
    • Make text content readable and understandable.
    • Make the site appear and operate in predictable ways.
  • Robust: Content must be robust enough that it can be interpreted reliably by a wide variety of user agents, including assistive technologies.
    • Maximize compatibility with current and future user agents, including assistive technologies.

Examples:

  • Adding alternative text to images and providing captions for videos to provide a more accessible experience for users with visual impairments.
  • Making sure that all functionality can be accessed via a keyboard for users who cannot use a mouse or other pointing device.
  • Providing clear and simple language and instructions for users with cognitive disabilities.
  • Ensuring that website code is structured in a way that can be interpreted by a wide range of devices, browsers, and assistive technologies.

Let’s look at some more ways to make your content accessible and inclusive.

Ways To Make Your Web Content Accessible

According to leading digital accessibility solutions provider eSSENTIAL Accessibility,

“WCAG covers an exhaustive list of digital elements that can create barriers for people with disabilities. The guidelines address common barriers that prevent people from using digital platforms. Barriers can be tricky because unless they directly affect you, you might have an extremely difficult time knowing they exist.”

Source: What is WCAG?

Each of the four principles listed earlier provides a range of guidelines for making your web content more accessible and ensuring it complies with regulations. Click on each of the links above to view these recommendations.

Some examples of content-related areas covered in the WCAG include:

  • Non-decorative images and images that serve a structural or navigation purpose must contain descriptive alternative text (alt-text), so visually impaired users can have an appropriate description of the image.
  • The on-page text must be realizable without disrupting how the page displays, so people with vision disabilities can magnify the content and have an easier time reading.
  • Pre-recorded and live video with audio content need to have captions for users who are deaf or hard of hearing.
  • Pre-recorded audio content files need to have a written transcript. This is also helpful for users who can’t turn on the sound or are in a noisy environment and want to listen to an audio file.
  • Form-entry tasks must not have time limits or must include an extended, lengthy time limit to accommodate people who need more time to fill out forms.
  • Elements that display across multiple web pages (e.g. navigation, headers, footers, sidebars, etc.) must consistently show in the same areas of the website so regardless of which page users are on, they will always know where to find these.
  • Users must be able to navigate your website without the use of a mouse. For example, users should be able to use the “tab” button on a keyboard to progress through any given page.
  • All web pages must use a proper heading-level structure to allow users with screen readers to navigate easily through the content.

Web Accessibility Evaluations Tools

There are website accessibility evaluation tools you can use to determine if your web content meets accessibility guidelines and automatically help you handle many accessibility barriers.

Web Accessibility Evaluation Tools List
There is a range of web accessibility evaluation tools available to ensure that your web content meets accessibility guidelines. Source: W3C

In addition to the list provided in the above link, see this page to determine what kind of tool you need and how it can assist you: Selecting Web Accessibility Evaluation Tools.

Summary

Content accessibility is crucial for ensuring that everyone has equal access to information and opportunities online. WCAG provides a framework for making web content more accessible, and meeting these standards can benefit both individuals with disabilities and businesses.

Making your web content accessible not only makes your website more inclusive for all users and is a legal requirement in many countries, but it also helps to create a more inclusive and equal society.

This lesson provides an overview of the steps you need to take to make your web content accessible to all users.

Action Steps

Download the guides and checklists in the Resources section below and conduct a thorough audit of your web content to ensure that your website meets all web content accessibility guidelines

Resources

Visit our tools and resources section for additional courses, guides, and helpful tools and resources.

References

Next Lesson

***

Image: Man reading braille

Workflow Documentation

Learn how to document your content workflow for ease of use and quick access to everything your content team needs for content production. 

Workflow Documentation

Learn how to document your content workflow for ease of use and quick access to everything your content team needs for content production. 

Workflow DocumentationDocumenting your content workflow is not only important to ensure the efficiency of your content production process, but it is also an important aspect of your organization’s overall content documentation system.

In this lesson, we’ll cover:

  • The Importance Of Documenting Your Content Workflow
  • Workflow Management Tools
  • Additional Workflow Documentation
  • Storing Workflow Documentation
  • Accessing Workflow Documentation

***

The Importance Of Documenting Your Content Workflow

According to the Content Marketing Institute, documenting your content workflow:

  • Provides structure and visibility to content production processes
  • Increases execution efficiency to help deliver content on time
  • Helps your team to better understand how dependencies affect processes
  • Increases clarity into when and how to push work forward
  • Enables faster content approvals and less rework

Documenting workflows not only helps to define the roles, tasks, processes, and steps involved in the production of content, it also helps to organize content ideas, prioritize projects, track their execution, determine what happens to the content after its published, and record how and where all the information gets stored.

Workflow Management Tools

In the Content Workflow lesson, you were asked to identify what each role in the content production process does for any given workflow, break these down into tasks, assign each task to a role, and order these tasks in a logical and sequential order of completion.

After you have done this, where do you then record all this information so everyone in your team can access it to begin and track content production?

You can do this manually (e.g. using a spreadsheet or drawing it on a whiteboard), use workflow management software, or a combination of both. It all depends on how your business works and what works best.

As long as workflow processes are defined and written down somewhere (and don’t exist only in someone’s head), you have documentation that others can access and refer to. Later in this lesson, we’ll look at how to organize this documentation more efficiently for easy access and retrieval.

For now, let’s look at using various tools to document your workflow processes.

Spreadsheets

If you have been tasked with designing, building, and documenting a content workflow for your organization, spreadsheets are a great way to develop a prototype for your content production workflows.

Using spreadsheets can help you focus on streamlining the production stages and tasks in your workflow, identify dependencies and issues, and track your content production team’s progress.

Case Study

When I began working as a blog writer for a web development services provider, my team consisted of myself, two other blog writers, and our CEO who was also filling in for the role of Editor.

Each week, we would discuss ideas for new articles during our weekly team meeting. Each writer would then go and write the articles, and get them reviewed until these were approved and published, and we would then repeat the process the following week.

After a short while, our small team began to grow. Additional writers and illustrators were brought in, and I soon found myself having to schedule the production of new content for the blog in addition to reviewing and updating existing content.

We had guidelines for getting the work done but no clearly defined workflows for managing and tracking the people and processes involved, so I created a spreadsheet with various color-coded sections and workflow columns to schedule new projects and keep track of our content production.

Workflow Documentation - Blog Team Content Production Spreadsheet
Our team initially used a spreadsheet-based content production board to schedule and track the production of new articles for our blog.

As we began to rely more on this spreadsheet to plan and manage our team’s workload, I then fine-tuned, inserted, and rearranged some columns within the spreadsheet to improve workflow efficiency.

Workflow Documentation - Blog Team - Content Workflow Spreadsheet
Starting with a spreadsheet is a useful way to test, improve, and document your content workflow.

tip

When working with spreadsheets, we also recommend adding comments to all the column headings so your content team knows exactly what they are required to do every step of the way.

Adding comments to Excel spreadsheet
Adding comments to spreadsheet column headers is a great way to document your workflow processes.

In addition to content writing, our blog articles also require custom artwork such as featured images (hero banners). This is done by our illustrators.

WPMU DEV Blog
Creating articles for this blog involves using illustrators to create featured images and documenting this in the workflow as a sub-process. Source: WPMU DEV.

Our illustrators and designers, however, create artwork for the entire company, not just the blog team. Also, each writer in the blog team is responsible for sourcing images, creating screenshots, and requesting artwork for their articles, so the blog team mostly uses the company’s illustrators to request featured images for articles.

Given this structure, we decided to incorporate the task of requesting and tracking the delivery of featured images into the workflow as a sub-process, using a separate spreadsheet.

Workflow Documentation - Post banner requests - workflow tracking spreadsheet.
Featured images for blog articles are requested separately using a banner request spreadsheet.

All our illustrators have to do is:

  1. Check the spreadsheet for new banner requests (when a writer requests a new banner we notify our artwork team via our team messaging software)
  2. Assign the creation of the banner to one of their team members (they decide who to assign the work to internally, we just place the request)
  3. Provide a link to download the artwork when the banner is done.

Whichever writer requested the banner then uploads the featured image to their article and marks the task as completed (“done”) in the artwork team’s spreadsheet.

Workflow Documentation - Post banner requests - workflow tracking spreadsheet.
Once images are created and delivered, the task is marked off on the spreadsheet.

The writer then marks this task as done in the blog team’s main content tracking spreadsheet.

Workflow Documentation - Blog Team - Main content workflow spreadsheet.
Featured images for blog articles are also marked off in the team’s main content spreadsheet.

In addition to featured images, some of our blog articles include cartoons created by one of our team members who is a professional cartoonist.

Screenshot of an article from WPMU DEV blog with an embedded cartoon image.
Requesting cartoons for blog articles is a separate process. Source: WPMU DEV

As our illustrators are not involved in creating cartoons, this is another sub-process of the blog’s content workflow, so the team uses a different spreadsheet to submit cartoon requests and to track the completion and delivery of the artwork.

Workflow Documentation - Screenshot of a spreadsheet used to request and track delivery of cartoon artwork
Requests for cartoon artwork for blog articles are tracked on a separate spreadsheet.

The blog team also makes all published blog articles available to the SEO team to review, analyze, and look for ways to improve their performance.

As we don’t want to overload the SEO team with unnecessary and unrelated “content production” information, we treat this as another sub-process of our content workflow and track it on a separate spreadsheet after articles are published on the blog.

Workflow Documentation - Screenshot of WPMU DEV's Blog SEO Review spreadsheet.
Another spreadsheet is used to keep a log of all published blog articles for review by the company’s SEO team.

In addition to using spreadsheets, our team uses tools like Slack (our team messaging software) to add content writing task reminders for deadlines and schedules during times when team members and other company staff are away on leave, holidays, etc. (you can also use an editorial calendar.)

Screenshot of Slack thread with content writing schedules and reminders.
Use tools like Slack to communicate with team members and add content writing schedules and reminders.

A production and performance summary report is also compiled from the spreadsheets at the end of the year and posted to the team on Slack.

Screenshot: Blog team production summary report - Slack
We publish a simple blog team summary production summary report at the end of the year.

As you can see from the above, documenting the content workflow of something as simple as the production of a single content type (e.g. blog articles) can involve various processes.

If your workflow management needs outgrow spreadsheets, then consider using other software tools.

Workflow Management Software

While spreadsheets are a great way to document some workflow processes, you may want to use a workflow management software.

For instance, with the example we’re using in this lesson, spreadsheets are sufficient to document certain sub-processes like requesting images/artwork and for tracking SEO progress. Documenting the entire content production workflow, however, required using a more flexible tool.

Getting approval for blog articles, for example, often involves members from other teams (e.g. software development, hosting, support, and business development teams), and work priorities often change to align with other events taking place in the company, such as releasing new product features and new service launches (or launch delays).

So, we turned to workflow management software when spreadsheets were no longer adequate to help us manage content production.

There are many great workflow management tools available and the right tool for your organization depends on its needs and preferences. In this case, we decided to use Jira to document and manage our workflow processes, as most of our teams were already using it to manage their workflows.

A workflow management software is not just a great content production tool, it is also a powerful workflow documentation tool.

As mentioned earlier, starting with a spreadsheet is useful for developing prototype workflows. After learning the basics of how to use the software, all we had to do was to map out the content workflow processes in the tool.

Jira screen: Assignment workflow
A tool like Jira automatically documents the workflow as you configure processes on your kanban board.

Once this step was done, managing content workflow became much easier. The tool itself became one of the main components of our workflow documentation process.

Jira board screen.
The columns display the content production workflow.

Some of the benefits of using a workflow management tool to document processes include the following:

Any team member can contribute to improving workflow documentation by modifying the workflow management tool itself.

Jira board screen.
Rearrange columns on the kanban board to update workflow processes.

For example, team feedback and discussions contributed to improving the order of processes to improve production flow and efficiency. Adding, removing, or rearranging the columns on the tool’s kanban board automatically updates the workflow documentation.

Jira - Task transition menu
A workflow management tool like Jira lets you easily assign tasks to different stages of the production process.

Using agreed standards and conventions for creating projects in the tool also benefits the workflow documentation.

Screenshot of a section of a Jira board showing a task added to a workflow column.
Using agreed standards when adding tasks to the workflow tool helps the content team and is also part of the workflow documentation.

Additionally, you can improve the workflow documentation by building “templates” for new jobs into the workflow processes.

These templates can include essential elements of the project brief, such as:

  • Project description – This section provides notes and background to help whoever is assigned the job understand what is required.
  • Reference – Here, we add any links to internal conversations and discussions about the project. Writers can then get a better idea of things like context, suggestions made by other team members, things to highlight or avoid in the content, etc.
  • Keywords – Keyword research information goes here. The writer knows then which keywords to focus on when creating or updating the article.
  • Internal Links – Here we list the URLs of other blog posts related to the topic so the writer can link to these in the article where and when appropriate.
  • Competition – Here, we provide a list of competing articles on the topic or keywords that we are targeting. This helps the writer research the topic and gives them a better idea of what the article needs to cover to rank competitively with other existing articles.
Screenshot of a job in Jira with built-in workflow templates.
Add templates to your workflow management tool to improve workflow documentation.

Templates can improve workflow (and workflow documentation) significantly. When a writer is assigned a new blog article project, for example, they already have all the information they need to get started…

Screenshot of Jira job with sections of a job template filled in.
Templates can improve workflow documentation significantly.

This can also help the writer save time with other tasks, such as doing research or linking to existing topic-related articles on the blog…

Screenshot of Jira job with sections of a job template filled in.
A workflow management tool not only documents the workflow, it also saves the content used to create your projects.

Collaboration features such as team commenting are also part of the workflow documentation.

Screenshot of Jira comments section.
A workflow management tool allows team members to add comments to communicate and collaborate with other team members on projects.

A workflow management tool, in fact, documents everything associated with a project’s workflow. This includes brief notes, comments, attachments, production time, etc.

Screenshot of Jira job board.
Everything associated with the project’s workflow is recorded, documented, and archived.

Workflow documentation isn’t confined to using a great content production and workflow management tool, however.

Additional Workflow Documentation

In the content workflow lesson, we explain the importance of breaking down and defining each task in as much detail as is necessary to minimize confusion, avoid unnecessary steps, save time, and improve workflow efficiency.

This all requires additional documentation.

For example, let’s say that a new writer has to create an article about one of the company’s main products or services.

Where does the writer go to get information about the company and the products, request or download artwork, obtain access logins for certain tools or services required to complete the article, standards and guidelines for spelling and grammar, accuracy, voice and tone, or compliance with certain policies or legal requirements?

These aren’t documented in the workflow management tool. They require additional workflow documentation.

Below are some of the essential types of documentation your organization should have and be able to provide to its content team. It will help them save time planning, researching, and accessing commonly-used information (and minimize disrupting other team members from doing their work):

Company Information

  • Vision, Mission, Value statements
  • HR documents (e.g. compliance, security, codes of conduct, requesting time off, etc.)
  • Company training manuals
  • Team member details (names, description of role, contact info)
  • Logins and passwords to services pertaining to their roles

Marketing Information

Product Information

  • Landing Pages (Sales/Pricing)
  • User Manuals
  • FAQs
  • Roadmap

Style Guidelines

  • Standards and guidelines for spelling and grammar, accuracy, voice, and tone, etc.

See this excellent article if you need help putting together a Content Style Guide: Content Style Guide – A Step-By-Step Guide To Creating Your Own

Templates

  • Content Brief
  • Call-T0-Action (CTA)

Checklists

WordPress Plugin - Pre-Publish Checklist
Pre-publishing checklists can be built into your Content Management System (CMS). Image: Pre-Publish Checklist Plugin.

For a complete list of useful documentation for your content writing team, refer to the Content Documentation lesson.

For tasks that require more details than the workflow tool can provide, we recommend building an online guide for your content team with regularly updated links to internal documentation, style guidelines, useful information, tips, tutorials, login details for online services, code snippets, shortcuts, time-saving hacks, etc.

The purpose of this guide is to point your team to all the information and resources they will need to complete their projects (e.g. where to find company information, audience profiles, word-count goals, style guidelines for voice, tone, and format, etc.).

This is a great way to help your team save time with content production and onboard new team members.

Screenshot - WPMU DEV Blog Team Guide
Build an online guide for your content team with links to all the documentation they need to produce content.

You can build this helpful guide starting with just the basic information like useful links to company documentation, get your team to contribute to it (e.g. whenever someone experiences an issue and finds a way to solve it), and appoint someone to manage the guide and be responsible for keeping the content in it up-to-date and accurate.

Screenshot - WPMU DEV Blog Team Guide
Make all workflow documentation accessible to your content team from a central location.

You can build this guide online in a subfolder of your main domain (e.g. yourdomain.com/content-guide) and make it private using a content management system like WordPress or build it on a platform like Google Sites.

Storing and Accessing Workflow Documentation

Your Workflow Management software can document some of your workflow processes, but where do you store additional documentation used in your content workflow, such as style guides, content brief templates, etc.?

We address this topic in the Content Documentation lesson.

Content Workflow Documentation Checklist

  • Define the purpose of your content workflow documentation: This step involves identifying the goals and objectives of creating the documentation, such as improving team collaboration, streamlining the content creation process, and ensuring consistency in the content produced.
  • Gather information: This step involves collecting information about the current content creation process, including the roles and responsibilities of team members, the tools and software used, and any existing documentation or guidelines.
  • Identify key stakeholders: This step involves identifying the individuals or teams who will be impacted by the content workflow documentation, such as content creators, editors, and marketers.
  • Create a template: This step involves creating a template for the content workflow documentation, including sections for an introduction, roles and responsibilities, the content creation process, tools and software, and any relevant guidelines or best practices.
  • Outline the content creation process: This step involves outlining your step-by-step process for creating content, from idea generation to publication.
  • Assign roles and responsibilities: This step involves assigning roles and responsibilities to team members, including who is responsible for creating, editing, and publishing content.
  • Identify tools and software: This step involves identifying the tools and software used in the content creation process, such as content management systems, project management tools, and design software.
  • Develop guidelines and best practices: This step involves developing guidelines and best practices for the content creation process, such as style and tone guidelines, and accessibility standards.
  • Document procedures: After defining all of the above steps, it’s important to document your procedures.
  • Review and test: This step involves reviewing and testing the content workflow documentation, seeking feedback from key stakeholders, and making any necessary revisions.
  • Finalize and distribute: This step involves finalizing the content workflow documentation and distributing it to the appropriate team members, ensuring that everyone has access to the latest version.

Summary

Documenting workflow processes helps your content production team know what they are doing (or what they are supposed to do) and shows them how to do it in the most efficient and effective way possible.

This frees everyone in your team to focus more of their time and energy on creating better content.

Action Steps

If you haven’t begun to document your content workflow processes yet, then it’s important to make a beginning.

You can start simply by writing down or typing out processes and procedures in bullet point form so they are recorded and stored somewhere, and bookmarking links to frequently accessed pages of your website or other sites, shared drive folders, useful tools, resources, etc.

Documentation is an ongoing process, so get started and continually add to it. Get everyone in your team or company to contribute to growing and improving this documentation and remember to schedule periodic reviews to make sure everything is kept up-to-date.

Resources

References

Next Step

***

Image: Writing Pad

Screenshots published with permission from WPMU DEV and members of the WPMU DEV blog team.

Content Management Checklists

Checklists and templates to help you manage your content more effectively.

Content Management Checklists

This section provides checklists and templates to help you manage your content more effectively.

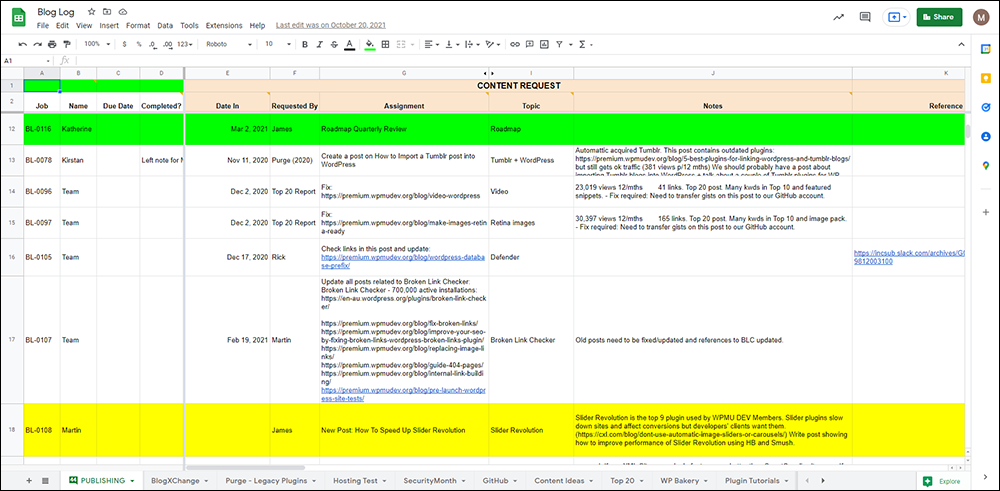
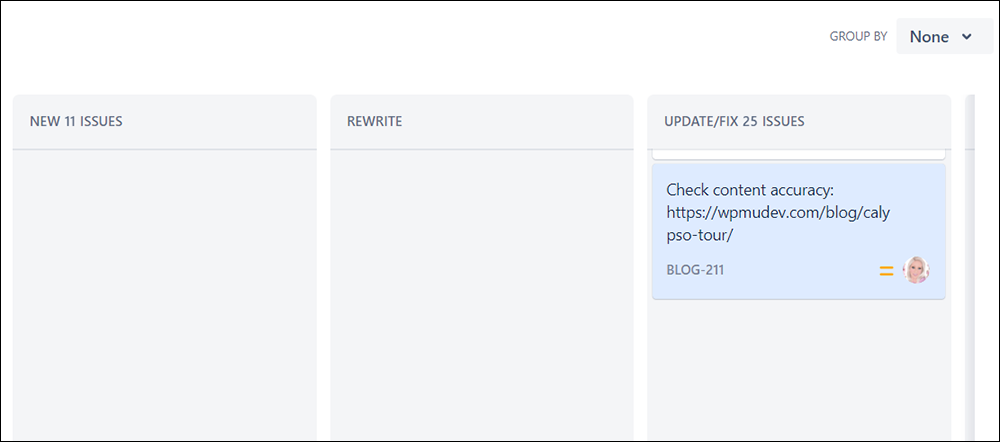
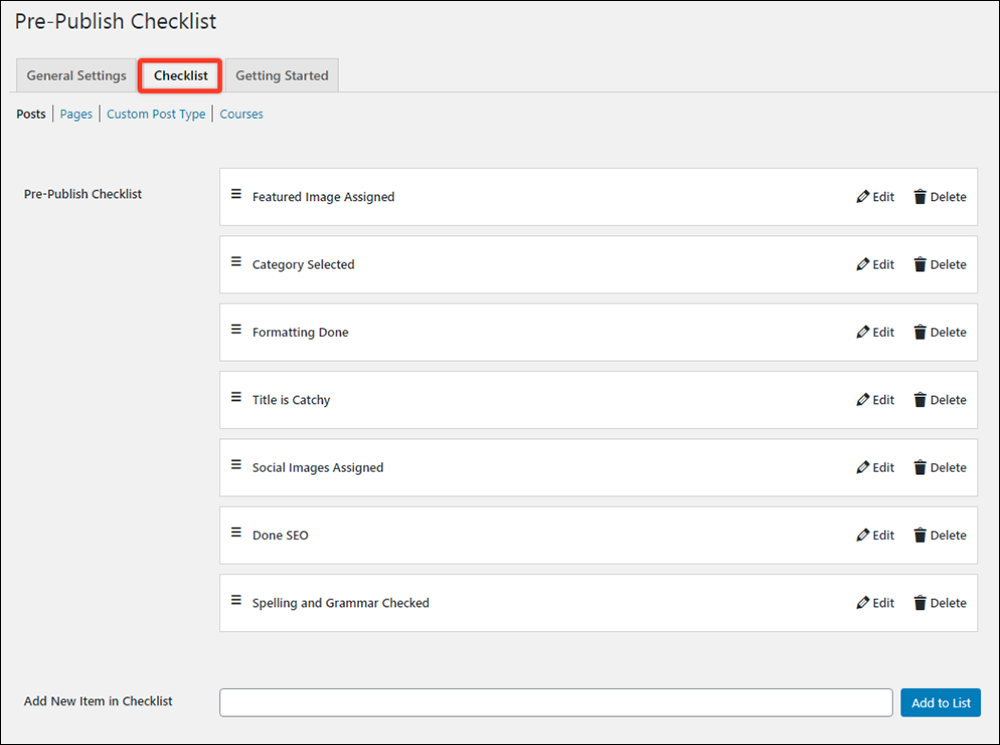
Use the checklists and templates in this section to help improve your content team’s efficiency and productivity in areas like content strategy, content planning, content production, content promotion, and content management.

Note: To receive practical content management tips and links to useful information, including downloadable checklists, and templates, sign up for our free Content Management Course Lessons, delivered directly to your inbox.

Checklists & Templates

Checklists and templates play a pivotal role in content management for several reasons:

  • Consistency and Standardization: Checklists and templates ensure a consistent approach to content creation, editing, and publication, fostering standardization across various tasks and team members.
  • Efficiency and Time-Saving: They streamline workflows, providing a structured framework that helps content managers and teams efficiently navigate through tasks. This leads to significant time savings.
  • Communication and Collaboration: Checklists serve as clear communication plans, outlining job responsibilities and facilitating collaboration within the content management process.
  • Error Reduction: Templates act as guides, reducing the likelihood of errors in content creation and publication. They ensure that essential steps and details are not overlooked.
  • Productivity Boost: By providing a structured roadmap, checklists and templates contribute to enhanced productivity, allowing content managers to conquer goals and meet deadlines more effectively.

Below you will find checklists with links to the Content Documentation section and other lessons in this training course containing downloadable templates and resources and additional information.

tip

Refer to our content management glossary if you need help understanding some of the terms or concepts described in this section.

Your Business

Complete the steps below to ensure that your business has set up the right foundation to develop an effective system for managing its content:

Content Strategy

Complete the steps below to develop an effective Content Strategy that will help your business achieve its goals and objectives:

Content Planning

Complete the steps below to develop an effective Content Plan aligned with your Content Strategy:

Content Production

Complete the steps below to create content for your business:

Content Promotion

Complete the steps below to ensure that your Content Promotion activities are aligned with your Marketing Strategy:

Content Management Checklists

Complete the steps below to ensure that you are managing your content effectively:

WordPress Checklists

If your site runs on WordPress, there are a number of WordPress checklists and templates you can use to save time, including:

Resources

Visit our tools and resources section for additional courses, guides, and helpful tools and resources for managing content effectively.

***

Image: Checklist

Content Documentation

This section looks at practical ways to build a content documentation system for managing content effectively in your business.

Content Documentation

This section looks at practical ways to build a content documentation system for managing content effectively in your business.

Content Documentation - Woman typing on laptop with notes.Documenting systems and processes in areas of your business like content planning, content production, content promotion, and even content management itself allows you not only to better manage these areas but also to improve your results.

In this lesson, we look at the documentation we recommend you develop and store for effectively managing content in your business.

tip

Refer to our content management glossary if you need help understanding some of the terms or concepts described in this section.

***

The Importance Of Documentation

Imagine that your business is run by a team of highly competent, experienced, and knowledgeable people and that there is no need to document anything in your business because everyone is an expert in their area and knows exactly what to do in every situation.

One day, a group of very wealthy investors comes along and expresses an interest in buying your business. They love your products and are very impressed with how things are run.

After introducing them to your wonderful team, they express curiosity about how your business is able to maintain such great standards of quality and consistency and ask about your systems and processes.

You start telling them about the wonderful people in your team and how they know everything.

Your investors then quickly lose interest and withdraw their offer to buy your business.

Why?

Because without documentation, all of the systems and processes of your business exist only inside people’s heads and only for as long as they are physically present and working in your business.

Human skull illustration with a superimposed flowchart diagram.
If this is where all of your business systems and processes live, then yours is a very high-risk business! Source: The Small Business Digital Manager

If someone leaves your business, they take your business systems and processes with them.

Documented systems and processes:

  • Allow your business to improve quality and consistency across all areas.
  • Help to provide better and faster hiring and training across your organization.
  • Lead to higher individual/team productivity and efficiency, and better performance and results.
  • Save time and speed up business growth.
  • Increase the value of your business.

More importantly, having documented systems and processes allows you to work on your business and improve its results by improving its systems and processes.

Content Documentation - Image of 3-ring binders inside a laptop.
Documentation helps you manage your content more effectively.

The section below includes a list of the documentation we recommend your business develop, keep regularly updated, and make accessible to your content team. It will help to improve the quality, consistency, accuracy, and management of all content and content processes in your organization.

Internal Documentation

“Internal documentation is the record of all your company’s internal knowledge, ranging from processes and procedures, best practices, IT and software specs, and much more. Internal documentation is intended for reference by employees to get their work done and standardize performance across the organization.”

Source: Document360

There’s a whole range of internal content your business should create, document, and maintain.

Different types of internal documentation include:

  • Process Documentation –  How-to guides and manuals, best practices, Standard Operating Procedures (SOPs), checklists, etc.
  • Project Documentation – Proposals, plans, strategic documentation, meeting minutes, risk analysis, issue logs, etc.
  • Technical Documentation – Software and IT infrastructure, product specifications and requirements, development processes, etc.
  • HR Documentation – Company policies, onboarding and training materials, employee handbooks, etc.

For more information, see this article: Internal Documentation: How To Create, Tips & Examples

Business Documentation

In addition to having internal documentation such as company policies and documenting procedures and processes describing how work should be done in the business, keeping documentation for the areas below will help your team create accurate content about the company aligned with its business objectives:

Internal Content

  • Business Vision, Mission, Core Values
  • Company History
  • Business Strategy/ Business Plan
  • SWOT Analysis
  • Team Organization Chart
  • Employee/Team Member Profiles And Descriptions (for blog author pages)
  • Support Request Guidelines (to help the Customer Support team)

For more information on additional content you can document about your business, see the Business Basics section.

Web Pages

Check that your site has the following pages (note: some pages are optional) and review their content:

Basic Pages
  • Home Page
  • About Us/Meet The Team
  • Contact Page
  • FAQs
  • Landing Pages (Products and Services)
  • Blog Section
  • Portfolio/Our Work
  • Careers/We’re Hiring
  • Roadmap
Legal Pages
  • Privacy Statement
  • Terms And Conditions
  • Website Disclaimers
  • General Data Protection Regulation (GDPR) Compliance
  • Affiliate Agreement
  • Anti-Spam Policy
  • Compensation Disclosure
  • External Linking Policy
  • Health Disclaimers
  • Refund Policy
  • Media Terms Of Use

Web Content Accessibility

The Web Content Accessibility Guidelines (WCAG) provide technical specifications to improve the accessibility of web content, websites, and web applications across all devices for people with a wide range of disabilities.

Essential Accessibility is an all-in-one accessibility platform that provides accessibility tools, expertise, training, and support, including compliance guides and a downloadable interactive WCAG checklist.

Essential Accessibility WCAG 2.1A and AAA checklists
Use Essential Accessibility’s WCAG 2.1A and AAA interactive checklists to ensure your site and content are compliant with accessibility guidelines.

Access the checklist here: WCAG 2.1 Checklist

Content Planning Documentation

Documenting the content below will help to speed up the process of content creation and ensure content is aligned with business outcomes and expectations:

Content Production Documentation

Documenting the content below will help to speed up the process of content production, improve timely delivery to production deadlines, and help to ensure the quality and consistency of all created content:

Additionally, you can help to improve your team’s efficiency and productivity with documentation covering processes like:

This documentation can include training, guides, guidelines, and tips on:

  • Organizing email inboxes and folders
  • Using applications and sharing content on work tools (e.g. Slack, Zoom, etc.)
  • Uploading files to your website, web server, and cloud storage services.

Most professional tools provide their own documentation and tutorials, so there’s no need to reinvent the wheel. Just create a simple guide with key processes team members should follow, add links to the tool’s documentation, tutorials, and help sections, and include additional resources from the web (e.g. links to helpful articles or videos).

For example, you can use links to resources like the examples shown below to quickly create a simple yet useful guide for team members on how to organize their Gmail inboxes to help them save time and increase their productivity, then provide this guide as part of their orientation and training process:

Content Promotion Documentation

Documenting the content below will help to improve results in areas like lead generation and sales conversions:

  • Marketing Strategy/ Marketing Plan
  • Content Marketing Documentation
  • Content Guidelines:
      • Branding (e.g. see “Positioning Statements” section below)
      • Reciprocal Linking (See Content Distribution)
  • User Documentation
    • Lead Generation (e.g. Guides, PDF reports, etc.)
    • User Education & Training (help users get the most out of your products and services)
    • Distribution Materials (e.g. for wholesalers, retailers, vendors, partners, affiliates, etc.)
  • Marketing Training (Manuals and guides)
  • Creating Marketing Reports

Brand Positioning

Positioning statements help to ensure that your marketing efforts are aligned with your brand.

  • Unique Selling Proposition (USP) – Describes to your target market how you’re different and why they should buy from you.
  • Unique Selling Point– Describes how your company stands out from the competition.
  • Value Proposition – Describes what you are offering to customers for what they are paying and answers the question: Why should customers care that you’re different?

For examples of positioning statements and a free template, go here: Examples Of Positioning Statements (Free Template)

Content Management Documentation

Documenting the areas below will help to improve your content management processes:

Website Documentation

Keeping the information on your website accurate and up-to-date is a form of documentation.

This includes:

  • Company Pages (e.g. About Us)
  • Products & Services Pages
  • FAQs
  • Blog
  • Legal Pages

Legal Pages

Your website needs various legal pages to comply with regulatory requirements (e.g. federal and state laws), and 3rd-party providers (e.g. Google). Legal pages can also protect your business from legal issues, legal threats “takedown” notices, etc.

Legal pages include:

Additionally, depending on the nature of your business, you may also want to consider including some or all of the following pages:

  • Affiliate Agreement (if you sell products or services through an affiliate program.)
  • Anti-Spam Policy
  • Compensation Disclosure
  • External Linking Policy
  • Health Disclaimers (e.g. if your website provides general health or medical content.)
  • Refund Policy (if you run an e-commerce site.)
  • Media Terms Of Use (e.g. if you allow users to download videos or audio files on your site.)
Disclosure Pages – Types

Adding correct disclosure information to your site is essential. For example:

  • No Material Connection – Make your visitors aware that you will not receive compensation for writing the content.
  • Affiliate Links – Make your readers aware that you may be compensated financially if they buy through your affiliate link.
  • Review/Sample Copy – Disclose to your visitors if you have been given a review or sample copy of the product or service you’re reviewing by the author or developer.
  • Sponsored Post – Make your visitors aware that you were compensated in some way to write the post.
  • Third-Party Advertising – Let users know if you’re using online behavioral tracking technology. This is required to comply with the “enhanced notice” the Better Business Bureau has been requiring website publishers to show prominently on their sites since January 1, 2014.

Remember to regularly review and update the information on all of the pages listed above.

Documentation Management Systems

Other types of systems that allow you to manage documentation and your content include:

  • Document Management Systems – A software program designed to help organizations manage, store, and track their electronic and physical documents.
  • Digital Asset Register – Keep a record of all your documentation and digital assets with descriptions, versioning, location, access URLs, software licenses, subscription services, logins, passwords, etc.
  • CMS – Building your online presence using a platform like WordPress functions both as a content management system, and a content documentation system as described in the “Website Documentation” section above. Also, see these different types of Content Management Systems:
    • WCMS – Web Content Management System
    • ECMS – Enterprise Content Management System
    • CCMS – Component Content Management System
    • DAMS – Digital Asset Management System
  • Document Library – A document library is a collection of files, documents, or records that are systematically organized and stored in a digital format.
  • Content Tracking – Create documents and guides to help your team track content production and content performance across your organization, understand and interpret results, and create reports.
  • Documentation Storage – Create documents and guides to help your team access and use various digital storage tools (see below).
  • Content Guidelines For:

Document Storage

Effective content management requires effective ways to collaborate, store, organize, and retrieve documents and content.

Storing documents and content, however, presents its own challenges, as this involves not only working out an efficient way to store, access, and archive digital assets, but also making sure that assets can be worked on collaboratively and be shared, reused, and repurposed across multiple channels.

Some options for storing your documentation and your content include storing your documentation using digital asset management (DAM) software…

Screenshot of Canto - Digital Asset Management Software
You can use Digital Asset Management (DAM) Software…Source: Canto

On a knowledge base platform…

Document 360 - Knowledge Base Platform
Store public or private documentation and content for customers and employees on an online self-service knowledge base. Source: Document360

On a cloud storage solution (e.g. Amazon S3, Dropbox, etc.)…

Screenshot of Amazon AWS buckets
Store your documentation on the cloud using a solution like Amazon’s AWS…

In folders on a shared drive (e.g. Google Drive)…

Screenshot of artwork stored on a Google Drive folder.
Store your documentation inside folders on a shared drive.

In the WordPress Media Library (if you use WordPress as a CMS)…

WordPress Media Library

Or in additional places like cloud-based email, work productivity tools (e.g. Slack channels), and other tools.

Whether your organization chooses to use a digital asset management (DAM) system, online knowledge base software, or set up folders on a shared drive or cloud storage solution will depend on your organization’s digital asset management strategy.

  • Create an organized system of folders to add all the documentation your team members will need to complete their projects and make these sharable and accessible to your team.
  • Use easily identifiable folder naming conventions when storing documentation to ensure that the process remains standardized.
  • Make sure to reference where the folders containing your documentation are located. You can do this using your web browser’s Bookmarks tool and in internal documentation (e.g. create an online guide for your content team for easy access and retrieval of documents).

Document Access

You’ve documented everything in your business and worked out where to store it all…great!

Now, you need to work out how to make all of this documentation easily accessible and retrievable for your team. Otherwise, this will defeat the purpose of creating an efficient system to manage all of your documents and content effectively.

Content Documentation Chart - Documentation, Storage, and Access orbiting around Content Management
Effective content management requires effective documentation, storage, and access systems.

In addition to the storage methods mentioned earlier (e.g. DAM and Knowledge Bases), there are many places to access your documentation, including:

For example, your web browser’s Bookmarking tool is a great way to organize and access links to documentation and useful tools and resources for your content team.

Bookmark Organization
Your web browser’s Bookmarking tool is a great way to organize and access links to documentation, tools, and useful resources.

You can even export and share your bookmarks so everyone in your team can access the documents, tools, and resources they need quickly and easily.

Google Chrome Browser Bookmarks
Use your web browser’s Bookmarking tool to create an organized way for team members to quickly and easily access all the documentation they need to create, promote, and manage content.

Summary

All too often, business knowledge, systems, and processes are stored in the heads of employees and scattered across all the various tools used in the business. There is little documentation and no single source of truth for it.

This leads to valuable time and effort wasted searching for information across all areas of the business, including information required to assist in speeding up areas like content planning, content production, and content promotion.

An effective content documentation system that allows your content team to quickly and easily access all stored documents is essential to effective content management.

Documentation is a massive undertaking, but once started and implemented, it leads to improved results in all areas of the business.

Action Steps

  1. Review this lesson and identify all the different areas of your business that need documentation.
  2. Create a list of all the documented systems and processes each of these business areas needs to operate efficiently and effectively, especially in areas related to content planning, content production, and content promotion.
  3. Develop a plan for organizing, storing, accessing, distributing, and implementing all business documentation.
  4. Begin documenting all systems and processes listed above. This can be as simple as creating bullet-point guides, procedures, and checklists.
  5. Train your team members to use and follow the documentation.
  6. Continually review and improve your documentation.

Resources

  • How To Use Amazon S3 – Video course on using Amazon AWS to store files (e.g. media, documentation, etc.)
  • Content Troubleshooting Guide – Use this guide to help you troubleshoot issues with your content and improve your content management.

References

***

Image: Woman Typing, 3-ring Binders in Laptop