Content Linking Management
In this lesson, we look at the challenges of linking to content online and effective content-linking management practices.
 Links help users navigate your content and are an essential part of search engine optimization.
The ability to link content to different pages or sections of your website and other websites is what makes the World Wide Web the World Wide Web.
Without the ability to link content, all you would end up with is something like…well..we’ll let the video below explain it:
While many marketing sites provide excellent information on effective ways to build a content-linking strategy to boost your site’s traffic and SEO, the focus of this lesson is on how to effectively manage your content links.
In this lesson, we look at content linking, the challenges of linking to content online, and how to manage links effectively on your website and other digital assets.
Content Linking Basics
While most of us are familiar with content links (called hyperlinks), it will help to understand the challenges of managing links in your content if we start with a basic overview of what links are made of and the different types of content links used on the web.
What Is A Content Link Made Of?
Take a look at the illustration below. It shows how a content link is created, with each part of the hyperlink broken down and labeled.
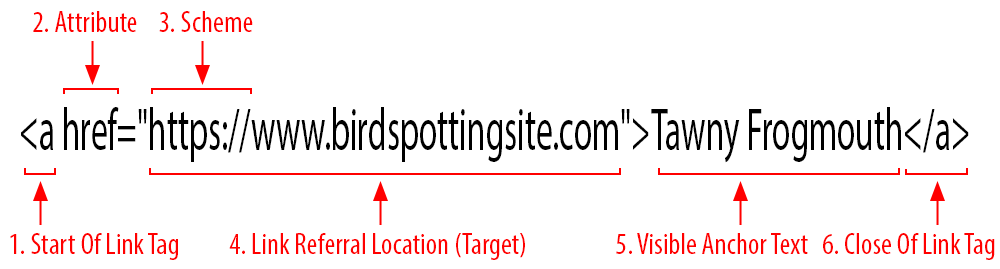
Let’s look at the parts of the hyperlink shown above:
- Start of link tag: This bit of HTML code is called an anchor tag (hence why it starts with an “a”). The opening tag informs web browsers and search engines that a link pointing to some destination is going to follow. An entire anchor tag includes the opening tag, any tag attributes, the link referral, the anchor text or object, and a closing tag.
- Attribute: The href (Hypertext Reference) is an essential attribute of the anchor tag (i.e. the
<a>element). It determines the link’s destination and indicates the relationship between pages to search engines. - Scheme: This part indicates the protocol (a set method for exchanging or transferring data around a computer network) that the web browser must use to request the resource. For websites, the protocol is typically either
HTTPS(secured version) orHTTP(unsecured version) - Link Referral Location: This is the target link or the URL (Uniform Resource Locator) destination to which the link is pointing. Note: The destination doesn’t always have to be another web page. It could be the address of an image or a file to download. It could also be something other than a URL, such as a specific section of a page or URL (called a jump link – see further below) beginning with a
#sign. - Anchor Text: This is the visible text and clickable part of the link.
- Close of link tag: This bit of HTML code indicates the end of the link tag to search engines.
As you can see, quite a lot goes into a hyperlink. The example above shows the construction of a very simple hyperlink.
There are more elements that can go into creating URLs, usually consisting of adding different attribute tags to links, such as attributes to indicate formatting (e.g. style="color: #0000ff"), instructions for where to open the links (e.g. target="_blank"), instructions for search engines (e.g. rel="nofollow"), and more.
Additionally, URLs for content like blog posts can have various levels of organizational structure between the domain name and the article title (also called the post slug), including subfolders, post IDs, post date, categories, subcategories, etc.

For this lesson, we won’t concern ourselves with all the technical aspects of hyperlinks (see the “Resources” and “Reference” sections at the end of this lesson for more information on where to go to learn this), but with the areas dealing with managing hyperlinks in your content.
Types Of Content Links
Let’s look now at some of the different types of links commonly used in web content.
First off, content links typically fall into one of two main types:
- External Links
- Internal Links
External Content Links
Links are considered to be external if hyperlinks point from a source domain to a target domain (i.e. a domain other than itself).
In other words:
- If another website links to yours, this is considered an external link to your site.
- Similarly, if you link out from your site to another website, this is also considered to be an external link.
External linking is an important part of a website’s search engine optimization (SEO) strategy (also called off-site SEO).
The PROs of external linking include:
- Links pointing from external websites to yours can help to boost your authority, improve your search rankings, and increase traffic to your site.
The CONs of external linking include:
- You have no control over who links to your website, what they are linking to, and where they are linking from.
While we provide some useful link management methods and tips in this lesson, external linking strategies are beyond the scope of this tutorial.
If you are interested in learning more about SEO linking strategies (including external linking strategies) see the “Resources” and “References” sections at the end of this lesson.
Internal Content Links
Internal links are links pointing to other URLs on your website.
In other words, when you link to your own pages on your website, those are internal links.
Although all internal links perform the same essential function, which is to help users better navigate your content and help search engines to better understand and index your content, there are different kinds of internal links you can use on your site.
For example:
- Permalinks
- Anchor Text Links
- Jump Links
- Image Links
- Category Links
- Tag Links
- Archive Page Links
- Menu Links
- RSS Feed Links
- “Read More” Links
- Pagination Links
- etc.
![]()
To learn more about using the different kinds of internal linking methods listed above, see these excellent step-by-step tutorials:
- How To Use Anchor Text Links To Improve Content SEO
- How To Use The WordPress Content Linking Tool
- How To Create Jump Links
Now that we have briefly covered the structure and types of links commonly used in web content, let’s look at some of the problems you can experience with links and how to fix these.
Content Link Management
Some common problems you may experience using links in your content which can lead to error pages (e.g. page not found errors), wrong destinations, poor user experience, etc. include the following:
Incorrect Links
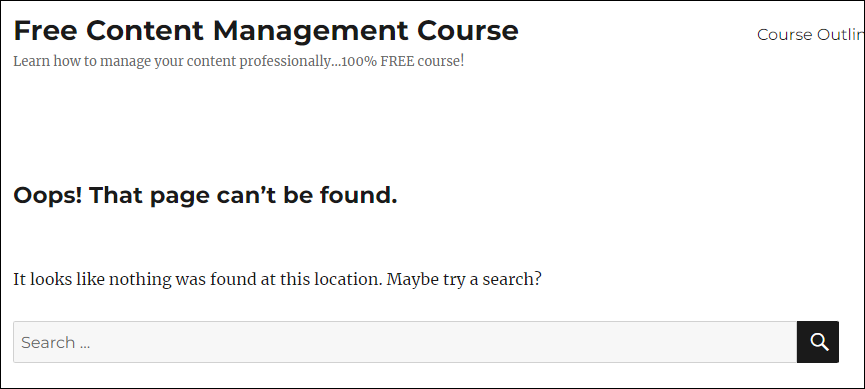
This includes incorrectly formatted links, misspelled links, links with additional or missing characters, etc., and can lead to a ‘page not found’ error message.
It’s easy to add an incorrect link to content, especially when typing out URLs.
e.g.
- https:/domain.com/article-name-goes-here (missing slash)
- https://domian.com/article-name-goes-here (misspelled domain name)
- https://domain.com/articel-name-goes-here (misspelled post address)
- https://domain.com.com/article-name-goes-herehttp (additional text or invalid character string added to URL)
Solution:
Check to make sure that the URL has been typed correctly, spelled correctly, copied and pasted correctly, etc.
Content Not Found At Destination URL
This can affect URLs, jump links, links to images or file downloads, etc. and typically happen when content sections or pages are moved to a different section of your website without thought of the consequences (i.e. what about all the links pointing to the content that has been moved?).
Pointing links to content that cannot be found at their intended destination can result in error pages, poor user experience, or both.
Solution:
- Keep track of changes to page URLs in your documentation.
- Use the broken link and/or redirection tools (see below).
- Use a search and replace tool to change URLs used in multiple locations of your site (see below).
- Use a link management tool to manage links used in multiple locations of your site (see below).
Pages With Renamed URLs
If you rename the URL of a blog post (e.g. by changing the post slug), links pointing to the old URL from other pages (especially external links) or websites can lead to error not found pages.
Solution:
- In WordPress sites, a feature called permalinks creates an internal redirection if you change the post slug. External links pointing to the old URL can still lead to errors, however, so additional steps may be required.
- Keep track of changes to page URLs in your documentation.
- Use the broken link and/or redirection tools (see below).
- Use a search and replace tool to change URLs used in multiple locations of your site (see below).
- Use a link management tool to manage links used in multiple locations of your site (see below).
Links To Private Content
Linking to content in private areas of your website (e.g. password-protected pages, membership areas like members-only forums or download sections, restricted areas in server directories, etc.) can lead to “permission denied” errors and error messages.
Solution:
- Check when copying and pasting links into your content.
- Don’t publish links to private content on public-facing pages or areas of your website.
Self-Referring Links
Circular reference links occur when links point back to the same source the content originates from.
If you are linking from content on a page back to itself, users will most likely just see the page load again.
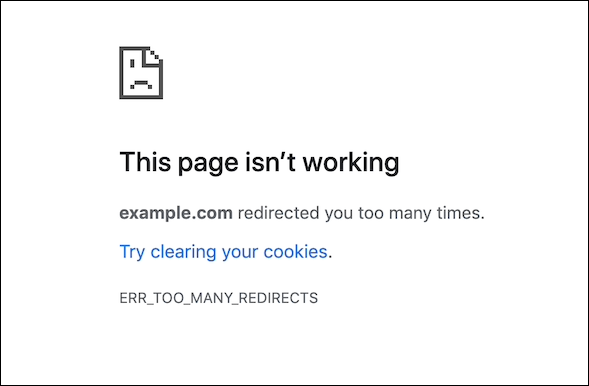
However, if you redirect a page URL to itself, the page may go into an endless loop of redirects, resulting in an ERR_TOO_MANY_REDIRECTS error message displaying in your web browser, like the example below.
Solution:
- Use the redirection tool (see below) and check that you are not copying and pasting the same URL into the ‘from’ and ‘to’ fields.
Pages, URLs, Or Sites That No Longer Exist
External links pointing to pages, URLs, or sites that no longer exist will lead to a ‘page not found’ error.
Solution:
- Use the broken link-checking tool to fix or remove broken links (see below).
- Use a search and replace tool to change URLs used in multiple locations of your site (see below).
- Use a link management tool to manage links used in multiple locations of your site (see below).
Jump Links Not Working
If jump links are not working properly, either nothing will happen when a user clicks on a jump link or they will end up going to a different content section, which can be confusing and frustrating to users.
Solution:
- Make sure that you have set up your jump link’s anchor and target links correctly (i.e. both the source and destination terms match, and the right link attributes and a
#oridhave been used in the anchor and target locations). - If using WordPress, you can use a plugin like Easy Table of Contents to automatically create and add jump links to your content sections. (This is the plugin used on this site – see the top of this lesson for a live example).
- For a step-by-step tutorial on using Jump Links in WordPress, go here: How To Create Jump Links
Wrong URL Protocol
Most sites nowadays use the https:// protocol, which is more secure than sites using http://.
Normally, this is not an issue, as sites whose URLs begin with https:// will automatically convert URLs to the right protocol and deliver users to the right pages.
However, if the destination URL points to a site that begins with http:// (i.e. a site that is not secure), visitors may get a warning message like the one shown below:
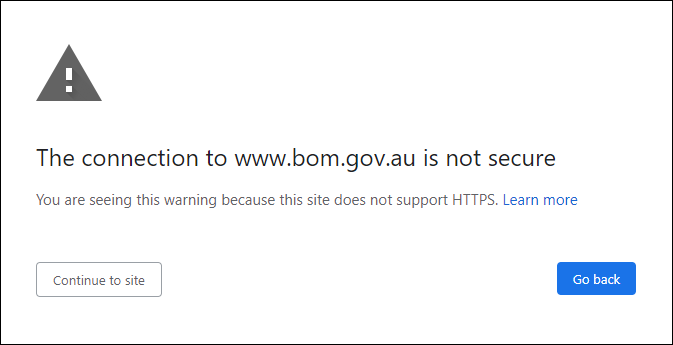
Seeing a message like the one above can discourage visitors from visiting the website.
Solution:
- Make sure your site uses the HTTPS protocol. Many reliable and secure web hosting platforms offer free Secure Socket Layer (SSL) certificates, which allow you to run secure sites with the HTTPS protocol. For more information, go here: HTTP vs HTTPS: What You Need to Know
- Make sure that your links match the destination URL’s protocol (i.e. don’t point
https://URL links tohttp://sites and vice-versa).
Non-Clickable Links
Formatting regular content to look like clickable links can lead to a poor user experience.
For example:
This looks like a clickable link … but it’s not! (Go ahead..try to click on it!)
In the above example, the text has been styled and formatted to look like a clickable link, when in fact, it’s just plain text with underlined formatting and text colors that match the colors of a clickable link.
Solution:
- Avoid styling and formatting your text to look like clickable links. This will only frustrate your website users.
Linking To Unpublished Content
Developing a content linking strategy for web pages that are still being written or are unpublished presents several unique challenges.
These include:
- Identifying Link Opportunities: Without fully written content, it can be difficult to identify appropriate internal linking opportunities. This requires a predictive approach, planning content and links based on anticipated content and themes.
- Content Silos and Structure: Unpublished content means the website’s structure may still be evolving. Without a clear structure, it’s challenging to strategically place links that enhance navigation and boost SEO through a structured and cohesive hierarchy.
- Link Relevance: Ensuring relevance between linking pages is crucial for SEO and user experience. When content is not yet complete, predicting the relevance and context of links between future content involves assumptions that may not hold true once the content is fully developed.
- Balance of Links: Determining the number and balance of links in content that is yet to be written is problematic. Too many links might disrupt readability and user experience, whereas too few could underutilize SEO potential.
- SEO Integration: Integrating effective SEO practices in the linking strategy without complete content involves guessing keywords and related semantic topics, which might lead to revisiting and revising once the content is published.
- Future-Proofing Links: Ensuring that the planned links will remain relevant and functional as more content is added or updated on the site requires ongoing adjustments and foresight into the future content development plans.
These challenges need a flexible, dynamic approach to internal linking strategies, with ongoing revisions and updates as new content is developed and published.
As you can see, coming up with a linking strategy for multiple web pages that are still being written and need to be interlinked can be tricky. For a practical solution to this challenge, see this lesson: Linking Content On Multiple Web Pages
How To Check And Fix Broken Links
Regularly checking your content for broken links and fixing these promptly is an important part of good link management, as broken links can affect your site’s SEO and lead to poor user experience.
If your site runs on WordPress, one of the WordPress CMS plugins we recommend installing on your site is Broken Link Checker.
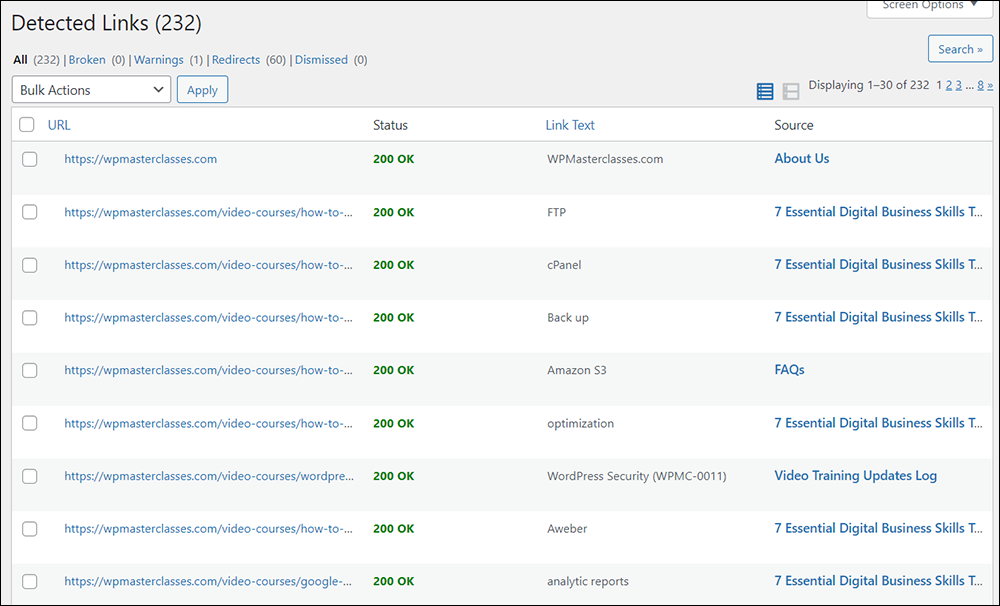
This plugin continually checks your site’s internal and external links to help you find and fix broken links.
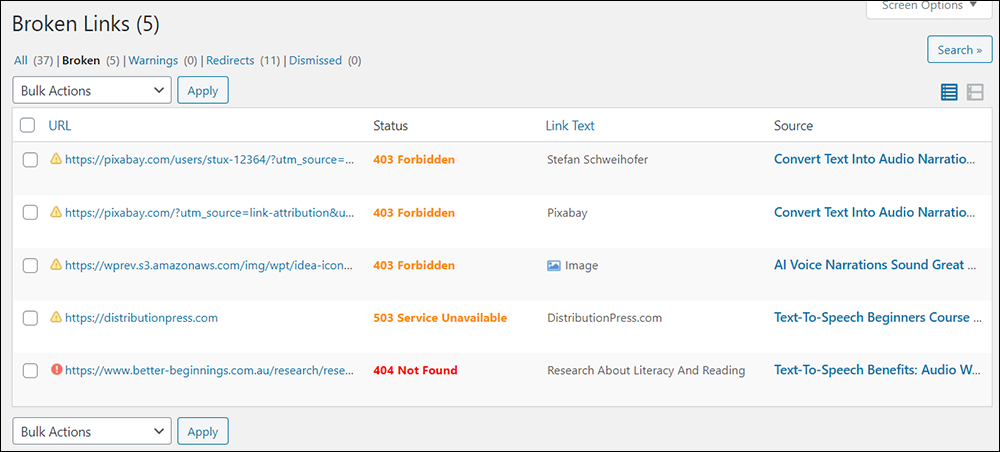
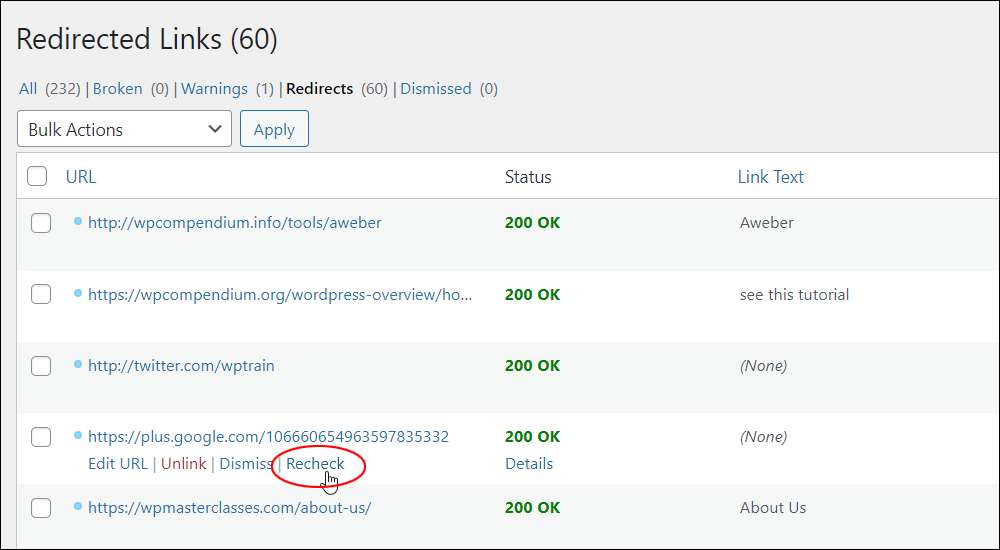
When broken links are detected, the plugin sends you a report. You can then go into the plugin’s screen and perform various options, such as editing the link’s URL, unlinking it from your content, marking it as “not broken”, dismissing, or rechecking the link.

The plugin also lists any problems that it suspects may be temporary or false positives.

You can also view all links you have redirected or dismissed.
The plugin also lets you recheck and visit any links that you are not sure about.
For a complete step-by-step tutorial on using this plugin, go here: How To Detect And Fix Broken Links In WordPress
To download the plugin, go here: Broken Link Checker
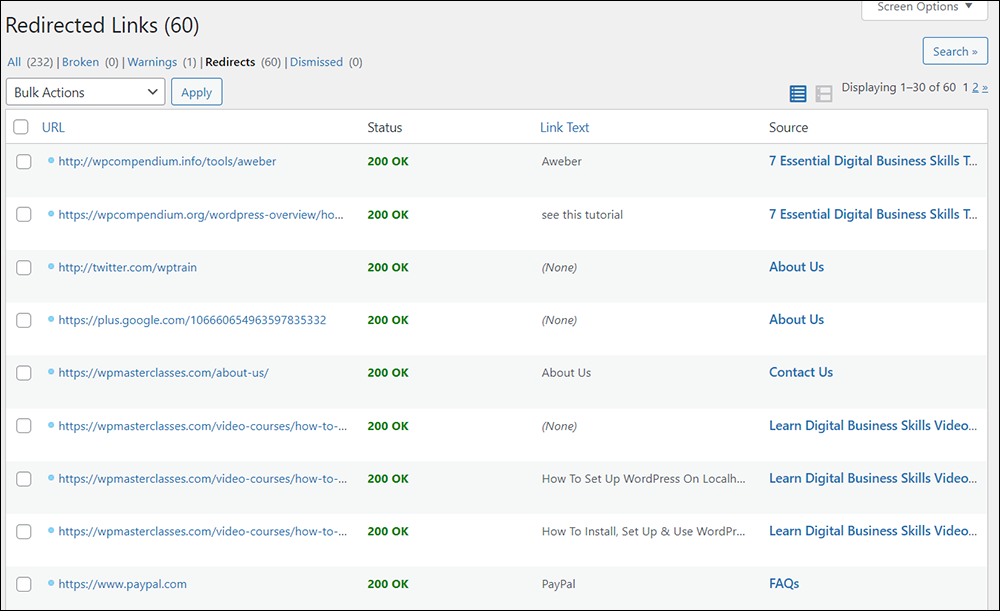
Link Redirections
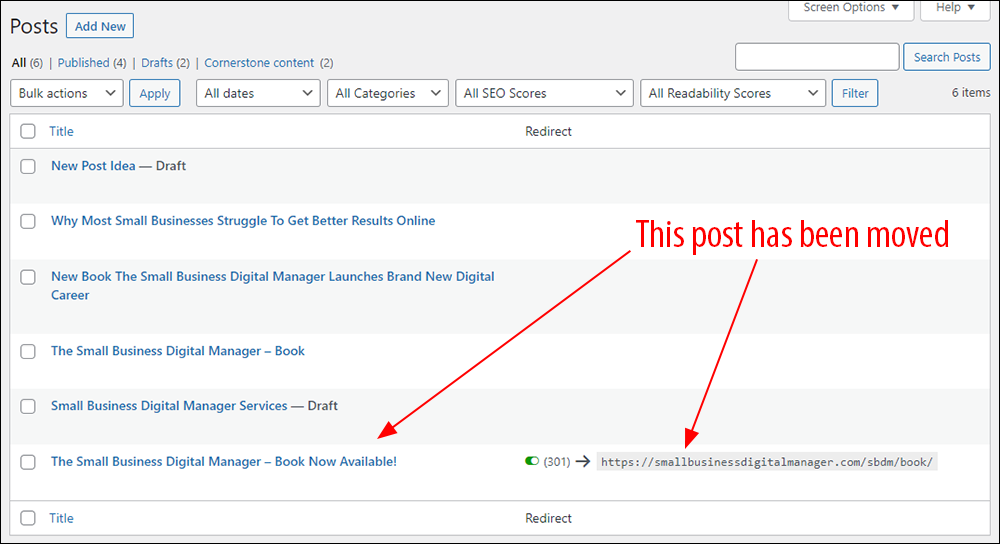
Broken links can happen when you move content from one page to another or change the page URL.
For example, let’s say you have a web page on your site called https://www.dreamcar.com/sports and you then rename your page URL to https://www.dreamcar.com/ferrari.
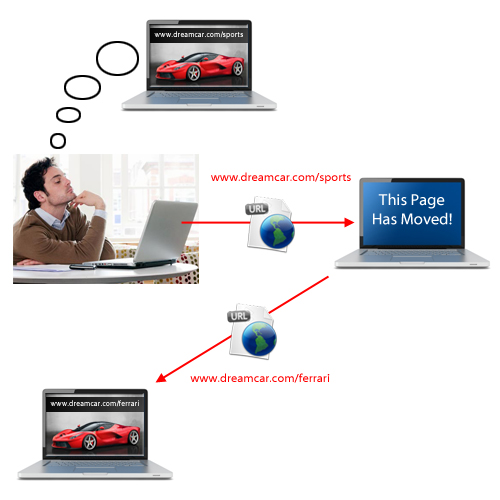
If other websites are linking to https://www.dreamcar.com/sports and a visitor clicks on this link, they will most likely end up seeing an error page, unless you redirect visitors from the old URL to the new URL.
You can add a “this page has moved” message on the old page and add a link pointing to the location where the content now resides, or…
You can set up a link redirection that will automatically send anyone clicking on a link pointing to the old page to the new page.
Redirections are not only useful for ensuring that site visitors reach their intended content, but they can also inform search engines to update their database records with your new content location.
Another use for redirecting URLs is if your site has pages or links pointing to http:// addresses that need to point to https://.
If you use WordPress, we recommend using a plugin like Redirection or any other plugin that will add link redirection codes to your site’s .htaccess file.
Replacing Broken Or Missing Links
If your content links to an external page that is no longer available (i.e. it leads to an error page when you click on the link), then your choices are:
- Leave the link in the article leading to an error page (not recommended)
- Replace the link with a link to another site containing similar information (e.g. the same news item reported elsewhere or someone else’s review of the same product)
- Remove the link altogether.
- Redirect the link (see the section below)
![]()
Another option you can use to leave a link pointing to content that is no longer available (for reference purposes ) when there is no other URL you can point your link to, is to replace the link from the broken or missing page with an existing archived version of the page stored on Wayback Machine.
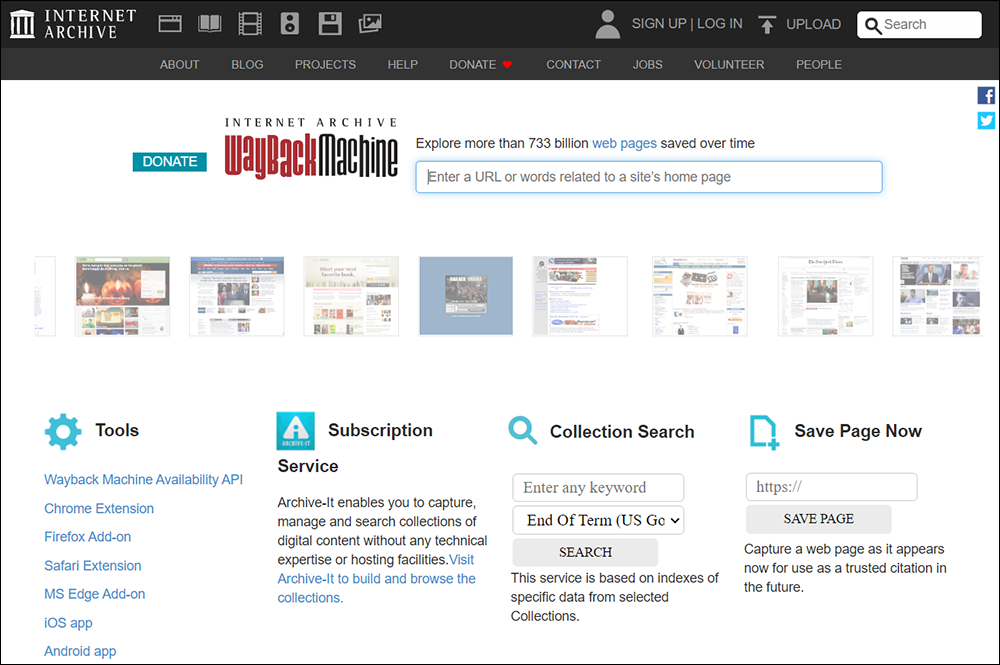
Wayback Machine is a massive historical database of previously indexed web pages. It stores hundreds of billions of archived “snapshots” of web pages (note: these pages may or may no longer exist).
For example, during a recent content review, we found this link in an article leading to an error page:
https://unamo.com/blog/mobile-first-indexing
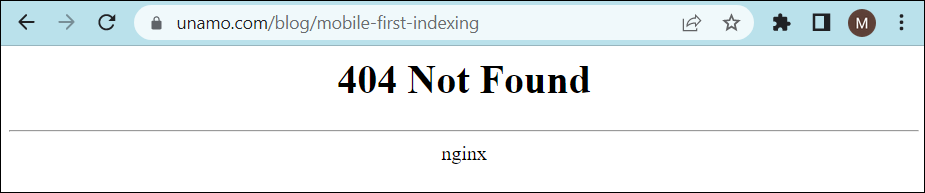
The site itself seemed fine but a link to their blog section lead to the error shown above.
While this could simply be a temporary issue that would be rectified in time by the site owners, external links are out of our control, so we decided to replace the link with the archived version of the page stored on Wayback Machine’s servers.
Here is how to do this:
First, visit Wayback Machine and enter the URL of the page you are looking for. This will bring up a calendar listing all previous instances that the page was crawled and indexed by the Internet Archive.
Hover over one of the highlighted dates and click on a saved snapshot.
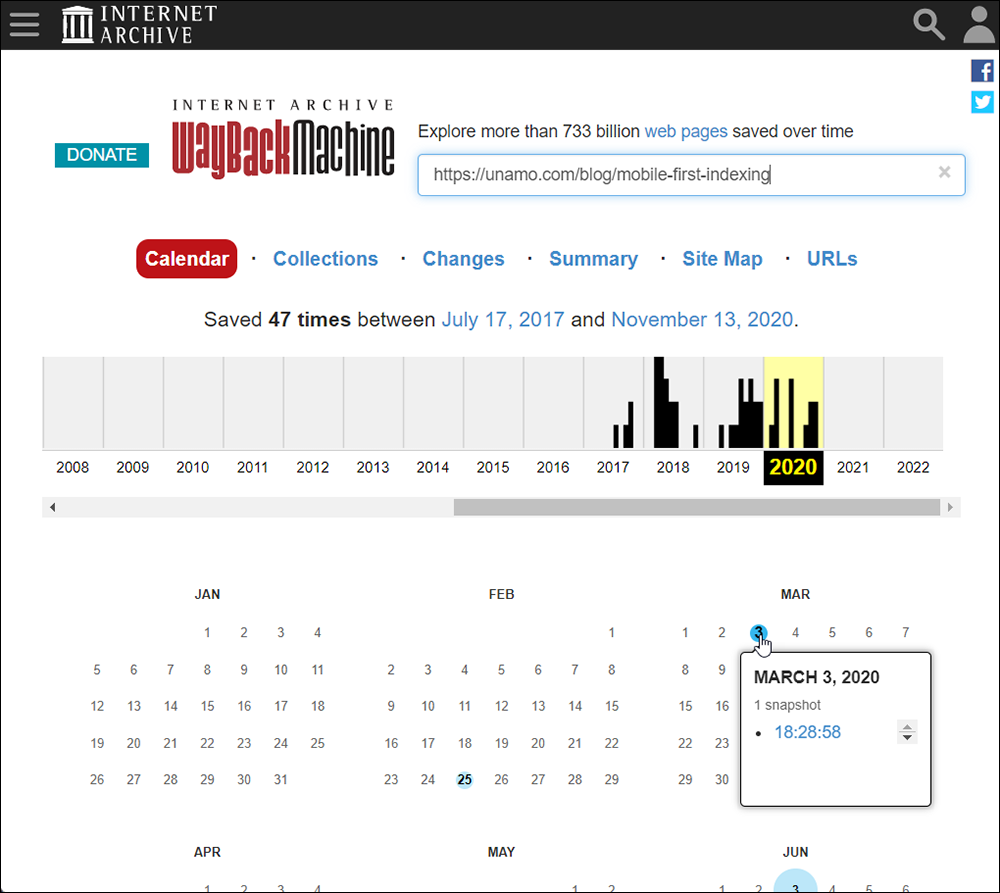
This will bring up the archived page.
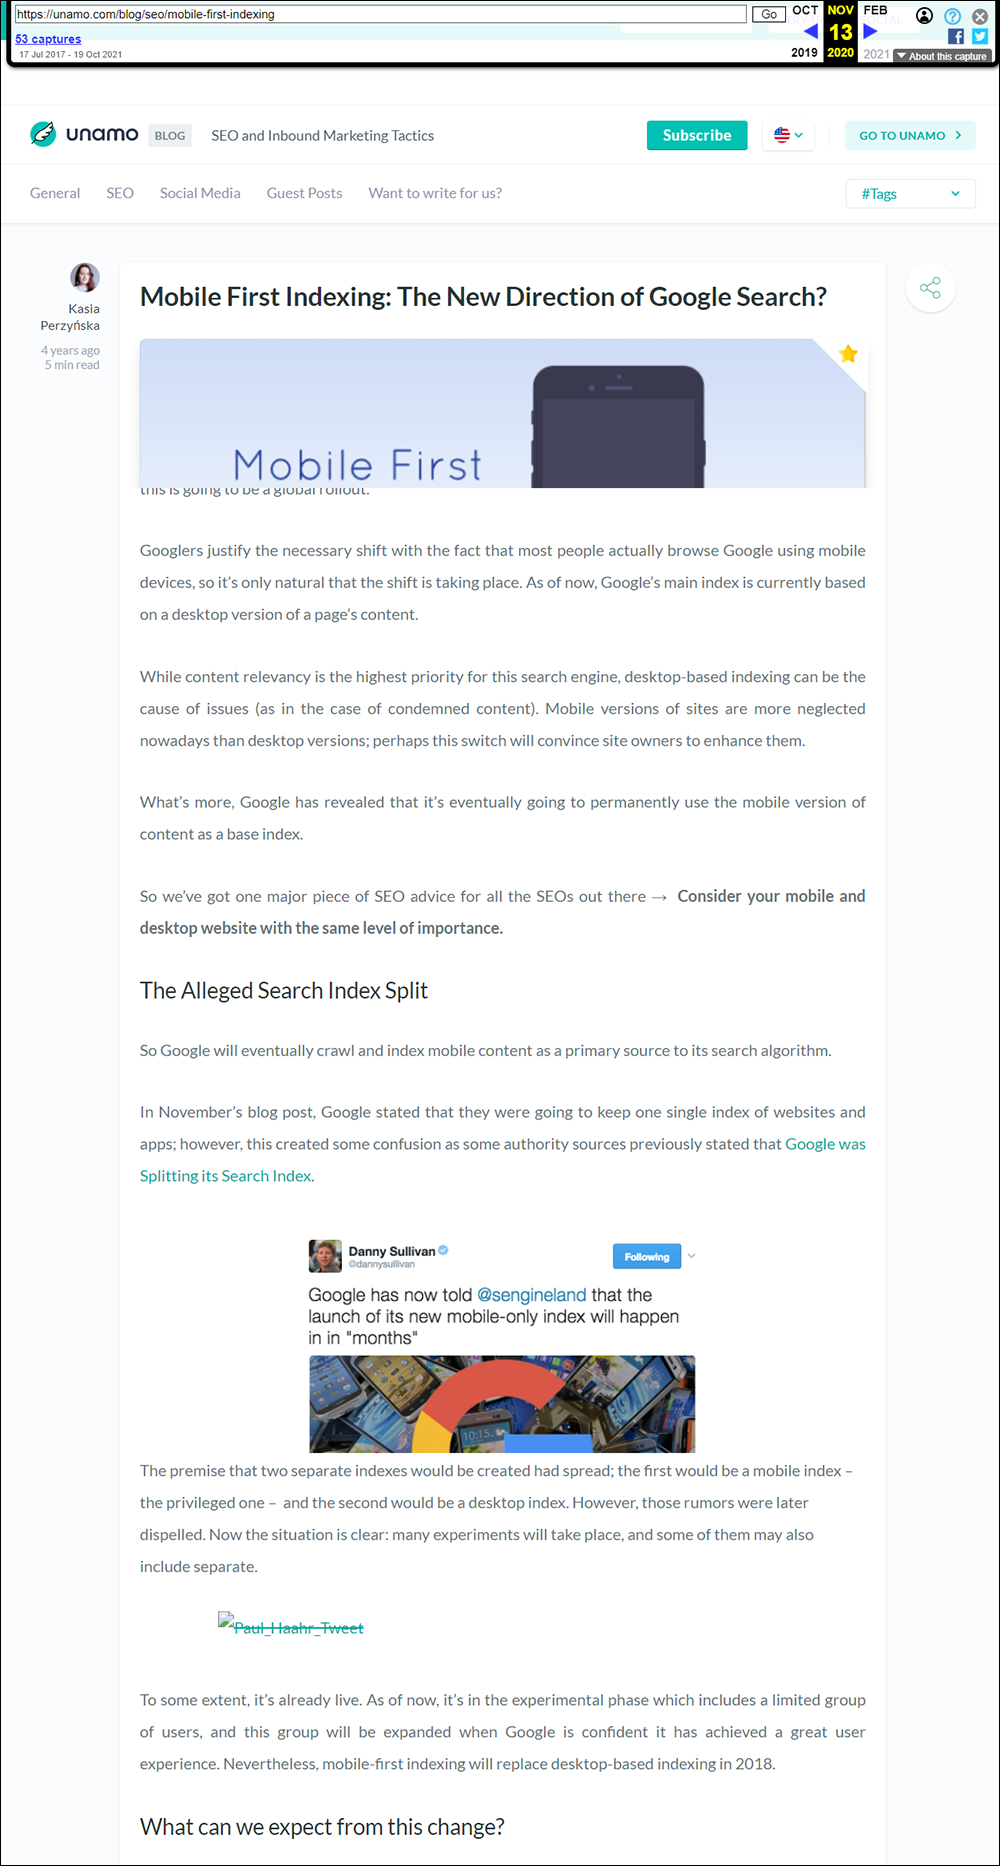
Now, simply copy and paste the archived URL into your content, replacing the original link.
So, in this example, we replaced the link shown below that led to an error page…
https://unamo.com/blog/mobile-first-indexing
With this link to the archived version of the web page…
https://web.archive.org/web/20201113031427/https://unamo.com/blog/seo/mobile-first-indexing
Even though the page is missing images and other elements, visitors will still be able to reference the information relating to the link in our content and not an error page.
More info: Wayback Machine
Link Management Tools
Here are some popular tools for managing links, tracking link performance, and managing affiliate links in your content:
LinkTrackr
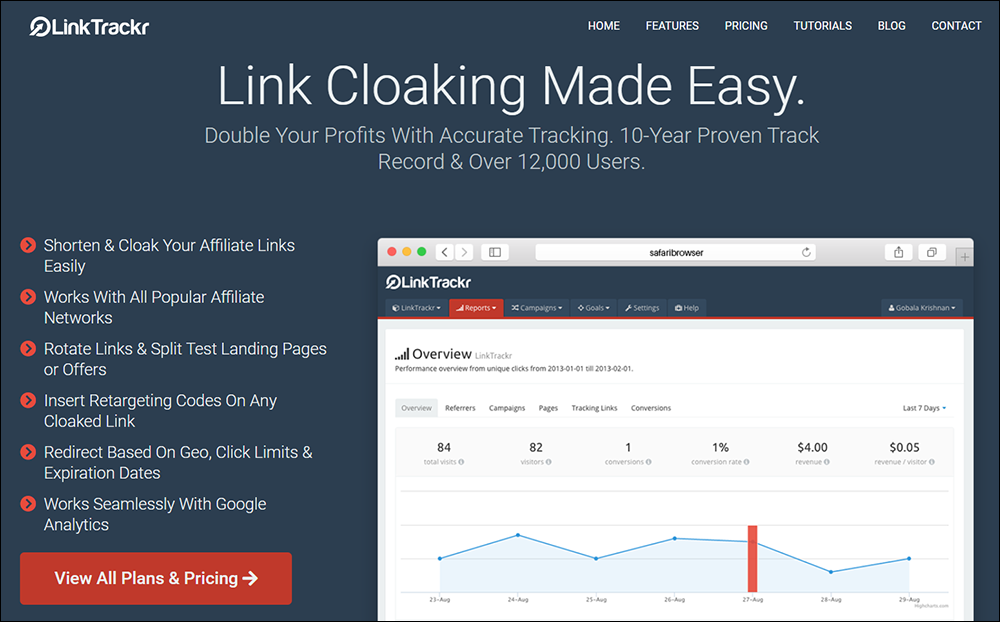
LinkTrackr is a web-based link tracking, affiliate cloaking and split testing software used to track sales and leads.
This all-in-one link management tool is designed to enhance your affiliate marketing and sales funnel tracking experience. It lets you easily shorten and cloak your affiliate links with a user-friendly interface that seamlessly integrates with all popular affiliate networks.
Key Features of this powerful tool include:
- Link Shortening and Cloaking: Effortlessly shorten and cloak your affiliate links for a professional and clean appearance. Compatibility with all major affiliate networks ensures flexibility in your marketing strategies.
- Link Rotation and Split Testing: Rotate links and conduct split tests on landing pages or offers to optimize conversion rates. Test the effectiveness of different strategies and refine your approach for maximum results.
- Retargeting Capabilities: Insert retargeting codes on any cloaked link to engage with your audience effectively. Enhance your marketing efforts by reconnecting with potential customers through retargeting.
- Customizable Redirects: Redirect links based on geo-location, click limits, and expiration dates, providing precise control over your campaigns. Ensure your links are directed strategically for the best user experience.
- Seamless Integration with Google Analytics: Works seamlessly with Google Analytics, allowing you to track and analyze data effortlessly. Gain valuable insights into the performance of your links and campaigns.
- Comprehensive Sales and Leads Tracking: Real-time conversion data for every sale or lead in your funnel. Track your entire sales funnel, including upsells, downsells, and one-time offers with ease.
- Source, Medium, and Campaign Tracking: Easily identify the source of your conversions by creating campaigns to track various channels. Gain a deeper understanding of your marketing channels and their impact on conversions.
- Intelligent Conversion Rules: Avoid duplicate conversions with intelligent tracking rules that can be easily customized. Tailor the conversion tracking rules to align with your specific promotions and marketing strategies.
- ROI and Profitability Reports: Detailed reports show your expenditure, profitability, ROI, and other critical metrics. Make informed decisions based on comprehensive data to maximize your return on investment.
- Affiliate Marketing Optimization: Cloak and track affiliate links to protect your commissions and gain control over your data. LinkTrackr supports major affiliate networks, including ClickBank, JVZoo, Commission Junction, Shareasale, and more.
- Import Commission Reports: Easily import CSV reports from affiliate networks for in-depth commission tracking. Match Sub IDs to our tracking system for detailed reports on each commission generated.
- Pixel and Postback Tracking: Streamline tracking for networks supporting third-party pixel codes or postbacks. Automatically integrate affiliate sales data into LinkTrackr with pixel and postback tracking.
- PPC Campaign Tracking: Centralize and consolidate your PPC campaigns for more effective management. Optimize Google AdWords campaigns with automatic tracking of campaign, ad group, ad ID, and keywords.
- Keyword-Specific Conversion Data: Identify which keywords are driving sales and leads for better PPC optimization. Track each conversion back to the referring keyword to refine your keyword strategy.
- A/B Split Testing and URL Rotator: Optimize landing pages and test affiliate offers from different networks. Improve conversion rates and ROI by systematically testing and refining your landing pages.
- Customizable Tracking Rules: Configure every aspect of your tracking to align with your specific requirements. Customize tracking rules for ad networks, Google Analytics, and other trackers to suit your unique needs.
- Custom Cookie Rules and Session Settings: Set custom cookie lengths for varied conversion results aligned with your ad network. Customize session length and exclusion settings to define new and unique visitors based on your preferences.
- Efficient Bot Filtering: Regularly updated bot list ensures real traffic engagement. Optionally add your own bot filters to tailor bot engagement based on your preferences.
LinkTrackr empowers you to take control of your marketing efforts, providing a comprehensive solution for link management, sales funnel tracking, and affiliate marketing optimization.
More info: LinkTrackr
Pretty Links
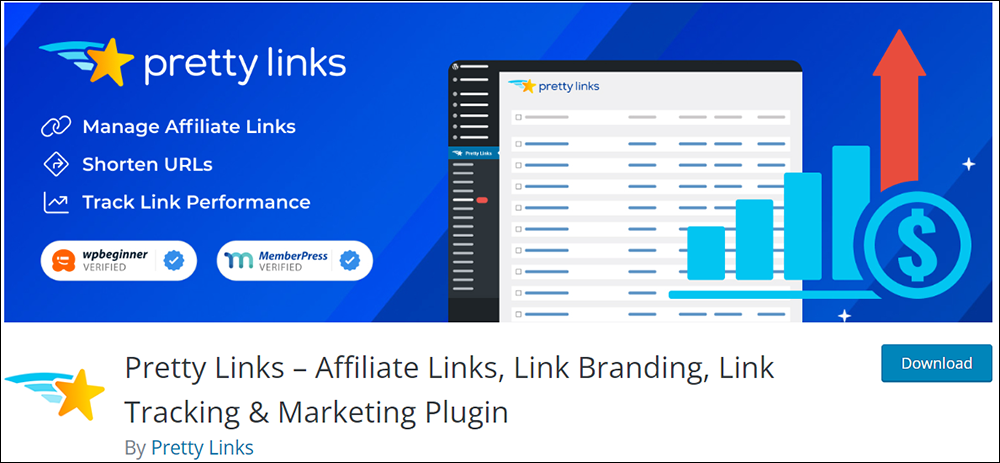
Pretty Links is an affiliate links, link branding, and link tracking and marketing plugin for WordPress.
Key Features of this plugin include:
- Link Optimization: Create clean, simple URLs that redirect to any other URL, effortlessly turning long URLs into concise ones. Fully configurable slugs with the option to generate random characters or create personalized slugs for your URLs.
- Seamless Stripe Sales: Unlock the power of PrettyPay™ Links for branded, one-click paths to payment, enabling instant sales anywhere.
- Versatile Redirects: Support for 301 (Permanent), 302 (Temporary), and 307 (Temporary) redirects, offering flexibility in directing users.
- One-Click Link Sharing: Centralized area for copying and managing pretty links, simplifying link sharing and management.
- Comprehensive Tracking: Track the number of clicks and unique clicks per link, providing insights into the performance of your pretty links. Generate highly customizable reports with configurable charts per day, filterable by link, date range, and unique clicks.
- User-Friendly Interface: Extremely intuitive admin user interface for easy setup and efficient link management.
- Download Click Details: Download click data for your links with the plugin generating a CSV containing essential information for effective link management.
The plugin also offers a Pro version with advanced features and tools for enhanced link management, such as
- Product Displays: Create beautifully styled and responsive displays for affiliate links to boost commissions effortlessly.
- Keyword & URL Replacements: Automate keyword and URL replacements, allowing Pretty Links to scan and replace defined keywords and URLs within your site’s content.
- Advanced Redirect Types: Take control with cloaked redirects, JavaScript redirects, Meta-Refresh redirects, Tracking Pixel redirects, and Geographic redirects.
- Automatic Pretty Links for Posts/Pages: Automation feature to create pretty links automatically for new pages or posts, streamlining the link creation process.
- Link Categories & Tags: Group and categorize links for more straightforward link management.
- Expiring Links: Set expiration dates for links, deciding where users are redirected after clicking an expired link.
- Link Health: Weekly scans to identify and report any broken links created within the Pretty Links plugin.
The plugin also offers seamless integration with Google Analytics for easy link tracking and compatibility with other analytics tools for performance insights.
More info: Pretty Links
Rebrandly
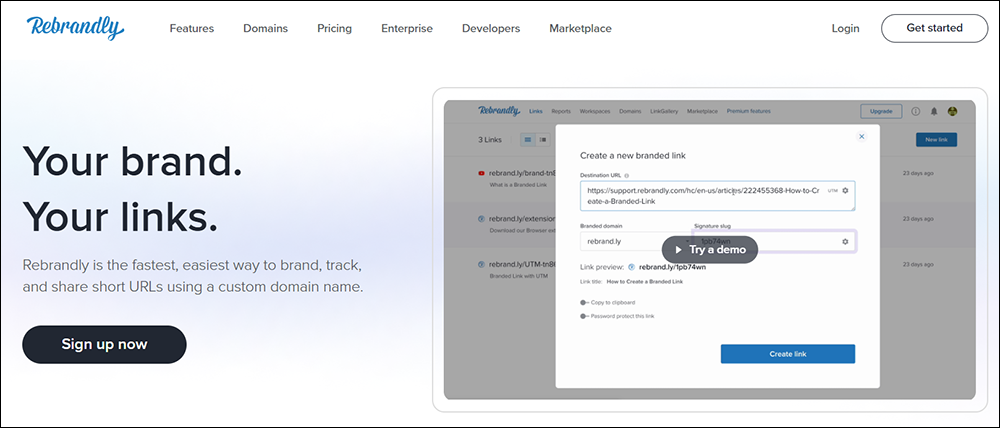
If you are seeking a comprehensive link management solution, Rebrandly is another tool worth exploring.
Rebrandly provides advanced analytics and tracking features, allowing you to monitor and optimize every aspect of your links.
With Rebrandly, you can create custom tracking links, analyze your traffic sources, and even set up A/B tests to optimize your conversions and fine-tune your affiliate marketing campaigns effectively.
More info: Rebrandly
Bitly

While primarily known for its URL shortening capabilities, Bitly also offers link management features that can benefit affiliate marketers.
With Bitly, you can create shortened, trackable links and gain insights into their performance through analytics. This tool is especially handy for those who frequently share their affiliate links on social media platforms.
More info: Bitly
Trackerly
What happens if you add links to distributable documents such as PDFs, slides, videos, emails, etc., and then change the content’s destination URL on your site?
Or, let’s say that you are an affiliate for a certain product and the company decides to change affiliate platforms, requiring you to change all of your affiliate links or lose out on affiliate commissions.

The best way to handle the situations described above is to use a link redirection management tool that lets you manage thousands of links (some tools even allow you to manage links on multiple domains) from a central location.
For more information and a step-by-step tutorial, go here: Using A Link Management And Tracking Tool
![]()
If replacing links to content that is no longer found on a page with a link to another page or site containing similar information (e.g. the same news item reported elsewhere or someone else’s review of the same product), removing the link or linking to an archived web page is not an option, then consider using one of the link redirection tools listed below.
Redirection Tools
Redirection enables you to forward one URL to another. It’s a handy way to not only send users and search engines to another URL while preserving your search engine rankings for that page, but you can also preserve the ‘link juice’ of the out-of-date content by redirecting old pages or posts to new ones with newer and better information.
WordPress Plugins
As mentioned earlier, a great plugin you can use to create automated redirection links is Redirection.

See our description of the plugin here or visit the plugin site directly for more information: Redirection
For other WordPress plugins you can use to manage link redirections, see this tutorial: How To Redirect Links In WordPress
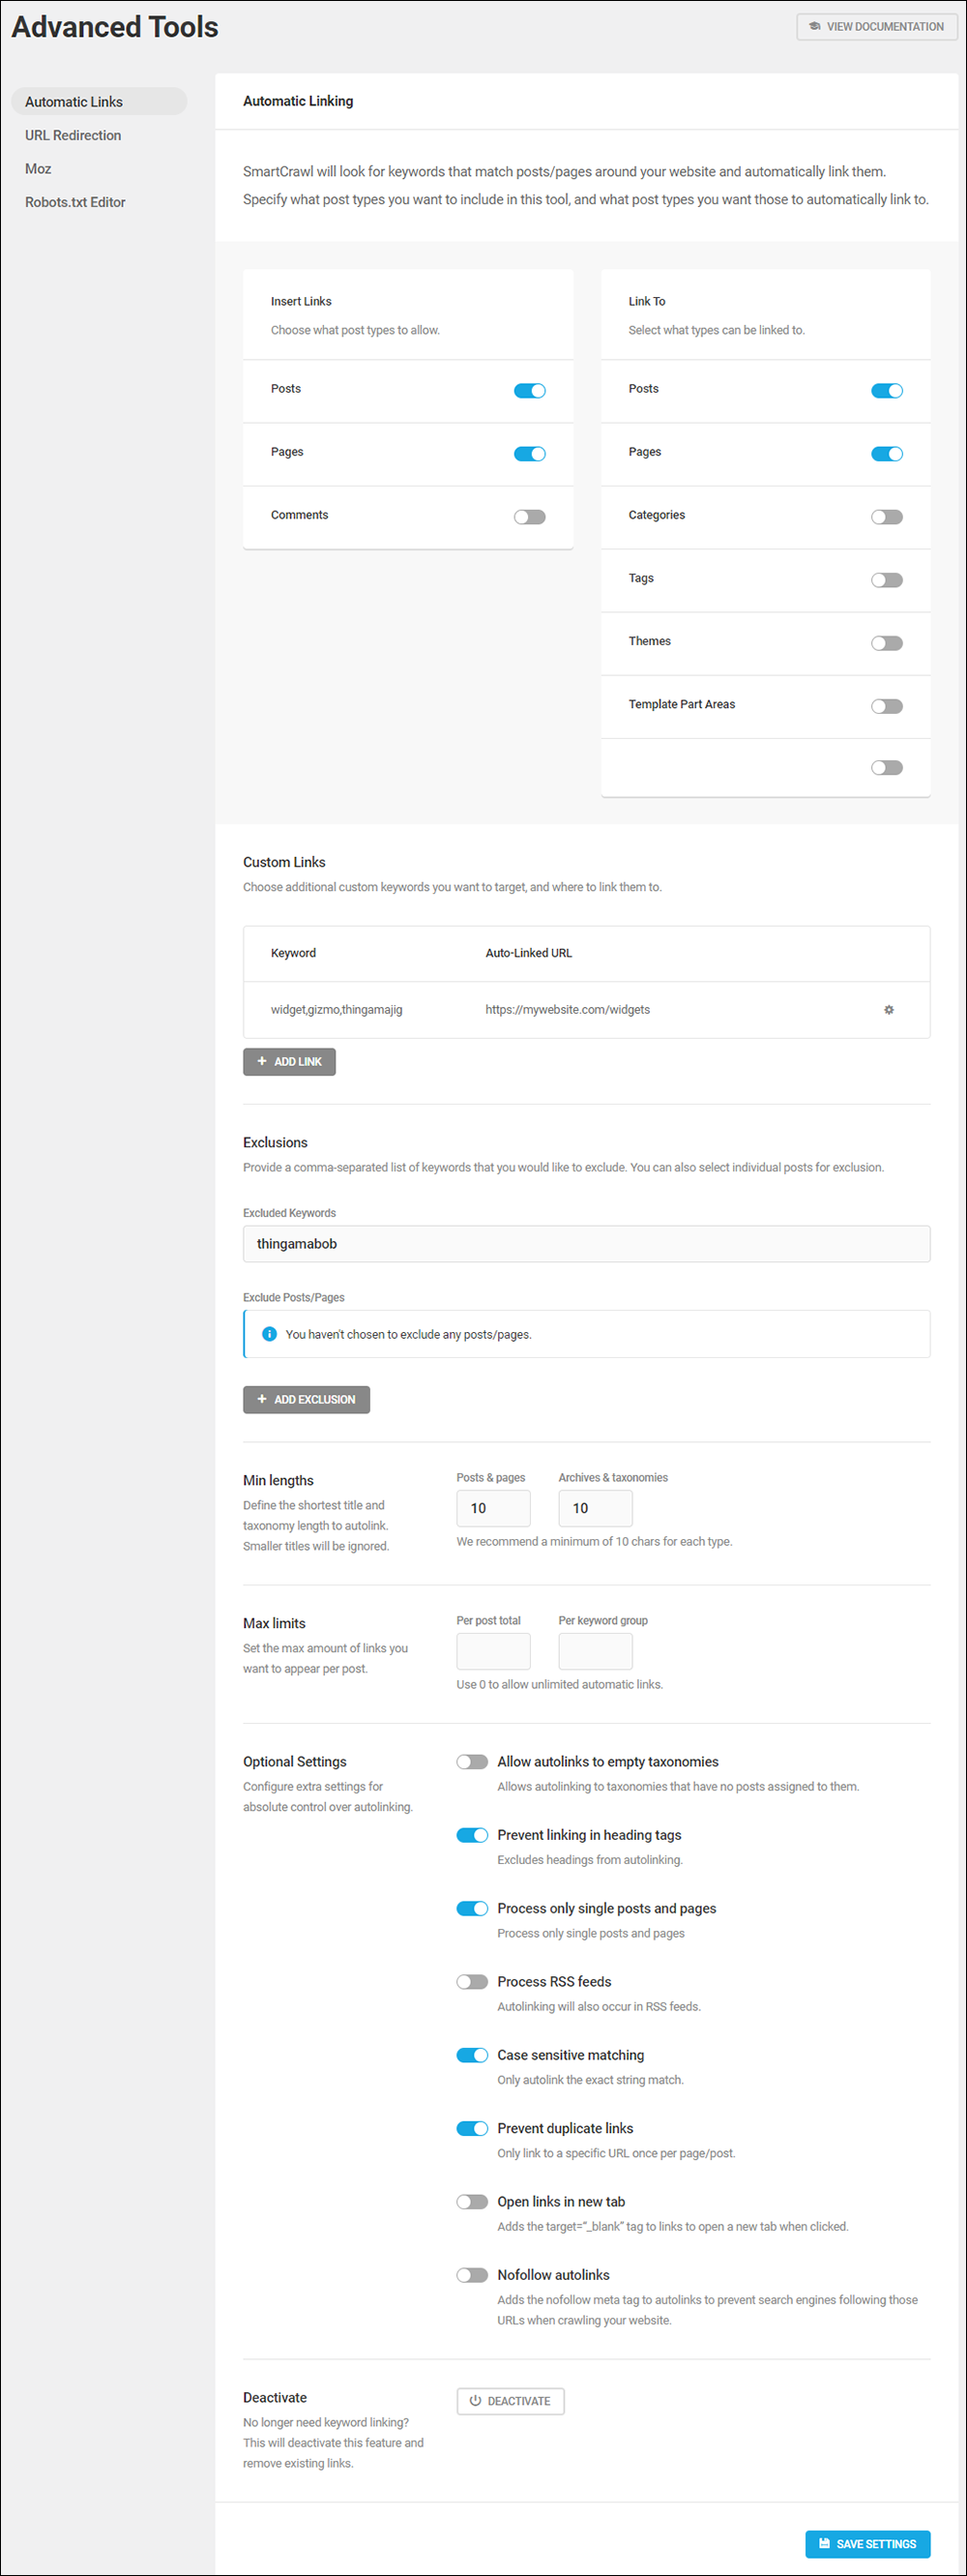
SmartCrawl
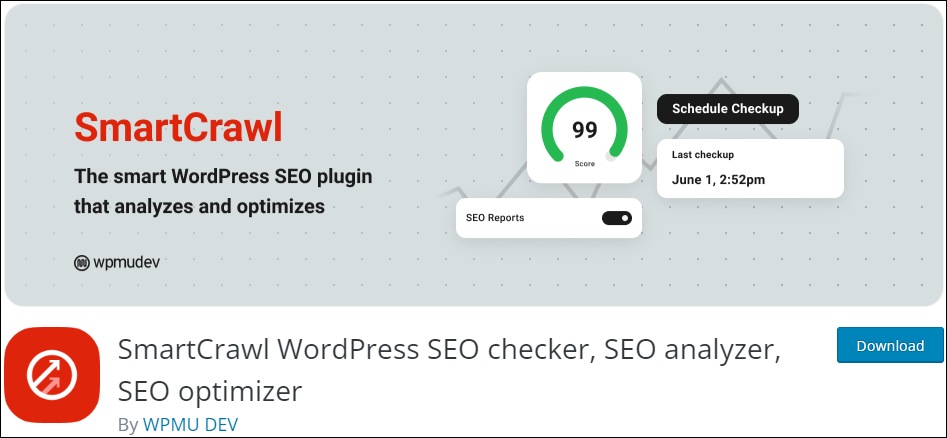
If you use a WordPress SEO plugin like SmartCrawl, you can take advantage of SmartCrawl’s Automatic Linking feature, which lets you boost your site’s SEO through internal linking methods by having the plugin automatically link words in your content to other posts or pages on your blog or even external sites.
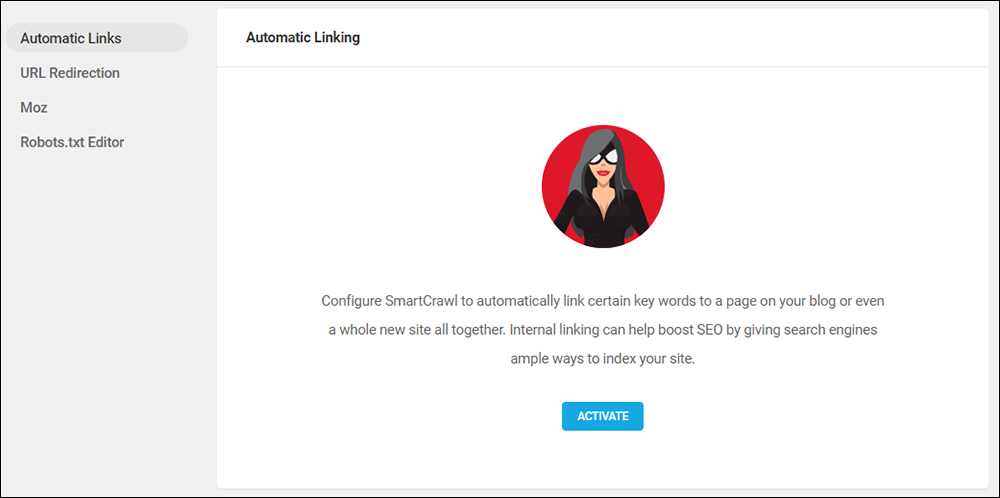
The plugin gives you complete control over your linking by allowing you to specify which post types you want automatic linking to be inserted in and linked to, the minimum lengths of post titles to autolink to, the maximum number of links per post or page, optional settings, exclusions, etc.
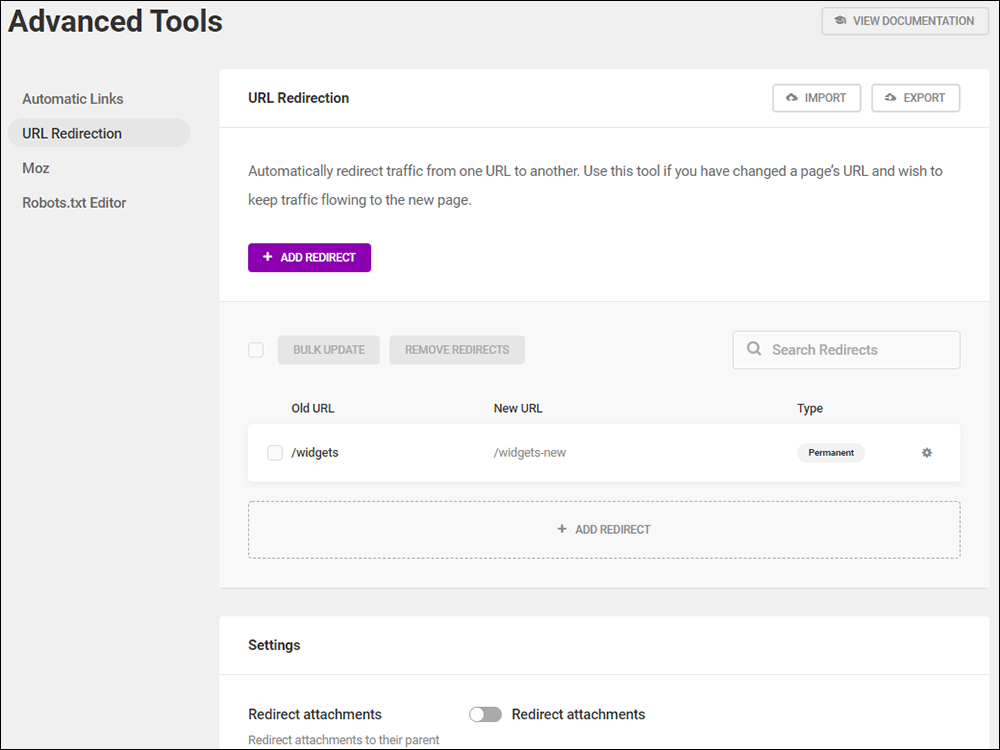
Another powerful feature of the plugin is URL Redirection, which lets you automatically redirect traffic from one URL to another.
This feature is useful if you have changed the URL of a post or page on your site and want to redirect visitors to the post or page’s new URL.
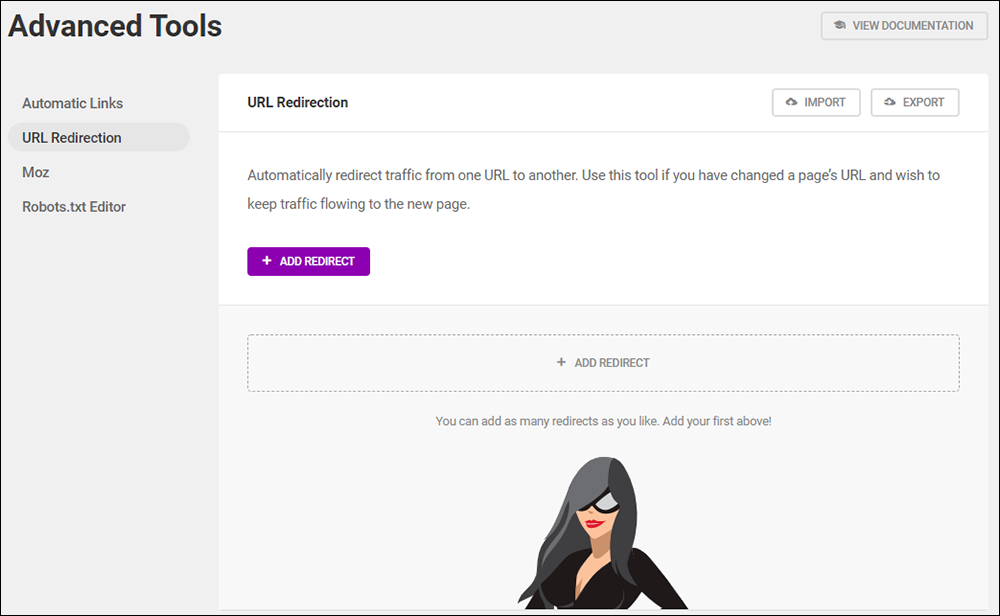
SmartCrawl’s URL Redirection feature includes advanced redirection options, such as the ability to use Regex (regular expression), which looks for all URLs containing a specific word in the URL and redirects them to a single URL.
You can download SmartCrawl for free and learn more about SmartCrawl’s Automatic Links and URL Redirection features.
Content Linking – FAQs
Here are frequently asked questions about linking web content:
What is linking in web content management?
Linking refers to the practice of connecting various pieces of content on the web through hyperlinks, allowing users to navigate between them easily.
Why is linking important in content management?
Linking enhances user experience, improves SEO by showing relationships between content, and helps distribute page authority across your website.
What types of links are used in web content?
There are primarily two types: internal links, which connect pages within the same website, and external links, which connect to pages on different websites.
How can linking impact SEO?
Proper linking can improve site architecture and increase the link equity among pages, which is beneficial for SEO as it helps search engines discover new content and determine its relevance.
What are best practices for linking web content?
Use descriptive anchor texts, ensure links are relevant to the content, update or remove broken links, and balance the number of internal and external links to avoid saturating the page.
What tools can help manage links in web content?
Tools like Google Search Console or specialized plugins for content management systems (e.g. Broken Link Checker) can help identify and manage broken links, as well as analyze the impact of links on your site’s SEO performance.
How do you ensure the quality of external links?
Only link to reputable and relevant sites, regularly check the validity of external links, and monitor the quality of content to which you are linking to ensure it remains appropriate and beneficial.
What are some common mistakes in linking web content?
Common mistakes include over-linking on a single page, using non-descriptive anchor text, linking to low-quality or irrelevant sites, and having broken links.
How often should links be reviewed in web content?
Links should be reviewed regularly, at least every six months, to ensure they remain accurate and relevant, and to remove or update any that are broken or outdated.
Can linking patterns affect website performance?
Yes, excessive linking, especially if scripts or plugins are used to manage them, can slow down page loading times, affecting user experience and SEO.
Summary
Linking to content and pages on your site and other websites is essential to having an online presence. Links help users navigate your site and find what they are looking for and having a good linking strategy is important for SEO.
Content linking, however, also presents a challenge, as all your links also need to be managed, especially when the content or pages these links are pointing to get moved elsewhere, or destination pages and URLs are changed, replaced, or removed.
Action Steps
Review your internal and external content linking strategy and implement some of the tools and methods suggested in this lesson to manage your links effectively.
Resources
- Beginner’s Guide To Link Building (Moz) – A free comprehensive guide to link-building for SEO.
- Google’s Guide To Linking Best Practices – A guide on best practices to avoid methods of acquiring links that violate Google’s guidelines against link schemes.
References
- What Are Href links? HTML Links Explained
- HTML Links Tutorial
- What Are External Links? Best Practices For Building Authority
- HTTP vs HTTPS: What You Need to Know
- Challenges Of Internal Linking
Next Steps
- Return to the Content Management Overview module
- View the Course Outline
***
Image: https