Content Management Glossary

Useful terms and definitions related to the creation, management, and distribution of digital content.

Content Management Glossary

This content management glossary provides terms and definitions related to the creation, management, and distribution of digital content.

Content Management Glossary - Laptop with image of wooden block letters.

Whether you are new to the content management field or an experienced professional content creator, digital marketer, project manager, or executive, this content management glossary will serve as a useful reference to understand content management terminology and concepts used in the field and help you stay up-to-date on the latest developments and best practices in content management.

Agile Content Marketing

Agile Content Marketing is a flexible approach to creating and managing content. It involves continuously planning, executing, and reviewing content in short cycles, allowing for quick adjustments based on feedback and performance. This method helps businesses stay responsive to market changes and customer needs, ensuring their content remains relevant and effective.

Business Goals

Specific, measurable, achievable, relevant, and time-bound objectives that a business aims to achieve.

Here are some examples of business goals:

  • Increase revenue by 10% in the next fiscal year
  • Expand into new markets by opening three new retail locations in the next two years
  • Launch a new product line by the end of the year
  • Achieve a net profit margin of 15% by the end of the quarter
  • Increase customer satisfaction ratings by 20% within the next six months
  • Reduce employee turnover by 50% within the next year
  • Increase the number of social media followers by 50% within the next quarter
  • Achieve a 90% on-time delivery rate by the end of the year
  • Increase the number of recurring customers by 25% within the next six months

Business Mission Statement

A statement that describes the purpose and values of a business.

Here are some examples of business mission statements:

  • “To provide the best products and services in our industry, and to always put our customers first.”
  • “To create value for our shareholders by building a sustainable and successful business that makes a positive impact on the world.”
  • “To be a responsible and innovative company that creates value for all of our stakeholders, including customers, employees, shareholders, and the communities in which we operate.”
  • “To help people achieve their financial goals and live better lives through innovative, reliable, and accessible products and services.”
  • “To be the leading provider of innovative, high-quality healthcare solutions that improve the lives of people around the world.”
  • “To be the most trusted and respected company in our industry, known for our commitment to excellence and innovation.”
  • “To be the global leader in providing sustainable solutions that improve the quality of life for all people.”

Business Plan

A document that outlines the goals, target market, and financial projections of a business.

Business Strategy

A plan for achieving the goals of a business, often involving the development of a unique value proposition and a competitive advantage.

Here is an example of a business strategy using content and content marketing:

Our company’s goal is to establish itself as the leading provider of healthy, convenient, and delicious food, helping people around the world to live their best lives.

To achieve this goal, we will develop a content marketing strategy focused on creating and distributing valuable, relevant, and consistent content to a clearly defined target audience. This content will include educational articles, recipe videos, and infographics that highlight the benefits of a healthy diet and the convenience of our company’s products.

The content marketing strategy will also include a strong social media presence, with regular posts showcasing the company’s products, highlighting customer success stories, and offering healthy living tips and inspiration. We will also partner with influential health and wellness bloggers and influencers to amplify its message and reach a wider audience.

Through this content marketing strategy, we will aim to attract and retain a loyal customer base, increase brand awareness and engagement, and ultimately drive sales and revenue growth.

Business Vision Statement

A statement that describes the long-term goals and aspirations of a business.

Here are some examples of business vision statements:

  • “To be the most trusted and respected company in our industry, known for our commitment to excellence and innovation.”
  • “To be the global leader in providing sustainable solutions that improve the quality of life for all people.”
  • “To be the premier destination for all of your entertainment needs, offering the best content, experiences, and value.”
  • “To create a world where everyone has access to high-quality education and the opportunity to reach their full potential.”
  • “To be the go-to source for the latest and greatest products, services, and ideas that make life easier, better, and more fun.”
  • “To be the leading provider of healthy, convenient, and delicious food, helping people around the world to live their best lives.”
  • “To be the most admired and respected brand in the world, inspiring people to be their best selves and achieve their dreams.”

Buyer Journey

The buyer journey is the process that a potential customer goes through to become aware of, evaluate, and purchase a product or service.

Understanding this process will help you create a content strategy aligned with your target audience’s interests.

The stages of the customer buyer journey can include awareness, research, evaluation, and purchase.

The goal of the customer buyer journey is to understand the customer’s needs and preferences and to guide them through the process of making a purchase.

Learn more here: Understanding Your Customer’s Buyer Journey

Content Analysis

The process of examining and evaluating written or spoken material to extract meaningful insights and improve the quality of the content.

Content analysis is an essential part of content research, as it can help to ensure that your content is relevant, informative, and engaging to your target audience.

Content Audit

A review and assessment of the existing digital content within an organization, often with the goal of identifying areas for improvement or updating.

Learn how to perform a content audit.

Content Authoring

The process of creating and writing digital content, often using a content management system or other tools.

Content Brief

A document that outlines the goals, target audience, and key messages of a specific piece of digital content.

Content Calendar

A schedule or plan for creating, publishing, and distributing digital content, often organized by date or topic. A content calendar (also known as an “editorial calendar”) can help organizations plan and coordinate their content creation efforts and ensure a consistent flow of content to their audience.

Content Creation

The process of creating and writing digital content.

Content Distribution

The process of making digital content available to a target audience, typically through a website or other online platform.

Content Documentation

The process of creating and maintaining records of digital content, including information such as the creation date, author, and any updates or revisions.

Content Governance

The policies, procedures, and standards that guide the creation, management, and distribution of digital content within an organization.

Content Link Management

The process of organizing and managing the links within digital content, often with the goal of improving navigation and user experience.

Content Management Audit

A review of an organization’s content management practices to identify areas for improvement.

Content Management Best Practices

Guidelines and strategies recommended by industry experts for managing content effectively and efficiently.

Content Management Governance

The processes and practices used to ensure that content is created, managed, and published in a way that is consistent with an organization’s policies and goals.

Content Management Lifecycle

The stages of content creation, management, and retirement within an organization.

Content Management Metrics

Data used to measure the effectiveness of an organization’s content management efforts.

Content Management Policy

A set of guidelines or rules governing the creation and management of content within an organization.

Content Management Strategy

A plan for creating, managing, and distributing content in a way that supports the goals of a business or organization.

Content Management System (CMS)

A software application, platform, or a set of tools used to create, edit, organize, store, manage, and publish content on a website or other digital media.

Additional useful CMS-related terms include:

  • Asset – A digital file or piece of content that can be managed and reused within a CMS.
  • Workflow – A set of steps or processes for creating, reviewing, and publishing content within a CMS.
  • Metadata – Data about content, such as tags or keywords, that can be used to classify and organize it within a CMS.
  • Permalink – A permanent URL that points to a specific piece of content within a CMS.
  • User role – A set of permissions or privileges that determine what actions a user can take within a CMS.
  • Taxonomy – A system for classifying and organizing content within a CMS, often using categories and tags.
  • Content type – A category of content that is defined within a CMS, such as articles, products, or events.
  • Revision history – A record of all the changes made to a piece of content within a CMS, along with who made the changes and when.
  • API (Application Programming Interface) – A set of rules and protocols that allow different software systems to communicate and exchange data with each other.

Also, see these types of content management systems:

WCMS

A web content management system (WCMS) is a platform that facilitates the creation, publication, and management of website content.

ECMS

An enterprise content management system (ECMS) is a software solution that allows businesses to store, organize, and manage their digital content, regardless of format or location.

CCMS

A component content management system (CCMS) is a software solution that helps organizations create, manage, and publish modular content in a structured manner to be used across different products, services, or platforms.

DAMS

A digital asset management system (DAMS) is a platform designed to manage digital files such as images, videos, and audio files, allowing users to easily store, organize, retrieve, and distribute their assets.

Content Management Team

A group of individuals responsible for managing the content of a website or other digital media.

Content Management Workflow

The process of creating, reviewing, approving, and publishing digital content within an organization.

Content Marketing

A marketing strategy that involves the creation and distribution of valuable, relevant, and consistent content to attract and retain a clearly defined audience.

Content Marketing Plan

A content marketing plan is a strategy for creating and distributing valuable, relevant, and consistent content to attract and engage a specific target audience, with the goal of driving profitable customer action.

Content Marketing Strategy

A content marketing strategy is a comprehensive plan for creating and distributing valuable, relevant, and consistent content to attract and engage a specific target audience, with the goal of driving profitable customer action.

It outlines the overall goals and objectives for your content, your target audience, the channels through which your content will be distributed, and the metrics by which success will be measured.

Content Measurement Plan

A content measurement plan is a document that outlines the goals, objectives, key performance indicators (KPIs), measurement tools, and schedule for measuring and evaluating the performance of your content marketing efforts.

It helps to track progress and make data-driven decisions on how to optimize your content strategy.

Learn more: Content Measurement Plan

Content Metrics

Data and metrics used to measure the performance and effectiveness of digital content, such as website traffic, engagement rates, and conversion rates.

Content Migration

The process of moving digital content from one platform or system to another.

Content Performance

The effectiveness of digital content in achieving its intended goals, such as generating website traffic or driving sales.

Content Plan

A detailed plan for creating and managing digital content, typically including goals, target audience, and a content calendar.

A content plan is a document that outlines the content that your business will create and publish in a given period of time.

It helps your business align its content with its overall marketing and business goals, and ensures that you have a steady stream of relevant, high-quality content to share with your audience.

Learn how to create a content plan for your business.

Your content plan can be divided into smaller plans covering different aspects such as content production, content promotion, and content management, and distributed to different teams of departments responsible for managing and implementing these:

Content Production Plan

A content production plan is a detailed plan that outlines the specific actions and resources that your business will use to create and publish its content.

It is a more detailed version of a content plan and helps your business stay organized and on schedule when creating content.

Content Promotion Plan

A content promotion plan is a strategy for getting the word out about your business’s content.

It helps your business increase the visibility of your content and drive engagement and conversions.

Content Management Plan

A content management plan is a strategy for organizing, storing, and maintaining your business’s content over time.

It helps your business keep your content organized, ensure that it stays up-to-date and relevant, and make it easily accessible to the people who need it.

Content Planning

The process of organizing and scheduling the creation and distribution of digital content.

Content Production

The process of creating and publishing digital content, often involving research, writing, editing, and design.

Content Promotion

The process of increasing the visibility and reach of digital content, often through marketing efforts or partnerships.

Content Publishing

The process of making digital content available to a target audience, typically through a website or other online platform.

Content Repurposing

The process of adapting or reusing existing digital content for a new purpose or audience, often through formatting or modification.

Content Research

The process of gathering information and data to inform the creation of digital content.

Content SEO

The process of optimizing digital content for search engines, including keyword research and the use of tags and meta descriptions.

Content Strategy

A plan for creating and managing digital content, typically involving the development of goals, audience targeting, and a content calendar.

Content Tracking

The process of monitoring and collecting data on the performance and engagement of digital content, often using tools such as Google Analytics.

Core Business Values

The fundamental principles that guide the actions and decisions of a business.

Here are some examples of core business values:

  • Integrity: honesty, transparency, and ethical behavior in all business dealings.
  • Respect: treating all stakeholders with dignity and respect.
  • Innovation: a commitment to continuous improvement and finding new and better ways of doing things.
  • Excellence: a pursuit of the highest quality in all aspects of the business.
  • Customer focus: a commitment to meeting the needs and expectations of customers.
  • Teamwork: a belief in the power of collaboration and the importance of working together towards a common goal.
  • Sustainability: a commitment to environmental and social responsibility, and to building a business that can thrive in the long term.
  • Social impact: a desire to make a positive difference in the world through the business.
  • Diversity and inclusion: a commitment to creating a workplace culture that values and supports diversity and inclusivity.
  • Employee development: a focus on investing in and supporting the growth and development of employees.

Document Library

A collection of files, documents, or records that are systematically organized and stored in a digital format.

Document Management System

A Document Management System (DMS) is a software program that is designed to help organizations manage, store, and track their electronic and physical documents.

Learn more about Document Management Systems

Eisenhower Matrix

The Eisenhower Matrix is a time management tool that helps prioritize tasks based on urgency and importance. It divides tasks into four quadrants:

  1. Urgent and Important: Do these tasks immediately.
  2. Important, Not Urgent: Schedule these tasks.
  3. Urgent, Not Important: Delegate these tasks.
  4. Not Urgent, Not Important: Eliminate these tasks.

This matrix helps businesses focus on what truly matters and manage their time more efficiently.

Evergreen Content

Evergreen Content refers to content that remains relevant and valuable over time. Unlike news articles or trend-based content, evergreen content addresses timeless topics and provides information that is consistently useful to your audience. Examples include how-to guides, tutorials, and FAQs. This type of content continuously attracts traffic and engagement long after it’s published.

Keyword Research

The process of identifying and analyzing the words and phrases that people use when searching for information on a particular topic.

Keyword research involves finding the terms that are most relevant to your content and that are likely to be used by your target audience. It is an essential part of content research, as it can help you to optimize your content for search engines and ensure that your content is being seen by the right people.

Learn more about keyword research tools.

Marketing Funnel

The marketing funnel is a framework used to describe the journey a potential customer goes through before making a purchase. It typically includes the stages of awareness, interest, consideration, and conversion.

The goal of the marketing funnel is to move potential customers through each stage, with the ultimate goal of converting them into paying customers.

Marketing Plan

A detailed plan for promoting and selling a product or service, including goals, target audience, and marketing tactics.

Marketing Strategy

A plan for promoting and selling a product or service, including an analysis of the market and the development of a unique selling proposition.

Metadata

Data about data, such as tags or descriptions, that can be used to describe and classify digital content.

Pomodoro Technique

The Pomodoro Technique is a time management method that breaks work into intervals, typically 25 minutes long, separated by short breaks. Each interval is called a “pomodoro.” After completing four pomodoros, take a longer break. This technique helps improve focus, reduce mental fatigue, and increase productivity by encouraging regular breaks.

Project Management

The process of planning, organizing, and overseeing the work of a team to achieve specific goals and meet specific success criteria. When managing content projects, this often involves using content production workflow tools.

Strategic Business Objectives

Long-term goals that a business aims to achieve to fulfill its mission and vision.

Here are some examples of strategic business objectives:

  • To become the market leader in our industry within the next five years.
  • To double the size of our business within the next three years.
  • To establish a strong presence in the global market within the next decade.
  • To develop a new product line that meets the needs of an underserved market segment.
  • To improve our supply chain efficiency by 30% within the next year.
  • To develop a customer loyalty program that increases retention rates by 50%.
  • To implement a new sales and marketing strategy that increases conversions by 20%.
  • To invest in research and development to create innovative products and services
  • To diversify our product offerings to reduce reliance on a single product or market.
  • To create a strong corporate culture that attracts and retains top talent.

You can also set specific content-related strategic objectives for your business.

Style Guide

A  set of standards and guidelines that determine the writing, design, and formatting of your website, documentation, products, or brand.

A style guide serves as a reference for maintaining consistency and ensuring that the various elements of your website, documentation, products, or brand present a cohesive and professional image to your audience.

Additionally…

Content Style Guide

A document that outlines the guidelines and standards for creating and publishing content for your business.

It provides a set of rules and recommendations to ensure consistency and quality across all your content, from blog posts and social media updates to product descriptions and email newsletters, and standards for the writing, design, and formatting of your web content.

A style guide focuses on visual elements while a content style guide focuses on written elements. Both guides are essential tools for creating a consistent and recognizable brand identity.

Learn how to create a content style guide.

Trend Analysis

The process of using data to identify patterns and trends in the content that is being consumed by a particular audience. By analyzing trends, your business can gain insights into the types of content that are popular among your target audience, and use this information to inform your content creation and marketing strategies.

User Persona

A user persona is a fictional representation of a business’s ideal customer. It is based on data and research about the target audience, and it is used to help businesses create more effective marketing campaigns and design user-friendly products.

User personas provide a detailed and specific picture of who the target audience is, what their needs and goals are, and how they think and behave.

View a list of free online user persona generators.

***

Image: Wooden Letters

Generate Quality Website Content Using AI

Can AI generate quality content that is engaging and valuable for human readers? Let’s find out…

Generate Website Content Using AI

Learn about the capabilities of AI in content generation and whether it can produce material that is engaging and valuable for human readers.

AI Content Generation - Laptop image with AI hand pressing key.Can AI really generate quality content that is engaging and valuable for human readers?

If so, would that not save your business significant and valuable time and money in areas like content planning, content research, and content production?

In this article, we’ll look at how AI tools can be used to generate quality content for your website, as well as the benefits and limitations of this approach.

Using AI Tools To Generate Quality Content For Your Website

Can AI really generate quality content that is engaging and valuable for human readers? If the answer is “yes”, would that not save your business significant and valuable time and money in areas like content planning and content production?

Artificial intelligence (AI) has come a long way in recent years, with numerous tools now available to assist with a variety of tasks.

One area where AI has the potential to make a significant impact is in the generation of written content. With the ability to analyze data and generate text, AI tools have the potential to create high-quality content for human readers.

However, the question remains: can AI tools truly generate content that is comparable to that produced by humans? And what are the benefits and limitations of this approach? And will it rank in the search engines?

ChatGPT: Free AI Content Writing Tool

I recently came across a “next-level” AI tool that is generating quite a buzz.

It’s called  ChatGPT. This technology not only displays impressive human-like content writing abilities, but it’s also (currently) free to use.

ChatGPT
ChatGPT is a powerful AI technology with impressive human-like content-writing abilities.

I discovered ChatGPT while researching content writing tools for this course.

As a professional content writer, I became very curious about this tool, so after watching some videos about ChatGPT on YouTube, I decided to see for myself whether this tool was capable of generating a high-quality article on a substantial topic quickly from scratch.

I also decided to record the entire content creation process from start to finish on video and share it here with you for free, so you can decide for yourself whether you would use AI to generate content for your own business and website.

You can watch all videos of my free “How To Create Quality Content Quickly Using Artificial Intelligence Tools” video course in the section below.

Following the video course section, I provide a written tutorial with additional comments and information about the article creation process.

How To Create Quality Content Quickly Using Free AI Tools – Free Video Course

Learn how to use the latest advanced AI technology to generate high-quality content quickly and easily for your business and website (no coding or technical skills required.)

If you want to save time and money creating quality articles and blog posts for your website in minutes instead of days or weeks, the step-by-step practical video course below will show you exactly how to do it.

To read the complete article that chatGPT generated (in less than 6 minutes), go here: 5 Tips For Streamlining Your Content Management Process

How To Create Quality Content Quickly Using Free AI Tools – Tutorial

Let’s break down all the steps I took to create an entirely AI-generated article in minutes. You can watch the video lesson and then review the notes below each video for more information.

Part 1 – AI Content Generation: Overview

As mentioned earlier, I wanted to see if today’s AI technology is capable of generating a high-quality article quickly, so I decided to use the tool to generate the following:

  • Content Ideas
  • Article Headlines
  • Article Outline
  • Article Introduction
  • Content For All Article Sections
  • Article Conclusion

As mentioned in the video, I had not used the tool previously to generate content and so I set certain goals and expectations, which I then discuss in the video:

How To Create Quality Content Using AI Tools video course - goals
These were my goals for using ChatGPT.

I then reviewed if and how each of these goals was met in the last video of the course.

Part 2 – Why AI Writing Tools Sucked…Until Now!

After providing an overview of the video course, we then looked at some of the earlier methods used by tools claiming to use AI technologies and their limitations.

In the video, I provide actual examples of some of the hilarious results of tools that generate rubbish content and some of the methods used.

info

It’s important to note that some of the tools that have evolved from the earlier methods shown in the video are actually quite good at what they do, provided they are used correctly.

Some of these tools include:

  • Quillbot – A language processing tool that uses artificial intelligence to rephrase and rewrite sentences and paragraphs. It is designed to help users generate new versions of text that are different from the original, while still retaining the meaning and tone of the original content. You can use this tool for a variety of purposes, such as generating unique content for websites, paraphrasing text for use in academic papers, and improving your writing skills with suggested alternative word choices and sentence structures.
  • SpinRewriter – This tool helps you generate new, readable versions of your original article using a proprietary technology called ENL Semantic Spinning and a hand-curated database of synonyms.

Part 3  – ChatGPT: Free AI Content Writing Tool

ChatGPT is an exciting and impressive new AI technology that helps you write quality content quickly and easily…for free!

Interestingly enough, when I asked ChatGPT to provide me with a description of itself, it played “dumb” and went into denial, as if calling it a bot was insulting…

ChatGPT - Screen grab.
Sorry, ChatGPT … I didn’t mean to offend you!

However, when I asked ChatGPT (I mean, “Artificial Intelligence Assistant” to create a video script describing all the ways I could use it to make money online, the tool seemed to have no issue referring to itself in the 3rd-person:

ChatGPT is a powerful language model developed by OpenAI that can generate human-like text based on a given prompt. It can be used for a variety of purposes, including generating content for websites and social media, creating chatbot responses, and more.

In this video, we’ll be exploring some of the ways you can use ChatGPT to make money online.

  • Content creation: ChatGPT can be used to generate articles, blog posts, and other types of written content. You can use it to create unique and engaging content for your own website or blog, or you can offer your services as a freelance writer or content creator to businesses and organizations.
  • Chatbot development: ChatGPT can be used to create chatbot responses that are personalized and engaging. You can use it to build chatbots for customer service, sales, or any other purpose, and offer your services as a chatbot developer to businesses and organizations.
  • Social media management: ChatGPT can be used to generate social media posts, including captions and hashtags. You can use it to manage the social media accounts of businesses and organizations, creating engaging and relevant content on a regular basis.
  • Virtual assistant: ChatGPT can be used to create responses to customer inquiries, schedule appointments, and perform other tasks typically handled by a virtual assistant. You can offer your services as a virtual assistant using ChatGPT to handle a variety of tasks for businesses and individuals.

There are many other ways you can use ChatGPT to make money online, and the possibilities are only limited by your imagination. Whether you’re a content creator, chatbot developer, social media manager, or virtual assistant, ChatGPT can help you provide valuable services and make money in the process.

ChatGPT - Make Money with ChatGPT video script.
ChatGPT will even tell you how to make money online!

To use the tool, you will need to sign up and create an OpenAI account.

After logging in, you will come to the tool’s main screen and its simple interface.

In the main section of the screen, you will find some examples of things you can ask the tool with descriptions of the tool’s capabilities and limitations.

Below it is the prompt where you enter your request and then hit enter, and on the left-hand sidebar, you will see a button for starting a new chat, a list with a history of your previous requests, and some settings (clear conversation, switch between light and dark mode) and additional information.

ChatGPT main screen.
Inside ChatGPT.

To start a new conversation, simply type in what you want to ask into the prompt, hit enter, and watch ChatGPT do its magic.

For example, in the chat below, I entered “Suggest 5 unique gifts for left-handed people” and this is what the tool created in mere seconds:

ChatGPT generated list
ChatGPT generated this list of unique lefty gifts in seconds.

Here are some additional things to note:

  • ChatGPT remembers your previous conversations. So, if you are working on an article, for example, you can enter new requests without referring to the article by name and the tool will know what you are referencing.
  • You can regenerate a response. ChatGPT will deliver you an entirely new reply, and you can toggle between the various generated responses.

tip

Sometimes, ChatGPT will just hang up in the middle of a reply.

If this happens, try typing “complete the above section.” into the prompt. ChatGPT will often resume its train of thought and complete its answer.

ChatGPT - Interrupted session
If ChatGPT hangs up mid-reply, try typing “complete the above section.” into the prompt to resume.

Part 4 – Generating New Content Ideas…Fast!

In this video, we look at how to use ChatGPT to generate great new content ideas for articles, blog posts, newsletters, videos, etc.

For example, when I typed “Generate 10 ideas for articles on effective content management with a brief description” into the tool, here is what ChatGPT returned in around 45 seconds:

ChatGPT request: Generate 10 ideas for articles on effective content management with a brief description
It took ChatGPT around 45 seconds to deliver the above list of content ideas for articles on effective content management.

Part 5 – Generating Your Article Outline

After generating a list of content ideas for articles on effective content management, the next step was to pick an article idea from the list and ask ChatGPT to generate an outline.

I picked the first article from the list and typed “Generate an outline for a comprehensive article on “5 Tips for Streamlining Your Content Management Process” into the tool.

Here is what ChatGPT returned in around 35 seconds:

ChatGPT: Generate an outline for a comprehensive article on 5 Tips for Streamlining Your Content Management Process
It only took ChatGPT around 35 seconds to deliver this article outline.

Part 6 – Generating Your Article Introduction

In less than a minute and a half, I had a list of great content ideas and an article outline.

Now it was time to begin building the actual article, so I asked ChatGPT to generate an introduction for the article.

Here’s what I got back after 15 seconds:

Chat GPT: Create an introduction for the article "5 Tips for Streamlining Your Content Management Process"
Chat GPT generated an introduction section for my article in 15 seconds.

This was so quick, that I asked the tool to regenerate a response and provide me with an alternative intro.

So, after one click, here’s what I got…

ChatGPT - alternative article introduction
ChatGPT generated an alternative introduction for my article with just one click.

So far, it’s not bad for less than 2 minutes work clicking a couple of buttons.

Let’s move on and…

Part 7 – Generating Your Article Conclusion

After using the tool to generate ideas, an outline, and a couple of great intros for my article, I decided to not only ask the tool to generate a conclusion section for the article in this video, but I also tested ChatGPT’s AI capabilities to recognize the context of our conversation and to “think outside the box” by giving it the following instruction:

Generate a conclusion for the above article. Include a call to action in the form of a haiku and write a limerick about content management.

As you will see in the video, ChatGPT not only understood which article I was referring to, but it only blinked its cursor once before delivering the following article conclusion in 20 seconds:

ChatGPT - Article conclusion.
ChatGPT delivered an article conclusion and composed a topic-related Haiku and a limerick in about 20 seconds.

Part 8 – Generating Your Article Content Sections

By now, I was feeling pretty confident that this tool can do anything you ask it to, so I thought, why not ask it to create all of the article’s main content section in one go and expand on each of the 5 tips listed in the outline?

So, I entered the following request “Expand on all of the above tips and generate an article between 1,500-2,500 words. Format each tip as a section heading enclosed in <h2> tags.”

ChatGPT immediately began spitting out some wonderful content, including bullet points, but then, around Tip #3 it choked and kind of hung up.

As you will see if you watch the video, I tried regenerating the response, and again it got to around Tip #3 and went no further.

I immediately began thinking that maybe it had exceeded the 2,500 word limit in my instruction, but when I checked using an online counter, it was only around 600 words, so I’m not sure what happened there.

Anyway, I got the section done by going back into the tool and asking it to expand on the missing tips, which it did in a total of about 4 minutes.

So, I copied and pasted the various responses I received into my swipe file and moved right along.

Part 9 – Reviewing Your AI-Generated Content

With all of the content sections generated, it was time to put my article together, which I did by logging into my website, creating a new post, pasting the content from the swipe file into the WordPress editor, deleting any irrelevant bits, then making some final SEO tweaks and formatting adjustments and saving it as a draft post.

In the video, I review the finished (and unpublished) article and discuss the process in a little more detail.

Part 10 – AI-Generated Content: Wrap-Up

Having allowed ChatGPT to create the entire article from start to finish, I then did some checks for content plagiarism to make sure the tool wasn’t just giving me someone else’s existing content, and asked it to perform some additional tasks before publishing the article by entering the following instructions:

  • Provide a post excerpt for this article
  • Write a meta description for this article and supply relevant tags.
  • Suggest an appropriate royalty-free image to be used as this article’s featured image.
  • Suggest synonyms for “content management process”
  • Provide sources to verify the claim that WordPress offers the ability to automate content scheduling.

Again, ChatGPT did an impressive job, as you can see if you check out the video.

Having satisfied myself that the content was indeed original and looking good, I then published the article.

After publishing the article (you can read the entire article here: 5 Tips For Streamlining Your Content Management Process), I then looked at the total time taken to create it (6 minutes), and whether the Ai tool met each of my goals (it did).

Finally, I wrapped up the video recording by discussing other potential content creation uses for the tool (e.g. generating recipes, creating video scripts, story plots for books, generating content with AI voice narrations, etc.)

ChatGPT - Hot And Spicy Air Fryer Chicken Recipe
Letting bots write your web content can surely make you hungry…so I asked ChatGPT to suggest a delicious air-fried chicken recipe for lunch.

Should You Use AI Tools To Create Your Website Content?

Whether or not you should use AI tools to create your website content depends on your specific needs and goals. If you are looking for a quick and easy solution for generating content, AI tools may be a good option.

However, if you want to ensure that your content is of high quality and truly unique, it may be best to stick with human writers.

And if you want your ai-generated content to rank well in the search engines (which, of course, you do), then make sure that it complies with Google Search’s guidelines for AI-generated content.

Ultimately, the decision will depend on your priorities and the resources you have available.

Benefits And Limitations Of Using AI-Generated Content

There are several benefits to using AI tools to generate content for your website:

  • Efficiency: AI tools can analyze data and generate written material quickly and efficiently, which can save time and effort for content creators.
  • Consistency: AI tools can produce content that is consistent in terms of tone and style, which can be beneficial for maintaining a cohesive brand voice.
  • Error-free: AI tools can generate content that is free of spelling and grammar errors, which can improve the overall quality of the material.
  • Cost-effective: In some cases, using AI tools to generate content may be more cost-effective than hiring human writers.

However, there are also some limitations to using AI tools for content generation:

  • Lack of creativity: While AI tools can analyze data and generate text, they may struggle to produce content that is truly creative or innovative.
  • Lack of emotional connection: AI-generated content may not be able to effectively connect with readers on an emotional level, as it lacks the human element.
  • Potential for bias: If the data that is used to train the AI tool is biased, the generated content may also be biased.
  • Legal issues: In some cases, using AI-generated content may raise legal issues, such as copyright infringement or plagiarism. It’s important to carefully review any generated content to ensure it is legal to use.

Conclusion

In today’s digital age, it’s more important than ever to have a strong online presence. One way to achieve this is by regularly publishing high-quality content on your website.

But if you’re struggling to keep up with the demands of creating new material, you might be wondering if there’s a way to automate the process.

That’s where AI tools come in. By leveraging artificial intelligence, it’s possible to generate written content that is not only error-free but also engaging and valuable for your audience.

In this article, we’ve looked at how AI tools can be used to generate quality content for your website, as well as the benefits and limitations of this approach.

And, of course, I let ChatGPT create all of the above sections 😉

ChatGPT: generate a conclusion for this topic: "Should You Use AI Tools To Create Your Website Content?"

ChatGPT: What are the benefits and limitations of this approach?

ChatGPT: Create an introduction for an article titled "Using AI tools to generate quality content for your website"

The Last (Human) Word

While I feel tools like ChatGPT have tremendous potential to save businesses time and money in content-related areas like content planning, content research, content production, SEO, and other ways I have yet to imagine, the ethical use of artificial intelligence tools is the subject of wide debate everywhere, Google says that using AI writing tools is against its guidelines, and there are other things to consider before filling up your website with AI-generated content, such as the limitations described above.

While ChatGPT created an impressive article in just a few minutes and with only a few clicks, I doubt if it could have created the article you are reading now…but I could be wrong!

After all, I’m only human.

***

Image: AI Hand Robot

5 Tips For Streamlining Your Content Management Process

Streamline your content management process, save time, and improve efficiency with these practical tips.

5 Tips For Streamlining Your Content Management Process

Looking to streamline your content management process? These practical tips will help you save time and create high-quality content.

Content Management Process: Man writing on a notepad next to laptop.Content management is a crucial aspect of running a successful business or organization. It involves creating, organizing, and distributing content across various channels and platforms.
However, managing content can be time-consuming and complex, especially if you don’t have a streamlined process in place.

In this article, we’ll cover five practical tips for improving efficiency in your content management process. By implementing these strategies, you can save time, reduce errors, and better engage your audience with high-quality content.

Tip #1: Automate Repetitive Tasks

One of the easiest ways to streamline your content management process is to automate repetitive tasks. This can save time and reduce the risk of errors, allowing you to focus on more important tasks.

There are many different tasks that can be automated, including publishing social media posts, sending email newsletters, and updating website content.

To set up automation, you’ll need to choose a content management system (CMS) or third-party tool that offers automation capabilities. Many popular CMS platforms, such as WordPress and Drupal, offer built-in automation features or plugins that you can use to automate tasks.

Alternatively, you can use specialized third-party tools to automate social media or email marketing tasks, such as IFTTT (If This Then That), Zapier, or Buffer.

Here are a few examples of tasks that can be automated:

  • Social media: You can use a tool like Hootsuite or Buffer to schedule social media posts in advance. This allows you to create and schedule content in bulk, rather than having to log in and post manually every day.
  • Email newsletters: If you have a regular email newsletter, you can use a tool like Mailchimp, Aweber, or ConstantContact to automate the sending process. Simply create your newsletter template and schedule it to go out at a specific time.
  • Website updates: If you use a content management system for your website like WordPress, you can use automation to publish new content at a set time or to update existing content on a regular basis.

When setting up automation, it’s important to carefully plan and test your workflow to ensure that everything runs smoothly. You should also consider the potential risks and limitations of automation, such as the potential for errors or the need for ongoing maintenance.

Tip #2: Utilize Project Management Tools

Effective content management involves coordinating the efforts of multiple team members and having a project management tool can help with this.

A project management tool allows you to organize tasks, set deadlines, and track progress in one central location. This can improve communication among team members and help ensure that projects are completed on time.

There are many different project management tools to choose from, ranging from simple to-do list apps to more comprehensive platforms like Asana, Monday, or Trello. When choosing a project management tool, consider your team’s size, workflow, and budget.

Here are a few ways to use a project management tool in your content management process:

  • Assign tasks: Use the tool to assign tasks to specific team members and set deadlines. This ensures that everyone knows what they are responsible for and helps prevent overlap or gaps in coverage.
  • Collaborate on content: Use the tool to share drafts and collaborate on content in real time. This can help speed up the review and approval process and improve the overall quality of your content.
  • Monitor progress: Use the tool to track the progress of each task and project. This can help identify bottlenecks and potential delays and allow you to make adjustments as needed.

Tip #3: Set Clear Guidelines For Content Creation

Having clear guidelines in place for content creation can help ensure consistency and reduce the time spent on editing and revisions. These guidelines can cover things like tone, formatting, and approval processes.

To create guidelines, consider the needs and goals of your audience, as well as the tone and voice that you want to convey. You should also consider the specific platforms and channels where your content will be published.

Once you have established your guidelines, it’s important to document them and communicate them to your team. This can help ensure that everyone is on the same page and that there is a consistent approach to content creation.

Here are a few things to consider when creating content guidelines:

  • Tone: Establish the tone and voice that you want to use in your content. This could be formal, casual, informative, humorous, etc.
  • Formatting: Determine the formatting standards for your content, including font size and type, headings, bullet points, and other formatting elements.
  • Approval process: Set up a clear process for reviewing and approving content. This can include establishing who is responsible for reviewing content, setting deadlines for review, and outlining the steps for making changes or approving content for publication.

Tip #4: Create A Content Calendar

Having a content calendar in place can help you plan and organize your content in advance. This can save time and reduce the risk of missing deadlines or forgetting to publish content. A content calendar can also help you identify gaps in your content and plan ahead for events or promotions.

To create a content calendar, start by determining the types of content you want to create and the frequency with which you want to publish it. You should also consider the needs and interests of your audience and any upcoming events or promotions that you want to feature in your content.

Once you have a list of content ideas, you can start organizing them onto a calendar. You can use a spreadsheet, a paper calendar, or a tool like Trello or Asana to create your calendar.

Here are a few tips for creating and using a content calendar:

  • Schedule content in advance: Plan out your content as far in advance as possible. This can help you take advantage of seasonal trends and plan around events or promotions.
  • Be flexible: While it’s important to have a plan in place, be prepared to adjust your calendar as needed. You may need to shift content around due to changes in your business or in response to current events.
  • Integrate with other marketing efforts: Make sure your content calendar aligns with your overall marketing strategy. This can help you create a cohesive message and ensure that all of your marketing efforts are working together.

Tip #5: Regularly Review And Optimize Your Content Management Process

Effective content management is a continuous process, and it’s important to regularly review and optimize your strategy. This can help you identify areas for improvement and make adjustments as needed to ensure that your content is meeting the needs of your audience.

To review and optimize your content management process, you can analyze data and gather feedback from your team and your audience. This can help you identify areas that are working well and areas that could be improved.

Here are a few tips for reviewing and optimizing your content management process:

  • Analyze data: Use analytics tools to track the performance of your content. This can help you identify trends and areas for improvement, such as which types of content are most popular or which channels are driving the most traffic.
  • Gather feedback: Ask your team and your audience for feedback on your content. This can help you identify areas where you are meeting their needs and areas where you may need to make changes.
  • Set goals: Establish specific goals for your content and track your progress towards meeting them. This can help you focus your efforts and ensure that your content is aligned with your overall business goals.
  • Experiment: Don’t be afraid to try new things and see how they work. This could include testing different types of content, experimenting with different formats or channels, or looking for ways to improve your workflow processes.
  • Identify bottlenecks: Look for bottlenecks in your content management process that may be causing delays or inefficiencies. This could include things like a lack of clear guidelines, inadequate resources, or overly complex approval processes.
  • Make changes: Based on the data and feedback you have gathered, make changes to your content management process as needed. This could involve adjusting your content strategy, implementing new tools or processes, or making changes to your team structure.
  • Continuously review: Make reviewing and optimizing your content management process a regular part of your content strategy.

Streamline Your Content Management

In this article, we’ve covered five tips for streamlining your content management process.

By automating repetitive tasks, utilizing project management tools, setting clear guidelines for content creation, implementing a content calendar, and regularly reviewing and optimizing your process, you can save time and improve the efficiency of your content management efforts.

So take these strategies to heart, and see how they can help you manage your content with ease.

Streamline your content flow
Efficiency is key, my friend
Try these tips today

(AI-generated Haiku)

There once was a content manager, whose job was quite a go-getter.
She streamlined her process, and saved lots of stress,
Now her team is much more productive, no debtor!

(AI-generated limerick about content management)

***

Note: This article is entirely AI-generated. The entire process from start to finish is described in this article: Generate Web Content Using AI.

Image: Man Writing

Effective Content Management: Documenting Procedures

Learn how to improve your content management practices by documenting procedures effectively.

Documenting Procedures For Effective Content Management

Learn how to improve your content management practices by documenting procedures effectively.

Documenting Procedures - BindersIn this article, we will explore the importance of documenting procedures and how to effectively create and maintain them.
We’ll also walk you step-by-step through an example of documenting a procedure when creating content documentation for your business.

***

Why Document Procedures?

Writing clear and comprehensive procedures is crucial for the smooth operation of your organization.

Not only do well-documented procedures provide a roadmap for your employees and team members to follow, but they also provide a record of the steps taken to complete a task, serve as a useful reference for new hires, set standards of quality and ensure consistency in work processes, and improve your overall content management practices.

What Is The Best Way To Document A Procedure?

There are a few key steps to documenting a procedure effectively:

  1. Identify the purpose of the procedure: Clearly stating the purpose of the procedure will help ensure that it is followed correctly and will be useful for those who need to follow it.
  2. Outline the steps involved: List the steps involved in the procedure in a logical order, using numbered or bullet points. Make sure to include any necessary details, such as specific tools or equipment that will be needed.
  3. Use clear and concise language: Use language that is easy to understand and avoid using jargon or technical terms that may not be familiar to all readers.
  4. Include any necessary warnings or precautions: If there are any potential hazards or risks associated with the procedure, make sure to include them in the documentation.
  5. Include any necessary illustrations or diagrams: If a visual aid would help to explain the procedure more effectively, consider including a diagram or illustration.
  6. Test the procedure: Before finalizing the documentation, it can be helpful to test the procedure to ensure that it is clear and easy to follow.
  7. Review and update the documentation regularly: Procedures may change over time, so it is important to review and update the documentation as needed to ensure that it remains accurate and up-to-date.

An Example Of Documenting A Procedure

While the summarized steps shown above are helpful, the actual process of documenting a procedure effectively can sometimes be challenging.

To illustrate this, we’ll go through an actual example and show you how we add new videos to our training sites.

In addition to ContentManagementCourse.com, we also run two online training sites:

As part of our content management processes for these sites, any time WordPress releases a new version of its core software, we add information about the new version features and improvements, including video tutorials covering these features to the above sites as follows:

  • WPMasterclasses.com – Add the videos to our video course on building a WordPress site, and update the product information page, the site’s video lesson counters, and the page listing recently added videos.
  • WPTrainingManual.com – Publish a post about the latest WordPress version.

Note: We write our own content for those sites but we outsource the creation of the WordPress update videos to an external supplier.

So, when our video supplier notifies us that new videos covering the new WordPress version release are available, we then add these videos to our video training site and create a post about it on our WordPress training site.

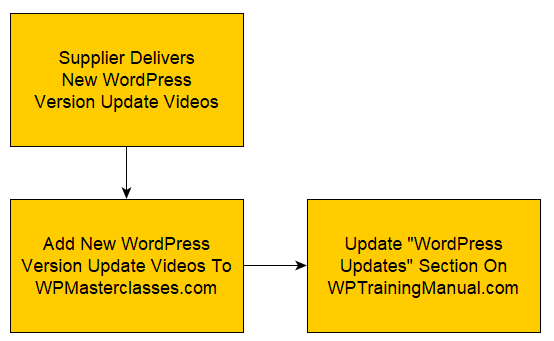
Simple chart outlining process of updating training sites with new content.
When new videos are released, we update the content on our training sites.

Adding videos to a couple of sites and creating a post about it sounds simple and straightforward enough.

However, suppose we want to assign these tasks to a newly-hired team member or outsource it to a third-party service provider.

How would we communicate this process effectively to ensure that whoever does the work will perform all tasks consistently to the standards of quality that we ourselves maintain and expect?

Obviously, this involves creating some form of documentation, but how detailed does this documentation have to be?

Let’s walk through the actual process and see.

Documenting Processes vs Documenting Procedures

The simple diagram shown above explains what we want to do whenever a new version of WordPress is released (i.e. add videos to our training sites and create a post about it).

Here is the diagram again:

Simple chart outlining process of updating training sites with new content.
This is what we want done.

This diagram shows what we want done, but doesn’t explain any of the processes involved in adding video content to the training sites, creating a post about it, and making sure that all relevant information is included for our users and formatted correctly.

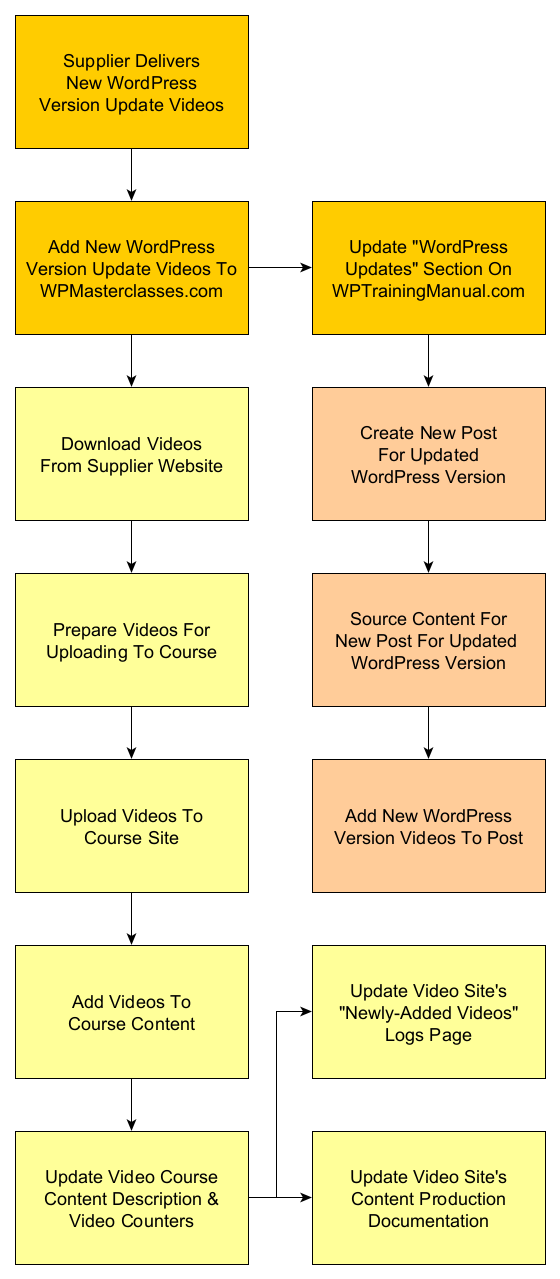
So let’s expand the diagram and include these processes as shown in the flowchart below:

Documenting Procedures: Flowchart - Adding new video content to training sites.
These are the main processes we need to be done to add new video content to our training sites.

In a nutshell, these are the processes we need done:

  1. When our video supplier notifies us that a new set of videos is available, we then…
  2. Log into the supplier’s website and download a zip file containing the videos and any additional information included with those files to our computer.
  3. Extract the video files, rename these to match our course website requirements, and prepare the videos for uploading.
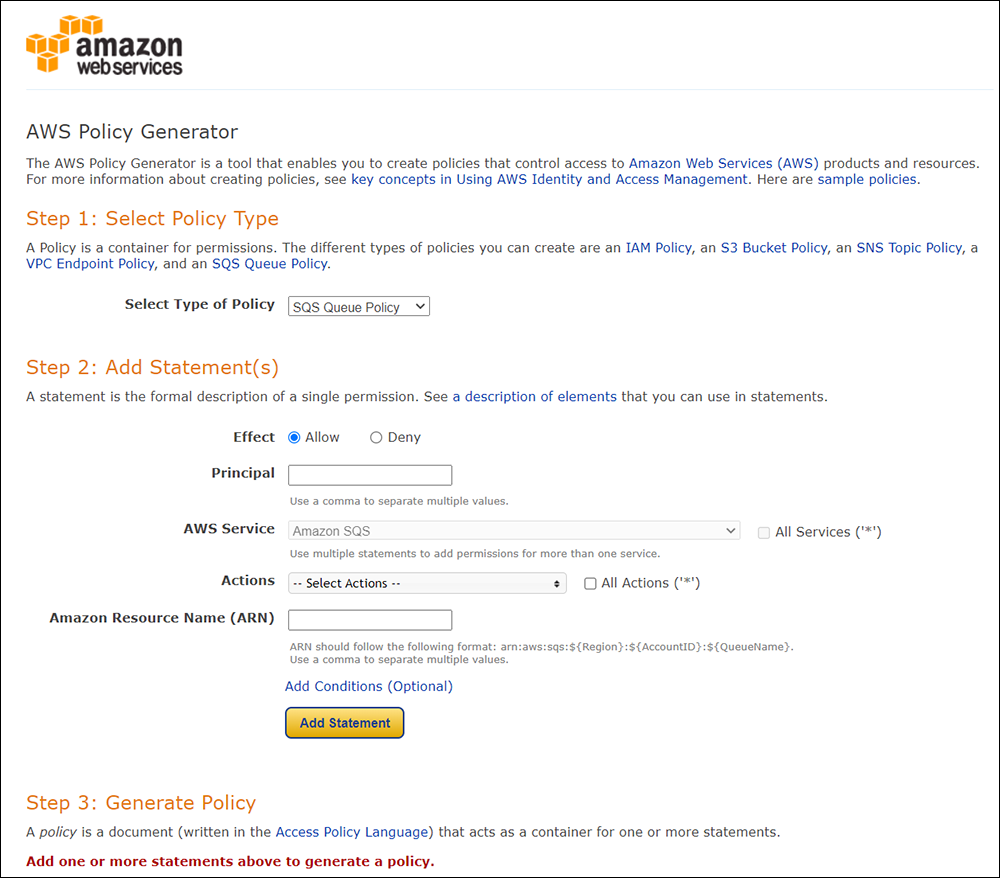
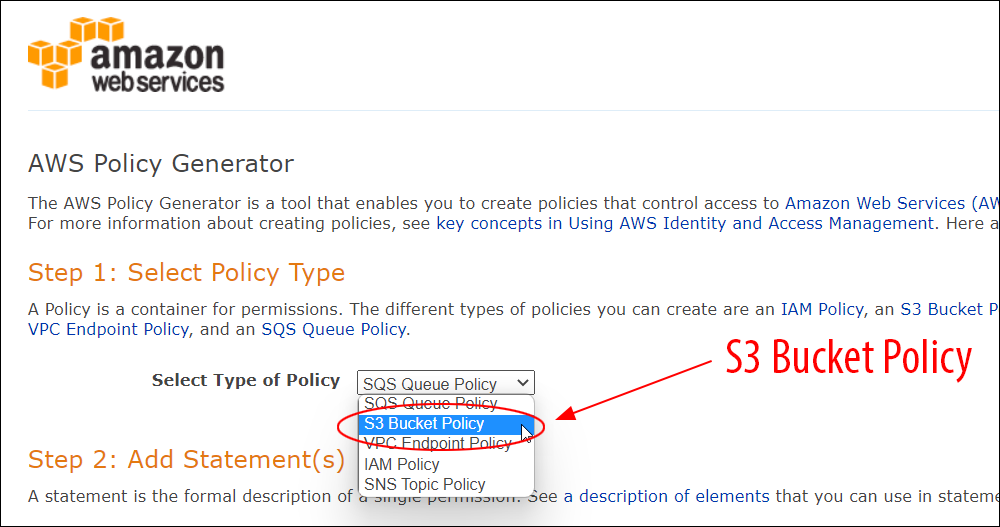
  4. Upload the videos to our video course site via Amazon S3.
  5. Create new course pages for our members and embed the video file URLs into the course content.
  6. Update the product information page that non-members see when they visit the site, including the video lesson counters on the site’s home page and the All Access Pass Membership pages.
  7. Update the Video Updates Log page that informs users about the latest videos added to the site.
  8. Update the video site’s content production documentation (so we can track what content is added to the site).

Once the above is done, we then also…

  1. Source content about the new WordPress release from the official WordPress site.
  2. Create a new post for the updated WordPress version on the WordPress Updates section of WPTrainingManual.com
  3. Embed the video content into the post and publish.
  4. Promote the new post.

The above lists the processes we need to go through every time WordPress releases a new version.

It is, however, still only an “overview.” While it can serve as a guide to help our newly-hired team member or outsourced person understand what we need them to do, it doesn’t specify “how” we want all of these processes to be effectively carried out.

This can lead to confusion, errors, and time-wasting delays due to the lack of detailed instructions, and low-quality output.

So, the next step is to turn all of the above processes into documented step-by-step procedures that anyone can follow to ensure that all of the required tasks are carried out effectively to consistently high standards and performed correctly and efficiently.

Documenting Procedures: Creating Step-By-Step Documentation

In addition to the steps provided earlier, here is the process we suggest following to create step-by-step procedures for your team or for outsourcing:

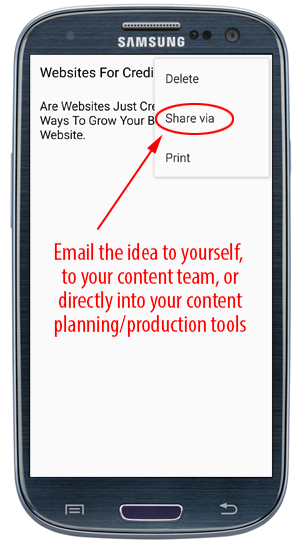
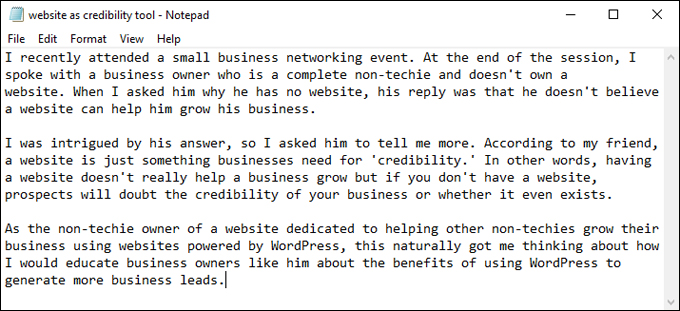
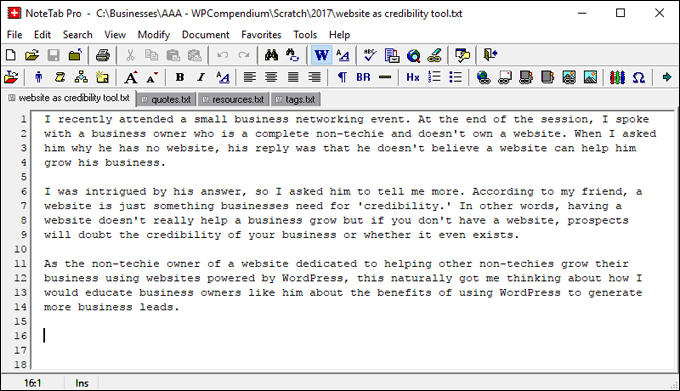
  1. As you go through the process yourself, initially record the steps involved in the process (tip: record these in a plain text file using simple bullet-point lists).
  2. The next time you repeat the process, follow the steps on your bullet-point list and fill in any “missing gaps” you identify as you work through the processes.
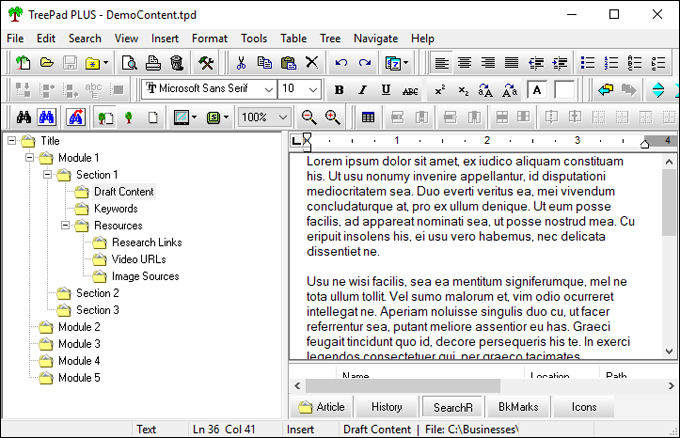
  3. Transfer the contents of your list to a shareable format (e.g. a Word or Google Doc document, an online page on a private section of your site reserved for staff training, etc.)
  4. The next time the task needs to be done, give your list to someone else and ask them to follow the documented instructions. Note down any areas of difficulty experienced by the other person, particularly areas like not knowing where to access login details, not knowing how to use certain software or tools, or not knowing how to perform certain tasks (e.g. how to create a post in WordPress).
  5. Use the information obtained from the previous step to expand your documentation (e.g. add links to other documents containing login details, link to software tutorials or other training sites, add screenshots or video screencasts to illustrate certain steps, etc.)
  6. Give your expanded document to someone else and repeat Step 3, i.e. ask them to complete the task following the documentation. Repeat this process until someone else can perform all of the required tasks successfully on their own by simply following the documentation.
  7. Add the documented procedure to your main content documentation and periodically review and update the information to keep it current, relevant, and accurate.

Let’s show you what “Steps 1 to 3” above would look like as a documented procedure using the example in the section below…

===  START EXAMPLE DOCUMENTATION  ===

[Note: Begin this document by providing an “Overview” of the 12 processes involved in performing and completing the task, as described earlier.]

WordPress Videos – New Version Releases

This section explains how to:

Tools And Resources Required To Perform This Task

The following resources, sites, services, tools, etc. are required to complete this task (contact your manager for access to all login details, software licenses, etc.):

  • Login details to PLR4WP.com  (video supplier website).
  • Access to hard drive folders: C:\Business\Businesses\A - WPMasterclasses\01-Vids Various\PLR4WP and C:\Business\Businesses\A - WPMasterclasses\00-Production\WPMC-0019 - BuildWP\00-videos
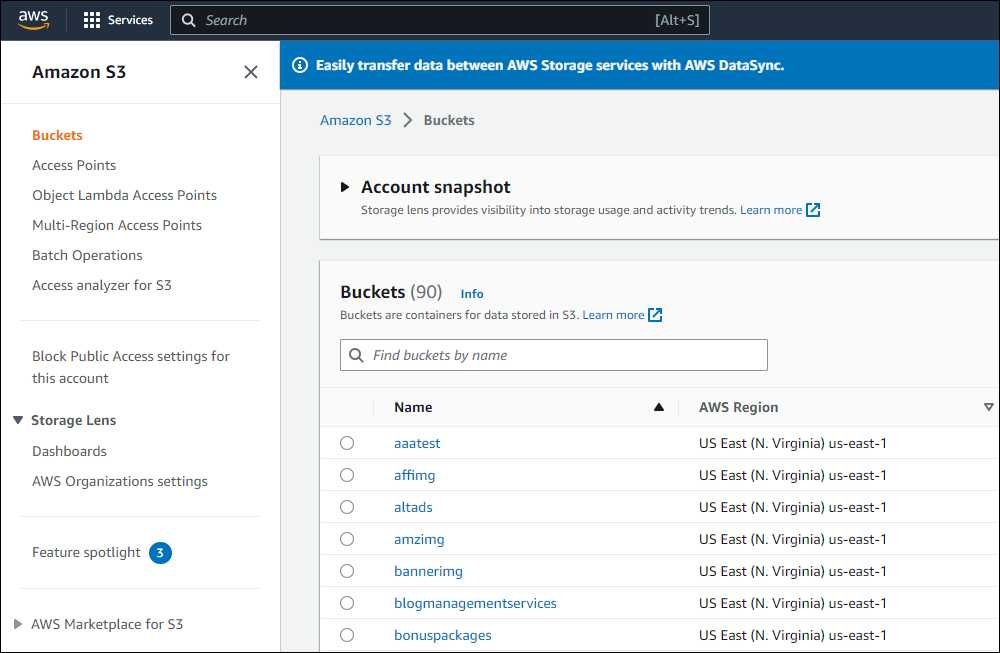
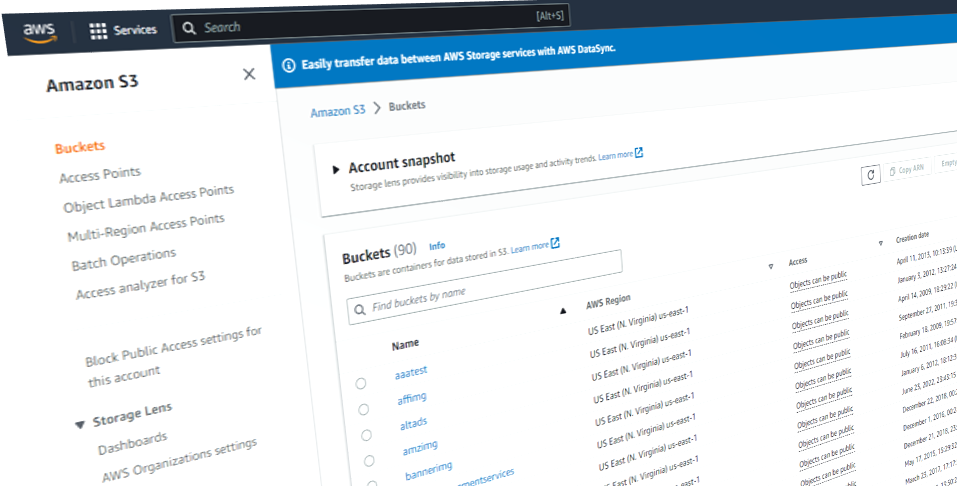
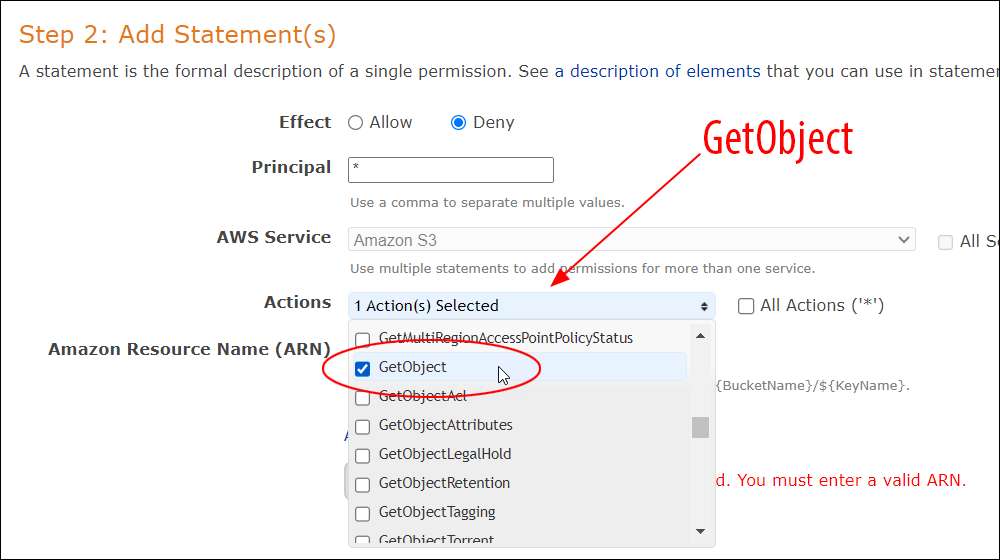
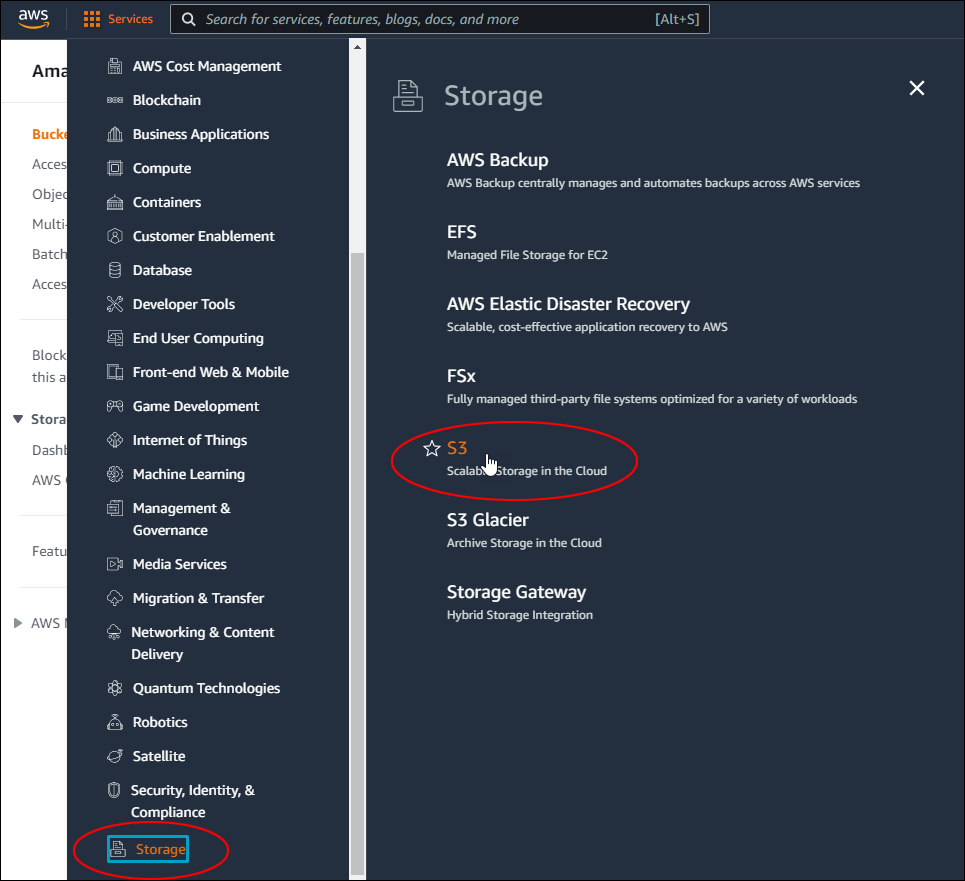
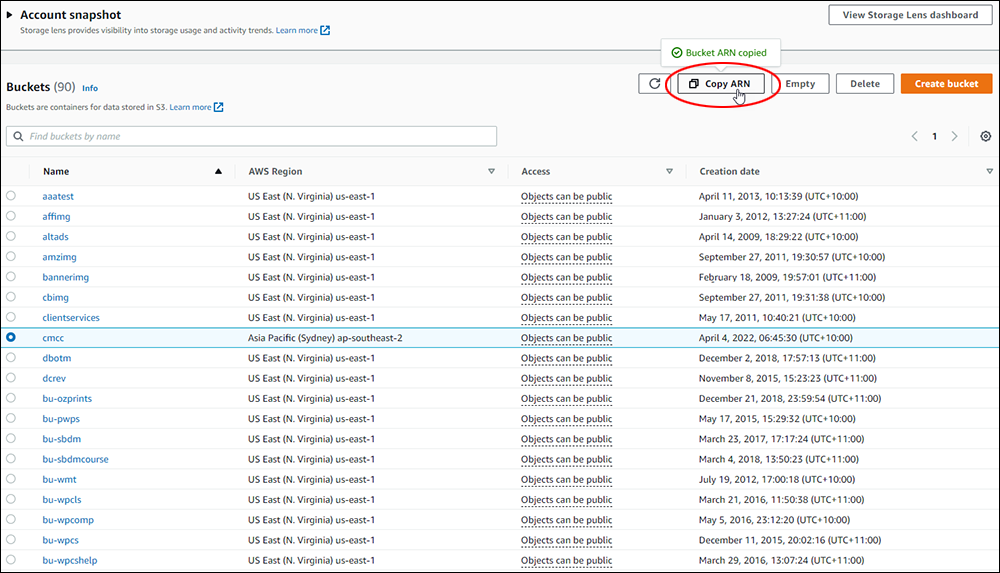
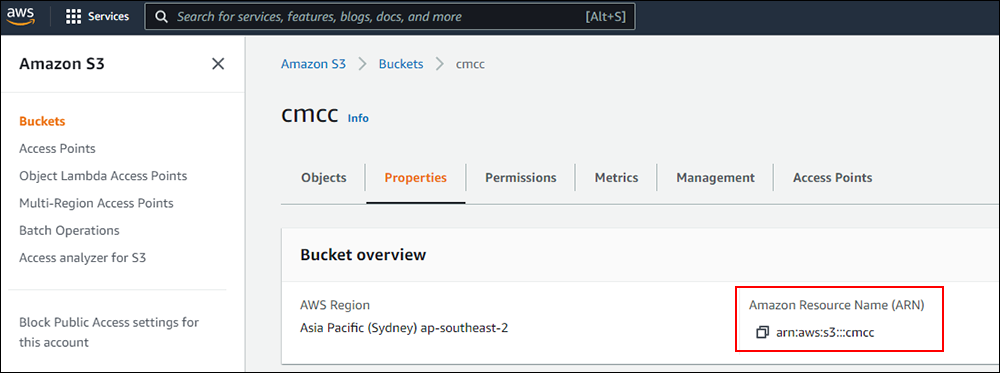
  • Access to Amazon AWS S3 account: Bucket = “wpmasterclasses” https://wpmasterclasses.s3.us-east-1.amazonaws.com/vids/0019
  • Admin access to sites: https://wpmasterclasses.com and https://wptrainingmanual.com (if you are a site administrator, see “Assets” spreadsheet for login details. If you are not a site administrator, then contact your manager for login details).
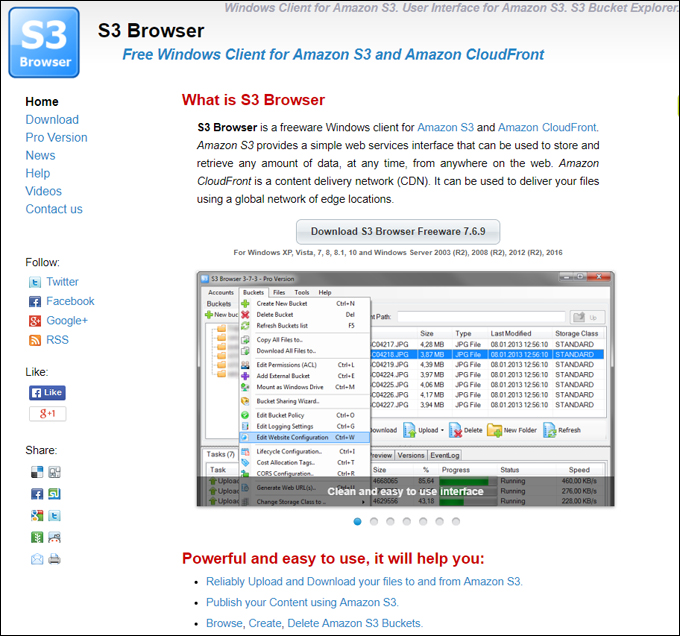
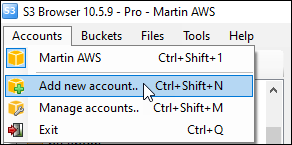
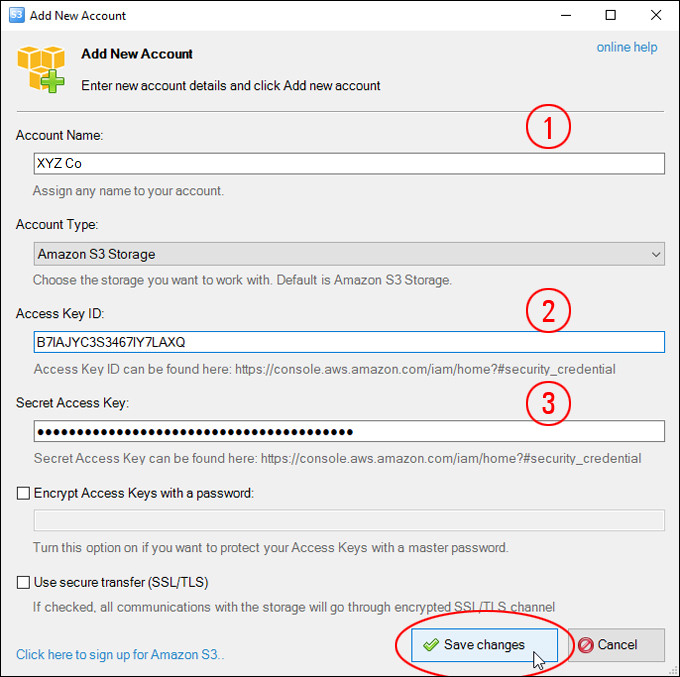
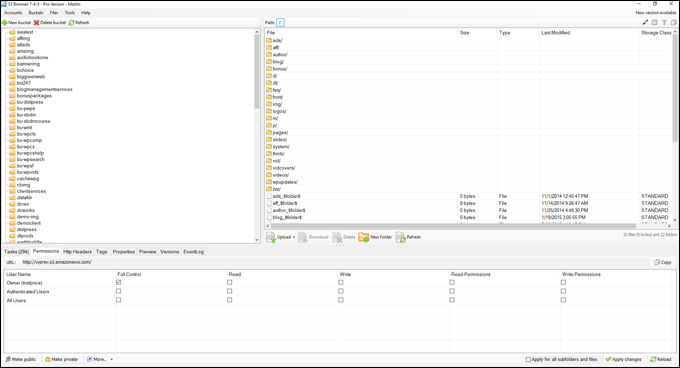
  • S3 Browser
  • S3 Media Maestro plugin for WordPress (use the supplied shortcode shown in the documentation).
  • NoteTab Pro text editor.
  • Photoshop image editing application.
  • WPMasterclasses Video Course Production Documentation master spreadsheet (Excel).

1 – Adding New Videos to WPMasterclasses.com

Destination Video Course

Add the WordPress version update videos to the following video course:

NEW WORDPRESS VERSION Videos – Procedures

1) Download And Prepare Video Source Files

When an email notification is sent from the video supplier informing us that videos for a new WordPress version or video updates are available, do the following:

  • Log into https://members.plr4wp.com/vol-01sn4/
  • Create a new folder with the WP version number (note: ignore periods, so “WP61” not “WP6.1, “WP62” not “WP6.2”, etc.) inside hard drive folders C:\Business\Businesses\A - WPMasterclasses\01-Vids Various\PLR4WP and C:\Business\Businesses\A - WPMasterclasses\00-Production\WPMC-0019 - BuildWP\00-videos
  • Download video zip files from the supplier website into the hard drive folder C:\Business\Businesses\A - WPMasterclasses\01-Vids Various\PLR4WP
  • Extract all videos into the above-created folder. Note: the extracted files contain various folders (transcripts, raw video files, audio files, etc.). The video files we need to upload are the finished .mp4 files (not the whitelabel version with the included source files).
  • Duplicate the extracted .mp4 video folder and add “renamed” to the file name.
  • Rename .mp4 videos to the filename format wp-version-videonumber-concisefilename (e.g. from “vol1-vid3.18d-whats-new-in-wp-6.1-document-settings-changes” to “wp-61-d-document-settings-changes”).
  • Move renamed .MP4 videos to the WP version folder created in C:\Business\Businesses\A - WPMasterclasses\00-Production\WPMC-0019 - BuildWP\00-videos
  • Notes: some videos include accompanying notes (e.g. scripts, checklists, or templates). Add these to this hard drive folder: C:\Business\Businesses\A - WPMasterclasses\00-Production\WPMC-0019 - BuildWP\02-dl

2) Upload Video Files To S3 Bucket

After downloading the video files from the video supplier’s website and preparing the video source files for uploading, the next step is to upload all the video files to the correct S3 bucket on our Amazon S3 account.

To do this, follow the steps below:

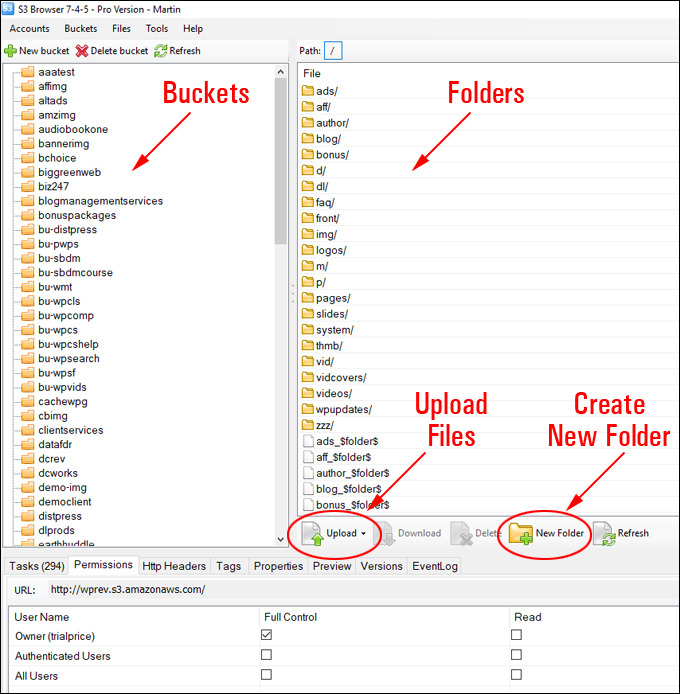
  • Launch S3 Browser
  • Go to Amazon S3 bucket = wpmasterclasses > vids > 0019
  • Create a new folder in S3 with the same name as the video download folder (e.g.: wp61) inside the course folder 0019
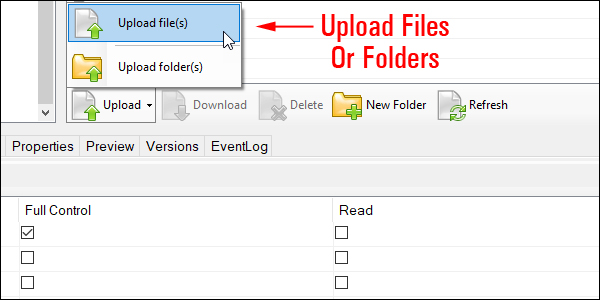
  • Upload all videos to the above bucket.
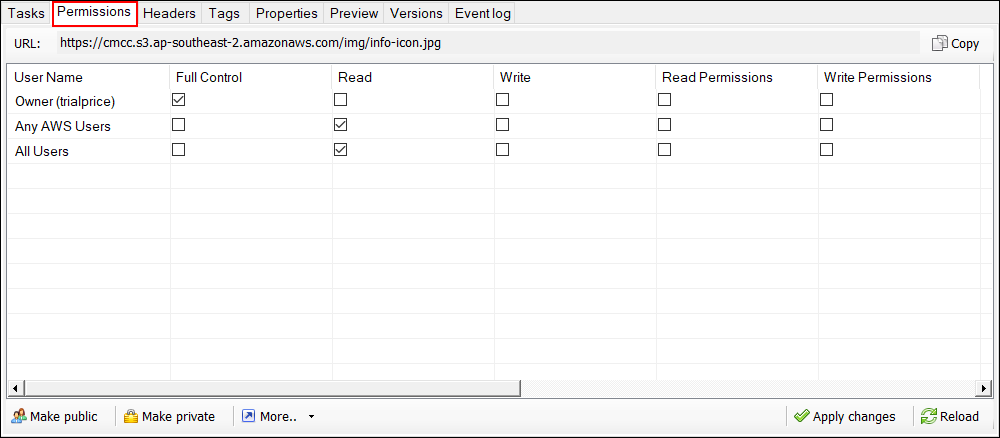
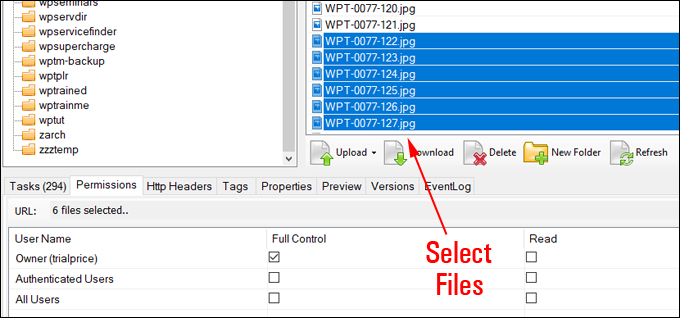
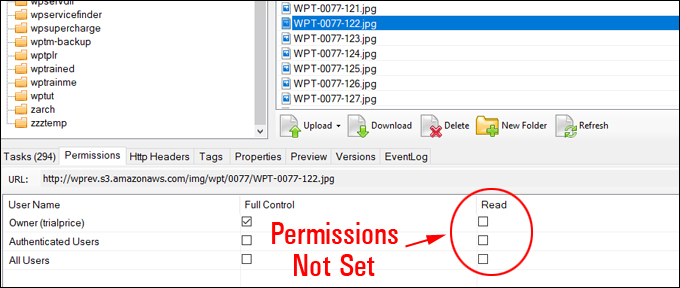
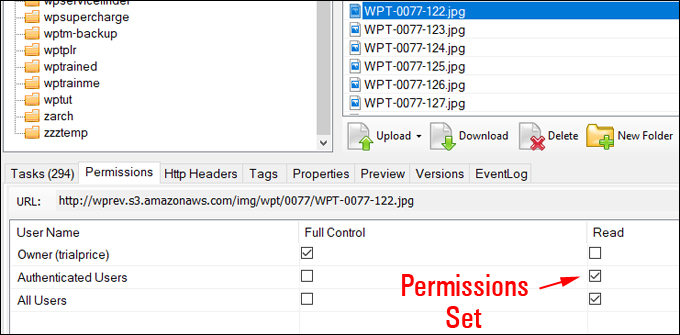
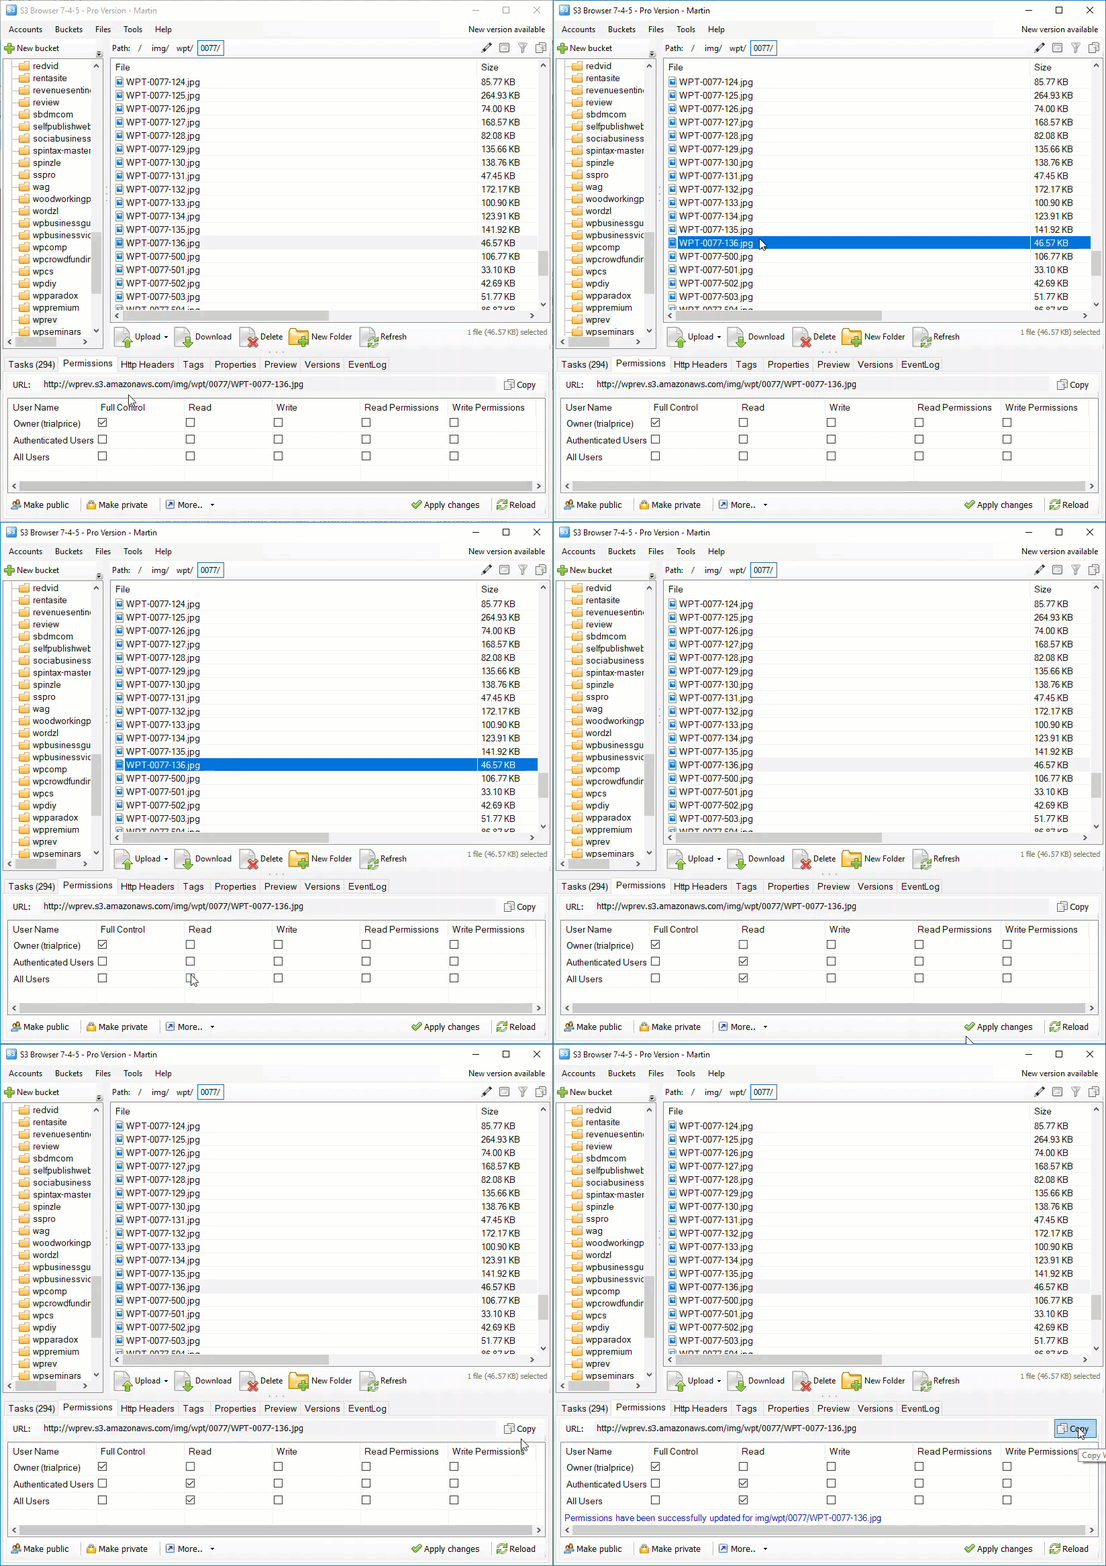
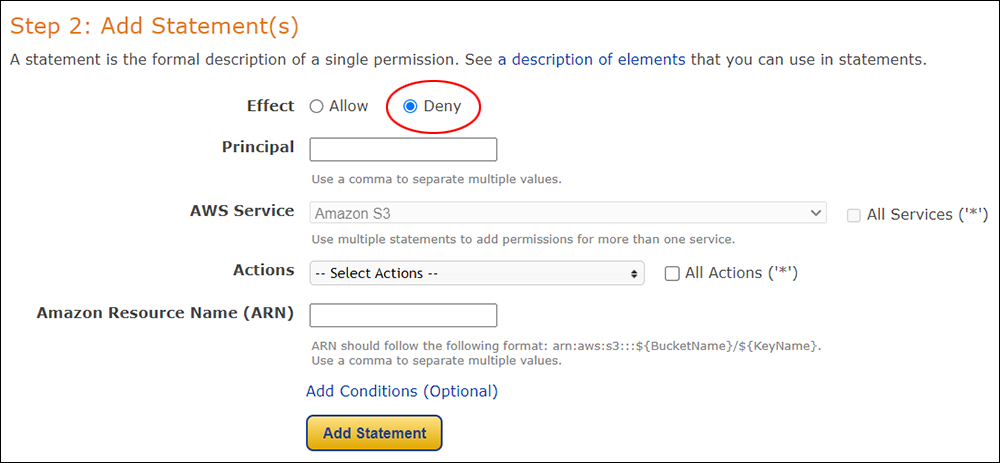
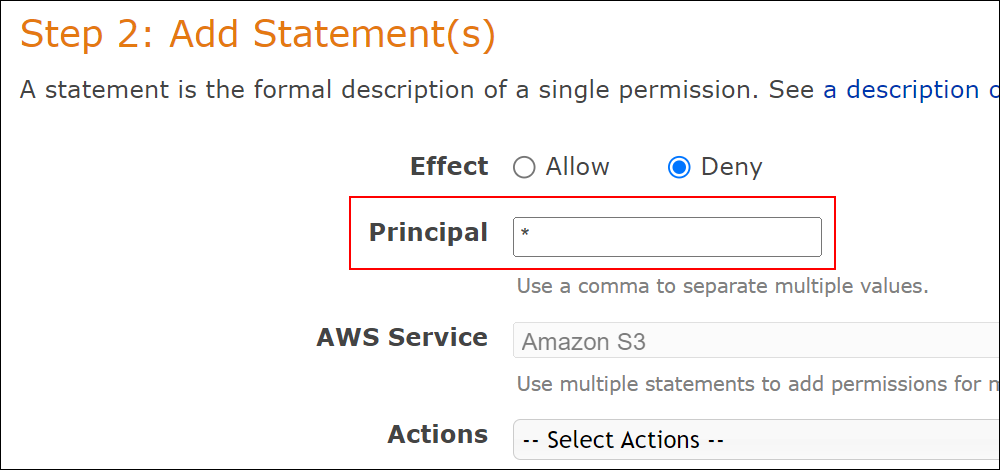
  • After all video files are uploaded, select all files and set permissions as follows:
    • Owner = Full Control
    • Any AWS Users = Read
    • All Users = Read
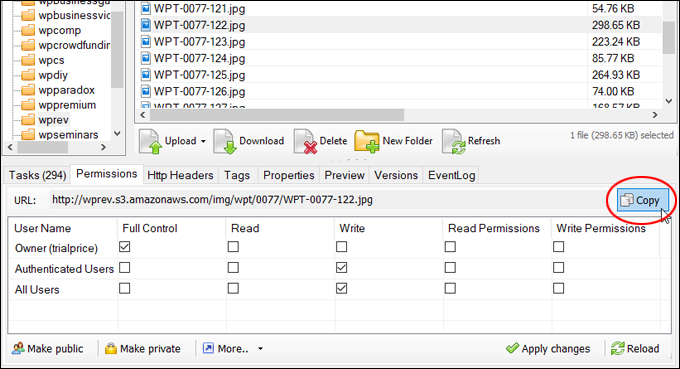
  • After setting permissions for files inside the S3 bucket, select all files and copy their URLs to your clipboard.

3) Prepare Content For Video Course

Once all the video files have been uploaded to our S3 account, file permissions have been set correctly, and video file URLs have been copied to your clipboard, the next step is to create a text file containing all the information we will need to update our course content and product pages.

To do this, follow the steps below:

  • Open up NoteTab Pro text editor, create a new text file, and paste all video URLs into the text file. All videos should have the following format: https://wpmasterclasses.s3.us-east-1.amazonaws.com/vids/0019/foldername/filename
  • Save this text file as wpversion-notes (e.g. “wp61-notes”) into the WP version folder created in C:\Business\Businesses\A - WPMasterclasses\00-Production\WPMC-0019 - BuildWP\00-videos
  • Open up the folder containing the renamed video files inside C:\Business\Businesses\A - WPMasterclasses\00-Production\WPMC-0019 - BuildWP\00-videos. Switch the folder view to “details.” Below the list of video URLs add the following details about each video:
    • Video Title – Use the format WP Version: Part X - Short Title
    • Video Description – You can obtain this by watching the first few seconds of each video or opening the video transcripts that accompany the videos.
    • Video Duration – Use the format (XX:XX) for the duration in minutes and seconds.
  • Also, add the following information to the text file (to be added to WPMasterclasses Video Production master spreadsheet):
    • Total number of new videos
    • Total duration of new videos
  • Proof all of the content (spelling, punctuation, accurate descriptions, video duration, etc.), as this description will be used in various locations (video course, product page, and video update post).
  • Save the text file when done.

4) Add Video Content To Video Course

After uploading all the video files to Amazon S3 and preparing all the information you will need to describe the content of these videos, the next step is to add this information to the video course.

To do this, follow the steps below:

  • Log into WPMasterclasses.com and select the WP Courseware > Courses menu option from the main menu to bring up the Courses screen.
  • Locate the How To Build A WordPress Site Fast course and click Edit.
  • Scroll down to the Course Builder section and expand Module 3 - New WordPress Features.
  • Right-click on the top entry and select ‘Open link in new tab’ from the menu. This will load the entry into the post editor.
  • Switch to the ‘Text’ tab, then select all the content and copy it to your clipboard.
  • Create a new text file in your text editor and paste the content from your clipboard into this file. You will use this as your template for adding new videos to the course module.
  • Close the existing course unit window after copying and pasting the item’s contents into your text file.
  • Return to the Course Builder section, scroll down to the bottom of the section and click on the “+Add Unit” button to create a new lesson page.
  • Select and copy all the contents from your text file. In the course unit post, switch to the ‘Text’ tab and paste in the content from your clipboard.
  • Switch to the Visual tab and do the following:
    • Copy and paste the video description from your ‘WPXX-Notes’ text file into the course unit’s content section. Make whatever adjustments are necessary to the body section of the content.
    • Change the highlighted section of the video’s filename in this line to match the correct location of the uploaded video (see list of video URLs copied into your text file): [s3mm type="video" files="vids/0019/wp60/wp-60-a-intro.mp4" /]
    • Copy and paste the video title into the course unit’s Title field. Make it as short as possible (this title will appear on the Course Lessons menu for users.
    • Switch the course unit post to ‘Text’ tab, then select and copy all the content to your clipboard and click ‘Add Unit’.
    • This will load another course unit black post into your window. Paste in the contents of your clipboard, make the same adjustments described above, and repeat this process until you have added all the videos to the course.
    • Drag the newly-added video lessons into their correct positions on the Course Builder module section to arrange course lessons so that newer videos display at the top of the course module.
    • Click the Update button when done to save your course settings.
    • Click on the View Course link at the top of the page to bring up the video course module as users will see it.
    • Click on each of the new video lessons and check that the correct video has been added and plays fine. If you spot any errors (i.e. wrong video, video not playing, typos in content, etc.), fix these by editing the course units and resaving, then test again.

5) Updating Video Course Product Page

After adding the videos to the course, the next step is to update the product page with information about the additional videos.

To do this, follow the steps below:

  • While logged into WPMasterclasses.com, navigate to the video course page (How to Build A WordPress Site Fast) and click on the Edit product link in the WordPress admin dashboard menu to edit the product page.
  • Copy all of the video description information from the “WPXX-Notes” file to your clipboard.
  • Scroll down to the ‘Module 3 – New WordPress Features & Updates’ section of the page and paste in the video description list from your clipboard.
  • Make sure the content is formatted correctly:
    • WordPress – Version X.X – Add an H4 heading tag
    • Titles – Bold
  • Proof content and formatting.
  • Scroll down to the Course Duration and Video Lessons fields. Update these fields with the additional number of videos and new total duration (hours and minutes).
    • Notes: Calculate video course duration by dividing the total minutes by 60 (to get the hours), then multiplying the whole integer by 60 and subtracting this number from the total to get the minutes. For example, 397 minutes = (397/60=6.61 = 6 hours. 6 x 60 = 360. 397-360 = 37 minutes. Total video course duration = 6 hours, 37 minutes).
    • You can get the total number of minutes from the video course production spreadsheet after completing the next step below.
  • Save to update the product page with the new information.
  • Click on the View Product link and open the link in a new tab to visit the product page. Perform a visual check to make sure that everything looks ok, i.e.:
    • Video content
    • Updated number of video lessons
    • Updated course duration

6) Update Video Course Production Documentation

After updating the video course and product page, the next step is to update the number of videos and video duration in the video course production documentation so we have an accurate inventory of the site’s content.

To do this, follow the steps below:

  • Open the Video Course Production Documentation spreadsheet.
  • Scroll to Row 21 (WPMC-0019).
  • Add the number of new videos to the number shown in the Lessons cell (Column G).
  • Add the additional number of minutes to the number shown in the Durations cell (Column H).
  • Scroll to the top of the spreadsheet. Note the following (you will need these numbers for the next step below):
    • Column G, Row 1 = New total number of video lessons.
    • Column Z, Row 1 = New total number of hours of video content.
  • Save the spreadsheet.

7) Update Video Counters

After updating the product page, the next step is to update the number of “Video Lessons” and “Hours of video” details on the home page and the ‘All Membership Access’ product page.

To do this, follow the steps below:

  • While logged into WPMasterclasses.com, click on the logo on the top left corner of the site to visit the home page.
  • Click on the Edit with WPBakery Page Builder link in the dashboard admin menu.
  • Scroll down to the Pie Charts. Edit the following:
    • Video Lessons – Click Edit Pie Chart and update the number of video lessons with the number shown in Column G, Row 1 of the Video Course Production Documentation spreadsheet. Click Save to update the pie chart.
    • Hours of video – Click Edit Pie Chart and update the number of video hours (whole integers only) with the number shown in Column Z, Row 1 of the Video Course Production Documentation spreadsheet. Click Save to update the pie chart then Close to exit the edit screen.
    • Click Update when done to save your new page contents.
  • Repeat the above process to update the pie charts on the All Access Pass Membership product page.

8) Update The Video Updates Log Page

After updating the video counters on the home page and the ‘All Membership Access’ product page, the last step is to add an entry about the newly-added videos to the content to the Video Updates Log page of this site.

To do this, follow the steps below:

  • While logged into WPMasterclasses.com, go to the Video Updates Log page and click on the Edit Page link to edit the page.
  • The easiest way to create a new entry for this page is to select and copy an existing entry from this page (preferably one where updates were made to the same course).
  • Paste this at the top of the content. Update the date and information (i.e. number of videos added and video topic).
  • Update the page to save the new content.
  • Click on the View Page link to inspect the page and make sure that all the information is correct.

This completes the update tasks for new WordPress version release videos on WPMasterclasses.com.

The last step is to create a new post about the updated WordPress version on WPTrainingManual.com.

2 – Create A New WordPress Release Post On WPTrainingManual.com

Create a post for every new major WordPress version release and publish it under the WordPress Updates section of WPTrainingManual.com.

1) Content Planning & Research 

  • Use the following sources to perform content research for the new post:
  • Create a new folder in your hard drive called wp-xx (where xx=version number. For example, WordPress 6.0 = wp-60) inside this directory: C:\Business\Businesses\A - WPTrainingManual\Content\Updates.
  • Right-click and save any new version release images and videos to be used in the post content to the newly-created folder.
  • In Amazon S3, create a new folder inside the wp-versions bucket located here https://wptrainingmanual.s3.us-east-1.amazonaws.com/elite/tut/wp-versions/. Name the bucket wp-xx (where xx=version number. For example, WordPress 6.0 = wp-60).
  • Upload media content to be used in the post to this bucket. Set the correct permissions, then select all file URLs and copy these to your clipboard.
  • Open the text file created earlier containing notes about the new version and paste the file URLs from your clipboard into the text file. Save the file.

2) Create A Featured Image

Each new version release post requires a featured image with the new version number.

To do this, follow the steps below:

  • Launch Photoshop and open the file WPTM-VideoUpdates.psd in this folder: C:\Business\Businesses\A - WPTrainingManual\Images\FeaturedImages-WPUpdates
  • Edit the text layer and add the correct version number to the slide.
  • Name the file wpxx (where xx=version number without periods or dashes. For example, WordPress 6.0 = wp60) and save the image file to the same folder.
  • Upload this image as the Featured Image of the post (see next section).

3) Create A New Post In WordPress

The easiest way to create a new post for WordPress version updates is to duplicate an existing post, keep the post content structure intact and edit the content to match the new version number.

To do this, follow the steps below:

  • Log into WPTrainingManual.com. From the WordPress Dashboard, select Posts > All Posts and then filter the table of posts by Category > WordPress Updates.
  • Hover over an existing post entry and click Clone to duplicate the post.
  • Click Edit to open the duplicate post in the WordPress Editor.
  • Edit the post as follows:
    • Change the Post Title
    • Change the Post Slug
    • Change the Post Tags
    • Upload the Featured Image created in the previous step.
    • Update the Post Content.
    • Add all media files saved earlier to the Post Content.
    • Add links from the post to relevant tutorials (e.g. if the post mentions a new feature of the WordPress Block Editor, then link the content to the WordPress Block Editor tutorial).
    • Fix the post’s meta description.
    • Save and publish the post.
  • After publishing the post, visit the WordPress Updates section and make sure that the new entry displays correctly in the grid list, then click through and check to make sure that all the post content is ok.
  • Promote the post.

===  FINISH EXAMPLE DOCUMENTATION  ===

Creating Hands-Free Step-By-Step Documentation: Benefits & Challenges

The above example illustrates the kind of basic documentation your business should aim to create before handing the responsibility for performing the task to someone else, whether in-house or outsourced.

In addition to text instructions, you can add screenshots, videos, etc. to the above documentation and publish it as an online tutorial inside a private or password-protected area of your site (e.g. give staff-only access to the training and documentation).

After documenting the above steps, make sure that the process can be run repeatedly to deliver consistent results, and periodically review and update the content.

info

Creating detailed documented procedures helps you to see what challenges you will need to address when choosing to outsource the task.

With the above, for example, some of the challenges to work out before outsourcing the task include:

  • Storing media files, notes, content production logs, etc. on a hard drive: In terms of document storage, it would probably be better to move these to the cloud and use collaborative/shared applications with separate user logins.
  • Access to tools and applications and competency in using these: The above process requires using licensed tools like Photoshop and S3 Browser, having basic skills in Photoshop, WordPress, etc., and having admin access to your website in order to perform certain functions.
  • Managing/sharing logins and passwords. For services that require access to credentials (e.g. Amazon S3), it’s important to set things up so that the security of important business accounts is never compromised.
  • Workflow processes. It’s important to work out beforehand how processes fit into your overall workflow.
  • Related processes and procedures also need documentation. Processes often involve additional or related processes and subprocesses, and these also need to be documented. For example, the last task in our example (“Promote the post”) is a whole separate process in itself, as documented in our Content Promotion training module.

Documenting Procedures: Final Thoughts

Creating detailed documented procedures can be very time-consuming but it’s vitally important for the sustainability, growth, and long-term success of your business.

Hopefully, you can see from the above that documenting procedures allows your business to:

  • Create “hands-free” step-by-step documentation that can be used to train new team members and outsource work effectively,
  • Track and measure the progress of its content strategy.
  • Improve content management practices.

Documenting Procedures – FAQs

Here are frequently asked questions about documenting procedures:

What is the purpose of documenting procedures?

Documenting procedures helps standardize practices, ensures consistency in operations, and facilitates training and compliance. It serves as a reference tool that can guide current and future actions within an organization.

What should be included in a documented procedure?

A documented procedure should include the purpose of the procedure, scope of where and when it applies, detailed step-by-step instructions, roles and responsibilities, required resources, and safety or compliance considerations.

How detailed should a procedure be?

The level of detail should be sufficient to enable a person with general knowledge of the field to perform the procedure without prior experience. This means including all necessary steps and avoiding assumptions about the user’s knowledge.

Who is responsible for creating procedures?

Typically, the responsibility for creating procedures lies with subject matter experts and managers who oversee the specific processes. It is crucial that those who are intimately familiar with the tasks write the procedures to ensure accuracy and completeness.

How often should procedures be updated?

Procedures should be reviewed and updated regularly to reflect changes in technology, compliance requirements, and operational practices. A good rule of thumb is to review procedures annually, but updates may be needed more frequently depending on the pace of change.

What is the difference between a policy, a process, and a procedure?

A policy outlines the rules or guidelines under which a company operates. A process is the highest level description of a broad task that may involve multiple steps. A procedure is a specific, detailed series of actions that are followed to comply with the policy or to complete a component of the process.

How should documented procedures be formatted?

Documented procedures should be clearly formatted with headings, subheadings, bullet points, and numbered steps to make them easy to follow. Visual aids like diagrams, flowcharts, and screenshots can also be helpful, particularly for complex tasks.

What are the best practices for maintaining procedure documentation?

Best practices include regularly reviewing and updating documentation, ensuring accessibility to all who need it, maintaining clear version control, and getting feedback from users to improve the clarity and effectiveness of the documents.

***

Image: Binders

Managing Your Affiliate Content

Learn how to manage your affiliate marketing content and affiliate links effectively to boost your affiliate earnings.

How To Manage Your Affiliate Marketing Content

Learn how to manage your affiliate marketing content and affiliate links effectively to boost your affiliate earnings.

Affiliate marketing - illustration inside laptop imageWhile there is an abundance of information online about affiliate marketing, much of it is focused on how to succeed as an affiliate promoting products and services, not on how to manage your affiliate marketing content.

Hence, affiliate marketing content management is a topic that is seldom discussed on internet marketing blogs. It is also typically overlooked by companies offering an affiliate or referral program, and generally ignored by providers of affiliate link management tools and software solutions.

In this article, we’ll briefly touch on what affiliate marketing is, discuss the challenges of managing your affiliate links and your affiliate marketing content, and show you how to build a simple affiliate link management tracking system for your digital presence to address some of these challenges.

***

What Is Affiliate Marketing?

Affiliate marketing is essentially earning commissions from referrals that lead to the sales of products or services of other businesses.

In a nutshell, here’s how affiliate marketing works:

Let’s say that XYZ company offers an affiliate program.

Typically, you can see if a company offers an affiliate program by looking for a link on the site’s footer or menu (e.g.”Affiliates”, “Referral Program”, etc.)

Affiliate Program link on web site footer.
Look for Affiliate Program links on website menus and footers.

When you apply to become an affiliate partner of XYZ company, if approved, you will be given a special link that includes your unique affiliate ID.

Affiliate URL with unique affiliate ID.
An example of an affiliate URL with a unique affiliate ID.

You then use this affiliate link to promote XYZ company’s products or services.

You can promote XYZ company using affiliate links in a number of ways. For example, by embedding links into your web content, content in downloadable reports, eBooks, etc., or using methods like display banners, video marketing, email marketing, etc.

Many companies also provide creatives (e.g. banners, text links, etc.) that you can use on your site, or copy and paste into emails, etc.

When a referred user clicks on your affiliate link, a cookie is placed on their web browser for a certain period of time (called the ‘cookie duration’).

XYZ company then tracks all sales and referrals made via your link and pays you affiliate commissions based on the cookie information.

Typically, companies with an affiliate program will provide a private login area where affiliates can view and edit their account details, access referral links, view referral stats, commission earnings, payout reports, download creatives, and more.

Affiliate area - statistics screen
An affiliate area lets you check your stats, referrals, payouts, and more.

So, that’s basically how affiliate marketing works.

info

Covering affiliate marketing as a method of generating income online is beyond the scope of this course.

If you are interested in learning how to use affiliate marketing to monetize your website or blog, there are many affiliate marketing courses and articles available online that you can refer to.

Also, if you are interested in running an affiliate program, there are many affiliate management software tools and services you can check out.

Note: Affiliate management software tools and services are not the same things as what we are discussing in this lesson. This lesson is about managing your affiliate marketing content and affiliate links, whereas most tools and services are designed for running an affiliate program and managing your affiliates.

The Challenges Of Managing Affiliate Content

While affiliate marketing is one of the fastest and easiest ways to start an online business and generate income online with no money and no products of your own, it also presents a number of challenges.

Let’s look at the main challenges of affiliate marketing from a content management perspective.

Affiliate Marketing And Your Content Strategy

If you plan to use affiliate marketing as part of your site’s monetization strategy, you will be working with affiliate links and affiliate marketing content.

As with all content, it’s essential to understand how your affiliate marketing content fits into your content strategy, content plan, content-linking management practices, and other content-related processes (i.e. production, promotion, and management).

Keeping in mind that your content strategy reflects the core values of your business, what does your strategy say about creating monetized content using affiliate marketing?

For example:

  • Will you only include or review products or services in your content that you can earn money from as an affiliate, or will you link to products and services that provide value to your audience regardless of whether or not the companies being linked to offer an affiliate program?
  • If you link to companies that offer an affiliate program, will you still promote their products or services and link to their website even if your affiliate application gets rejected?
  • Will you give prominence in your content to products or services containing affiliate links (e.g. will they feature higher in a list)?
  • If your content strategy allows guest posts or articles from external writers, will you allow the writers to insert their affiliate links into the content?
  • How will your business, site, and content comply with all the laws and regulations governing affiliate marketing, and individual company policies for promoting their products and services as an affiliate?
  • Also, some audience groups regard the presence of affiliate links as making the content seem biased (e.g. product reviews). What does your content strategy say about this?
Affiliate disclosure statements.
If you plan to monetize your content with affiliate marketing, make sure to comply with all legal requirements and add all the necessary affiliate disclosures.

Let’s look at the challenges of managing affiliate marketing content in other content-related areas.

Affiliate Marketing And Content Planning

Let’s say that you plan to create a monetized article based on reviewing the top 5 products in the XYZ niche.

After researching the topic, you find that a number of companies selling products in that niche offer an affiliate program.

Although you may be approved right away, many companies have a manual review process before they will approve new affiliates.

Affiliate application is being reviewed.
Many companies will review your application before deciding whether to accept you as an affiliate partner.

Companies can also reject your affiliate application for a number of reasons (e.g. maybe your site hasn’t launched yet or is too new, or doesn’t get enough traffic, or your niche/content isn’t aligned with their marketing or branding, etc.)

Affiliate application denied
It happens!

You have no control over these companies’ approval decisions or any of their business processes, so waiting several days or even weeks to find out whether you have been approved or not can impact your content planning.

For example, will your content team wait until you know whether a company has approved or rejected you as an affiliate before doing any further research, or will they invest time into planning, researching, and scheduling the content for production, and deal with things later?

And how will the above work if you plan to outsource your content creation?

Also, what does your content plan say about using creatives supplied by the company you are promoting as an affiliate?

For example, what if a company supplies ready-made, copy-and-paste affiliate banners but the dimensions or content are not suitable for your needs?

Will you create your own banners, edit the supplied banners using image editing software, ask the company to create new banners for you, rework your content around not using banners, or choose some other option?

Finally, what does your content plan say about using affiliate links in your content?

Will you add the affiliate links as supplied (which can sometimes be very long and ugly-looking) or use a link-shortening or link-cloaking tool or service to make your links look nicer, disguise the fact that they are affiliate links, or protect your affiliate links from being hijacked?*

* Affiliate Link Hijacking is when someone completely bypasses an affiliate’s link (usually because the full affiliate link is displayed), either by manually typing in the link’s URL into a web browser web and leaving out the part of the link containing the affiliate’s id, or replacing it with their own affiliate id. This results in the affiliate not earning a commission.

Affiliate Marketing And Content Production

Sticking with our “Top 5 XYZ products” example, let’s say that you apply to become an affiliate of all the products you plan to cover in your article and decide to go ahead and create the article before knowing whether you have been approved as an affiliate or not.

The article is published and a few days later you are informed by three out of the five companies whose products you have already reviewed in your article that your affiliate application has been denied.

What do you do with the article now? Do you…

  • Leave the content in the article as is and continue promoting the companies that rejected your application?
  • Remove the content from your article and look for new companies to promote so you can replace the deleted section?
  • Reorganize your list and move monetized content further up the page (as discussed earlier in the section on content strategy)?

Affiliate Marketing And Content Promotion

Affiliate marketing is fundamentally all about promoting other people’s products or services. After all, that’s how you earn affiliate commissions.

This has its own challenges.

For example, a company may supply you with ready-made affiliate banners or other creatives (e.g. email sequences, rebrandable reports, etc.) and declare these to be proven high-converters.

You then add them to your site and get no sales.

Has your business implemented effective content tracking methods and all the other systems and processes described in the content promotion module?

If not, how will you fix this issue, measure the performance of your affiliate content, or improve your results using any other affiliate program?

This brings us to the next content-related area of challenges.

Affiliate Marketing And Content Management

Suppose you decide to start a “review” blog promoting products and services in a profitable niche.

After doing some research, you discover that there are many great products you can review and promote as an affiliate and begin applying to all of their affiliate programs.

After several months of working hard to create original content, your blog has dozens of great product review articles monetized with affiliate links.

Then, you begin to notice things like the following happening on your site:

  • Links point to error pages – products have been removed or discontinued from being sold.
  • Product prices have changed – The product price has changed on the destination site. Your reviews have different pricing than the actual product price.
  • Product information is different – Product features and options that you promoted as being free are now premium options or part of a paid plan.
  • Bonuses are no longer being offered – Your review mentioned a whole bunch of great bonuses that were included with the product, but the product vendor has removed these from their sales page.
  • Product/Company names are different – The company offering the product has been acquired by another company and decided to rename or rebrand the product.
  • Product demo videos don’t work – The company has removed the YouTube video you added to your product review, so the video no longer shows.
  • Copy-paste banners link to a “buy this domain” page – The company has gone out of business and its domain name has expired.

Then, to make matters worse, because you have applied to so many different affiliate programs, working out which affiliate platforms manage which programs, what login details go with which platform, and which issues require fixing becomes overwhelming and time-consuming.

Currently the product that you were looking for is not able to be sold.
Uh oh…are your affiliate links sending visitors to pages like this?

As you can see, there are so many things that can go wrong with your affiliate marketing content, all of which affect your potential earnings.

As you become a more experienced affiliate marketer, you begin to realize that almost everything about affiliate marketing is outside of your control.

You have no control over the companies whose products or services you are promoting, or what they do.

Many companies that offer an affiliate program simply carry on doing their business and do not inform their affiliates about changes that can affect their affiliate campaigns, their content, and their links.

So, affiliate marketers promoting their products typically only find out that something is wrong with their affiliate content weeks or months after these events have taken place, resulting in many opportunities for earning commissions being missed.

This problem is compounded if you don’t have the systems in place (that we cover extensively in this course) to manage your content.

So, let’s begin by showing you how to develop…

A Simple System To Start Managing Your Affiliate Content

For this section, we’ll use as an example a simple system I built to manage the affiliate content and affiliate links on this website.

You may have already noticed that this course is 100% free.

As my vision is to provide high-quality information on ways to manage content effectively to as many people as possible, I decided not to create a paid membership site, but to make this course freely available to everyone.

To meet the costs of running this website and keeping it updated with regular content, I decided to monetize this website and some of the course content using methods like advertising, donations, and affiliate marketing.

As part of this site’s content strategy, the course recommends many great products, services, and resources, many of which I use and would recommend even if there was no affiliate incentive involved.

So, once we defined affiliate marketing as one of the content promotion methods used to grow and sustain this website, the next step was to work out how to go about it.

I know from years of experience that:

  1. Many affiliate programs require applications to be manually reviewed and approved,
  2. Many affiliate program managers prefer reviewing existing websites (i.e. not ‘under construction’) that are already generating traffic before approving affiliate applications,
  3. Applicants have a stronger chance of being approved as an affiliate if they can actually  provide a link to a page where the product is already being promoted, and
  4. Companies use different affiliate program management platforms, so it’s important to be able to keep track of many different dashboards, logins, etc.

The above raised the following challenges for managing affiliate links and affiliate content:

  1. How do we keep track of all the products and services mentioned in this site? This course contains over 100+ lessons and mentions hundreds of products, services, tools, and resources.
  2. Which products and services offer affiliate programs and which don’t?
  3. Which affiliate platforms are the companies mentioned in this course using to manage their affiliates?
  4. How do we keep track of which affiliate programs we’ve applied for, and whether we’ve been approved or rejected for these programs?

Given the above, here’s the plan used for this website:

  1. I wrote all of the initial course content before launching the website,
  2. As the course content was being written, I also created a spreadsheet listing all of the products, services, tools, and resources mentioned in the course content that offer an affiliate program but held off applying to these until after launching the site,
  3. For products and services mentioned in this course that offer an affiliate program, I used a link redirection tool to initially point the links directly to the product or service page. This makes it easier to replace links used throughout the course content once I got approved by the affiliate program (with the programs that rejected my application, there was no need to change the links, as they were already pointing to the product or service).
  4. After launching the site, I then went through the spreadsheet and began to systematically apply to all of the affiliate programs listed. To make the process easier and faster, I also created a generic “copy, paste, and edit” text template describing who we are, what the site is about, and how the site plans to promote the product or service (including the URL of the course lesson where we are already promoting it).

Affiliate Content Management Spreadsheet

To keep track of all the affiliate program applications, links, platforms, logins, etc., I created a spreadsheet with the following columns:

  • Product/Service – The affiliate product or service being promoted.
  • Description – A brief description of the product or service, also mentioning whether it is a plugin, SaaS, etc.
  • Affiliate Registration – The URL of the company’s affiliate program sign-up form.
  • Applied? – An “x” in this cell lets me know that I have applied for the affiliate program.
  • Approved? – Type “y” into this cell if approved for the affiliate program and “n” if the application was declined or rejected.
  • Affiliate Link Cloaked – The link used in the content created with a link-redirection tool.
  • Direct Link – The direct URL to the product or service.
  • Aff Link – The “raw” affiliate link supplied by the affiliate platform.
  • Where Used – The URL(s) of the post or page where the product or service is mentioned.
  • Network Dashboard – The URL of the affiliate platform dashboard where I can check stats, referrals, payouts, etc.
  • Notes – Enter any notes or comments here (e.g. “affiliate program temporarily on hold,” reason given for declining my application, etc.).
  • Login – The affiliate login username or email address.
  • Password – The affiliate login password.
  • Username – This is an additional field used if the affiliate login form accepts both an email address and a username.

In addition to the above columns, I also used color coding to make the management process using the spreadsheet easier:

  • Green – Affiliate program application accepted. Affiliate link replaced in affiliate link redirection tool.
  • Yellow – Affiliate application submitted – application pending review and approval.
  • White – Haven’t applied yet to the affiliate program. This can also signify that the affiliate program is currently unavailable. If so, this is recorded in the “Notes” column.
  • Red – Application initially rejected or declined. This can also signify that the affiliate program has permanently closed down.
Affiliate Content Management Spreadsheet
Use a spreadsheet to keep track of your affiliate program application process.

Notes:

  • There are various reasons why applications get declined or rejected. Sometimes it’s because the site is too new and hasn’t generated sufficient traffic yet. If a company rejects or declines my application, I will wait a little while and then apply again for their affiliate program or contact their affiliate manager via email.
  • Some affiliate platforms won’t allow you to apply for other programs until your site produces results for the existing programs you are promoting.

Managing Your Affiliate Links

Using a spreadsheet to keep track of all your affiliate programs with a password management tool and a link tracking tool may be all you need to manage your affiliate links.

At least, you will have a master document for your records.

From here, you can then access all of the various affiliate management platforms that companies use to run their affiliate programs from.

As well as providing you with access to your affiliate account, affiliate links, marketing creatives, and displaying your referral stats and earnings, many platforms also provide additional tools and useful reports, such as status updates on your applications, merchants, etc.

Shareasale dashboard - merchant status.
Shareasale provides reports and merchant status notifications.

Managing Your Affiliate Content

Once you have implemented the above system for managing your affiliate programs and affiliate links, use the content management lessons described in this course to help you manage your affiliate marketing content.

This is important because as was mentioned earlier, many of the companies you will be promoting as an affiliate will not keep you informed of changes they make in their business that can impact your earnings.

For example, having a content tracking system, good content link management practices, and doing regular content reviews will help you detect and address issues like noticing significant or sudden drops in affiliate revenue, links to error pages, outdated creatives, etc.

Additionally, having good content organization and content documentation systems in addition to streamlined content planning, content production, and content promotion processes can help you take advantage of special affiliate promotions that could give you a significant boost in affiliate earnings.

For example, many companies run special affiliate promotions during major online sales events like Black Friday, Cyber Monday, Christmas, Mother’s Day, Father’s Day, etc.

These events usually have very small windows of opportunity and if your business lacks sound content management systems and organization, these opportunities will come and go before you can even act on them.

With an effective content management system in place, your business can capitalize on these events by scheduling content to be created ahead of time in your content calendar (e.g. blog and social media posts) and published at a later date in your CMS, swapping out banners and creatives in your media storage services, planning email marketing campaigns, etc.

Managing Affiliate Content – FAQs

Here are frequently asked questions about managing affiliate content:

What is affiliate content management?

Affiliate content management involves organizing, optimizing, and tracking content related to affiliate marketing partnerships.

What types of content are managed in affiliate marketing?

Content can include product reviews, blog posts, social media updates, email newsletters, and banners that promote affiliate products or services.

How is affiliate content typically created?

Content can be created in-house by the affiliate marketer or outsourced to content creators such as bloggers, influencers, or freelance writers.

What are the key components of effective affiliate content management?

Key components include content planning, creation, optimization for SEO, tracking performance metrics, and ongoing content updates.

How do affiliate marketers optimize content for conversions?

Marketers optimize content by incorporating persuasive calls-to-action, using engaging visuals, providing valuable information, and ensuring seamless user experiences.

What tools are used for managing affiliate content?

Tools such as content management systems (CMS), affiliate tracking software, keyword research tools, analytics platforms, and email marketing software are commonly used.

How do affiliate marketers ensure compliance with affiliate program terms?

Marketers ensure compliance by reviewing and adhering to program terms, properly disclosing affiliate relationships, and avoiding prohibited promotional methods.

What are the best practices for updating affiliate content?

Best practices include regularly reviewing content for accuracy and relevance, updating product information, refreshing visuals, and optimizing for current SEO trends.

How do affiliate marketers measure the success of their content?

Marketers measure success through key performance indicators (KPIs) such as click-through rates, conversion rates, revenue generated, and return on investment (ROI).

What are the challenges in managing affiliate content?

Challenges include maintaining content quality, staying updated with program policies, managing multiple affiliate partnerships, and adapting to algorithm changes in search engines and social media platforms.

Summary

Affiliate marketing provides a great opportunity to monetize your content but it also presents many challenges for managing your affiliate content and affiliate links.

Sound content management can help you capitalize on affiliate marketing opportunities to boost your online revenue.

If your content strategy includes affiliate marketing as a method of promotion, then it’s important to implement good systems for managing your affiliate links and affiliate content.

Action Step

  • Follow the recommendations in this lesson to create a master document listing all of your affiliate programs, links, logins, etc., and add this to your content documentation.

Resources

***

Image: Affiliate Marketing

Password Management Tools

Password management tools let you easily store your login passwords and generate secure passwords.

Password Management Tools

Password management tools let you easily store your login passwords and generate secure passwords.

Password Management ToolsManaging content typically also involves managing many different accounts (e.g. other websites, social media platforms, subscription services, emails, membership sites, online banking, etc.).

If you have many online accounts to manage, keeping track of all your logins and passwords can be daunting.

A basic best practice for password security is to avoid using the same login details for every account, as this presents a huge online security risk.

This is where password management tools like the ones listed below come in handy.

***

Manage Your Logins And Passwords More Effectively

In the course of managing your content, you may undoubtedly end up also having to manage many different accounts across many different websites.

If you manage multiple accounts and use one login and password for everything, you will create a major security issue for your business, as anyone getting hold of your login and password combination will then be able to access and take over all of your accounts.

Good password security practices involve not only creating strong and secure passwords but also using different passwords for different accounts.

Without a good system to keep all of your different logins and passwords organized, easily accessible, and difficult for others to access, however, keeping track of many different passwords for many different accounts can quickly become daunting.

Sure, you can use a spreadsheet. Fortunately, however, there are excellent software tools available to help you manage and keep track of all your logins and passwords, keeping these secure, saving you time, helping you stay organized, and of course, keeping all of your logins and valuable business data safe, secure, and protected.

Typically, with a password management tool, you can access the “vault” where all of your other passwords are stored using a master password.

After storing your login details, you then simply navigate to a site that requires your password, click on a button, and the tool will then automatically enter your login credentials and grant you access.

The password management tools listed below will save you a great deal of time managing your content across different sites and services.

RoboForm

RoboForm - Password Management Tool
RoboForm – Password Management Tool

RoboForm - Password Management ToolRoboForm is one of the world’s leading password management software programs.

It is simple to install, easy to use, lets you fill in login usernames and passwords (and forms) automatically, and works on all devices (PCs, laptops, mobile devices, etc.), all browsers, and across all platforms.

Imagine having to memorize different logins and passwords for hundreds of accounts. RoboForm helps you manage multiple passwords easily and access all of your logins with a single click from your desktop PC, laptop, or mobile device.

RoboForm logins
RoboForm lets you easily manage logins for hundreds of online accounts

RoboForm also lets you print and save your stored details and synchronize logins between your computer or laptop and mobile device.

Mobile device with Roboform screen.
Use RoboForm to log in from mobile devices

RoboForm includes many handy features, including a password tool for generating and storing secure passwords.

RoboForm password generator

RoboForm is continually updated, secured with military-grade AES 256 encryption, and provides excellent user support.

Roboform - Secure Password Management Tool
Roboform – Secure Password Management Tool

More Info: RoboForm

1Password

1Password
1Password – Password Management Software

1Password offers more than just password management; it secures every sign-in for every app on every device with 1Password® Extended Access Management, which provides a comprehensive solution for securing every sign-in across all apps and devices, and is suitable for businesses of any size, so you can easily protect passwords, passkeys, and sensitive information.

1Password offers password management protection of various levels:

  • Personal: Manage passwords for you and your family anytime, anywhere.
  • Business: Secure your business by protecting your team.
  • Enterprise: Enable large-scale operations with minimized risks.
  • Developer: Streamline workflows and keep secrets out of code.

Key Features:

  • Manage More than Just Passwords: Instantly access passwords, seamless checkouts, and secure banking info, credit cards, software licenses, and more.
  • Simple, Secure Sharing: Set up shared vaults for family or team access and quickly share items from desktop, app, or browser.
  • More Visibility, Less Risk: Monitor and mitigate risks, track shadow IT, and reduce support tickets.
  • Integration with Security Stack: Use tools you trust, log activities to SIEM, and unlock with SSO to secure sign-ins.

Security Features include:

  • Secure by Design: A Secret Key adds an extra layer of security.
  • Private by Default: Your data is private and inaccessible to anyone, including 1Password.
  • Verified by Experts: Regular audits and a large bug bounty program ensure top-tier security.
  • Offline Access: Use 1Password without internet; data syncs when back online.

1Password is trusted by over 100,000 businesses, and offers a dual-layer encryption approach for end-to-end data protection. It is free to try for 14 days, and you can choose a plan that fits your needs afterward.

More info: 1Password

KeePass

KeePass - Free open-source password management tool
KeePass – Free open-source password management tool

KeePass - Free open-source password management toolKeePass is a free portable password manager for PC (Windows, Linux, Mac OS X), with ports available for Android, iPhone, iPad, and more.

KeePass keeps every username and password pair in an encrypted database, protected by a single master password or key (the only one you have to remember).

It doesn’t store your database in the cloud unless you upload it there.

Keepass - main screen.
Keepass – main screen.

More info: KeePass

LastPass

LastPass
LastPass

LastPass offers comprehensive password management solutions for both business and personal use, enhancing security and convenience across various devices.

Business Password Management Features

LastPass lets you:

  • Improve password behavior and security by facilitating secure access to applications and sensitive information.
  • Scale adoption with automation and proactive monitoring of company-wide password health.
  • Introduce passwordless login options to further reduce reliance on traditional passwords.

Personal Password Management Features

LassPass lets you:

  • Safely store and autofill passwords across devices, eliminating the need for password reuse with a built-in generator.
  • Enjoy one-click autofill functionality on any device and monitor security behavior for potential data breaches.
  • Minimize password typing with a passwordless login experience.

Security Features:

  • Benefit from best-in-class encryption, ensuring master passwords and stored credentials remain confidential.
  • Obtain global security certifications, including ISO 27001 and SOC2 Type II, to ensure compliance with industry standards.
  • Protect against security breaches and dark web threats with continuous monitoring and immediate alerts.
  • Enable multifactor authentication for enhanced account security and endpoint protection.

LastPass Premium Features:

  • Unlock unlimited device type access, dark web monitoring, and a security dashboard with score assessment.
  • Complete protection of your digital life with comprehensive security solutions.

More info: LastPass

***

Image: Password Login

Headline Generating Tools

Create compelling headlines for your articles quickly and easily with headline-generating tools.

Headline Generating Tools

Create compelling and high-converting headlines and titles for your blog posts and articles quickly and easily with headline-generating tools.

Headline Generating Tools - Never Run Out Of Fresh Article Headline Ideas, Post Titles, And Email Subject LinesWithout a compelling post title or an attention-grabbing article headline, your site visitors may never get to see your message.

In this lesson, we look at headline-generating tools that can help to improve your click-through results.

If you need help coming up with effective headlines for your content, see our free content creation email course.

***

Why Using Powerful Headlines In Your Content Is Important

Did you know that by simply replacing a few words in your headline, you can significantly increase your web traffic and engagement with readers, get more opt-ins to your email lists, boost your conversions, and generate more sales?

This can translate into thousands of dollars more in sales of your products or services…all because of a few words!

You can lift your conversions simply by changing a couple of words in your headline
Changing a few words in your headline can increase your conversions by 30% – 400%!

If you are not using high-converting headlines for your articles, you could be leaving a lot of money on the table.

Think about this…

  • Top companies have understood the importance of using powerful headlines before the internet was even around.
  • Just one great headline can flood your website with viral shares, web traffic, and loads of clicks!

The difficulty with trying to find post titles or headlines that are proven to convert better than others is that you need to crunch through a massive amount of web traffic in order to arrive at statistically significant results.

Typically, many corporations with large budgets will split-test, optimize, and analyze their headlines extensively.

Headline-Generating Tools

Fortunately, now there are smarter tools to help save you time and money on what can otherwise be a very time-consuming and resource-intensive process.

For example…

Fresh Title Headline Generator

Headline Generating Tools - FreshTitle Headline Generator
FreshTitle – Headline-Generating Tool

Fresh Title is a one-click software headline-generating tool that lets you brainstorm hundreds of proven headlines and titles for your web content in seconds and is compatible with both Mac and PC.

Simply enter a niche key phrase (e.g. make money working from home, speed reading, growing organic vegetables, etc.) and Fresh Title’s built-in method provides you with over 830 pre-optimized and proven headlines with a single click that you can then copy and paste into your web content.

FreshTitle Headline Builder - One-Click Access To Thousands Of High-Converting Blog Titles
FreshTitle Headline Builder gives you one-click access to thousands of high-converting headlines and post titles.

As well as entering niche keywords into the software, you can answer a few simple questions and the software will provide you with an additional 125 detailed and more finely optimized headlines that are also proven to convert.

Here are just some of the benefits of using Fresh Title to generate hundreds of proven post titles and headlines for your web content:

A Brainstorming Tool With Limitless Blog Post Title Ideas 

The FreshTitle headline builder tool gives you instant access to thousands of proven headlines for any content you want.

You can use this powerful application to generate fresh ideas for post headlines, Facebook posts, text ads, ebook headings, email subject headlines, etc.

Save Thousands Of $$$

You can instantly pump out hundreds of proven titles for all kinds of content in seconds and save thousands of dollars on the cost of hiring copywriters, data analysts, and web conversion experts.

You can use this tool in popular services, like:

  • Blogging Platforms – e.g. WordPress, Tumblr, Weebly, Joomla, etc.
  • Email Platforms – e.g. Aweber, iContact, ConstantContact, CampaignMonitor, etc.
  • Social Media Networks – e.g. Facebook, GooglePlus, Flickr, etc.
  • Press Releases – e.g. EinPressWire, eReleases, etc.
  • eCommerce – e.g. WooCommerce, Amazon, OsCommerce, Magento, Squarespace, etc.
  • Article Platforms – Ezine Articles, ArticleCity, Articlesbase, etc.
  • Video Platforms – YouTube, DailyMotion, Vimeo, etc.
  • Landing Page Platforms – LeadPages, Instapage, Megaphone, etc.
FreshTitle works with all popular online services
FreshTitle works with all popular online services.

FreshTitle is an intuitive one-click software tool that installs quickly and includes several powerful built-in tools, such as:

Title Builder

Enter a keyword, click a button, and generate hundreds of title ideas for your posts, email newsletters, etc.

Title Builder
Instant Headline Builder

Swipe Bank

FreshTitle includes a huge swipe database with over 420,000 headlines and email subject lines that are proven to convert. You can instantly copy and modify these for your own marketing campaigns.

FreshTitle - Swipe Database
FreshTitle includes a swipe database with hundreds of thousands of headlines and email subject lines.

News Headlines

Fresh Title Headline Generator pulls up the most popular headlines in real time from Google and Bing, giving you insights into your competitors’ most effective headlines.

FreshTitle - News Headlines Tool
Use the News Headlines Tool for competitive analysis.

My Titles Tool

The software also includes a built-in easy-to-use personal database tool for storing all of your favorite headlines. You can transfer headlines from the other sections to your My Titles area and edit the headlines to suit your own needs.

Fresh Title - My Titles
Use FreshTitle’s My Titles tool to edit headlines and store these in your own personal database.

Additionally, the tool comes with a built-in thesaurus, allowing you to further customize your post titles, plus a function for storing notes (e.g. marketing campaign results), a feature for rating your headline items, and a counter that lets you see which content items you most frequently use…

FreshTitle's built-in thesaurus
FreshTitle includes a built-in synonym finder.

Fresh Title Headline Builder And Title Analyzer Software Bundle

Dave Guindon, the creator of Fresh Title will occasionally bundle the headline generator with another powerful tool called Title Analyzer as a bonus.

Title Analyzer - Powerful Title Analysis Tool
Title Analyzer – headline analysis tool

Title Analyzer is a powerful headline analysis tool that can help you decide which headline is more likely to increase traffic, clicks, and conversions.

TitleAnalyzer uses a built-in algorithm to compare and analyze the performance of your titles.

TitleAnalyzer
Imagine knowing which titles will drive more web traffic, clicks, and sales without testing!

Title Analyzer lets you compare, analyze and calculate performance scores for multiple headlines without requiring you to be online to do all of the processing work.

TitleAnalyzer lets you enter multiple titles
Calculate performance scores for as many titles as you like!

The software’s internal algorithm accesses 1,800+ power words to calculate the overall performance score of your items.

TitleAnalyzer uses a large database of power words to score your titles
Title Analyzer includes a large database of power words used to score your headlines/

Title Analyzer not only scores your titles using a complex equation based on factors like power word density, the optimal number of characters, etc., but it also suggests ways to further improve your content.

TitleAnalyzer's Title Statistics screen
Title Analyzer provides suggestions on ways to further improve your headlines.

The tool also comes with an additional built-in headline editor that lets you quickly and easily optimize your titles using color-coded statistical data and a built-in thesaurus connected to its internal power words database.

TitleAnalyzer Editor: Choose the best power words for your post titles
Find the best power words for your headlines and post titles.

Fresh Title is well-supported and runs on both Mac and PC computers. You will get lifetime access to the software and a no-risk, thirty-day, full refund guarantee.

You can install the product on up to three computers (PC and Mac). The purchase price includes free minor version updates and discounts on future major version releases. Major version updates may require an additional fee.

For a demo video of the software in action, including installation instructions and tutorials, FAQs, support help desk, contact details, and more, visit the website.

Note: Price details for FreshTitle depend on whether there are any promotions or limited-time special offers. Also, some of the features discussed above may not be offered as a bundle when you visit the website.

More info: Fresh Title – Headline Generator

FreshTitle Headline Builder - Powerful Post Title, Email Subject Titles And Blog Content Idea Generation Tool
Never run out of ideas for compelling post headlines and email subject titles with headline-generating tools.

***

Images: laptop, old newspaper

Managing Your Content Ideas

Learn how to set up a simple and effective system for generating, storing, organizing, and managing your content ideas.

Managing Your Content Ideas

Learn how to set up a simple and effective system for generating, storing, organizing, and managing your content ideas.

How To Store, Plan And Organize Your Content IdeasYour business needs content. Your website needs content. Your social media needs content. Your blog, newsletters, product descriptions, post headlines, sales copy, social media, ads, articles, promotional pieces, news releases, customer training sections, FAQs, forum signatures, SEO meta descriptions, etc. all need content.
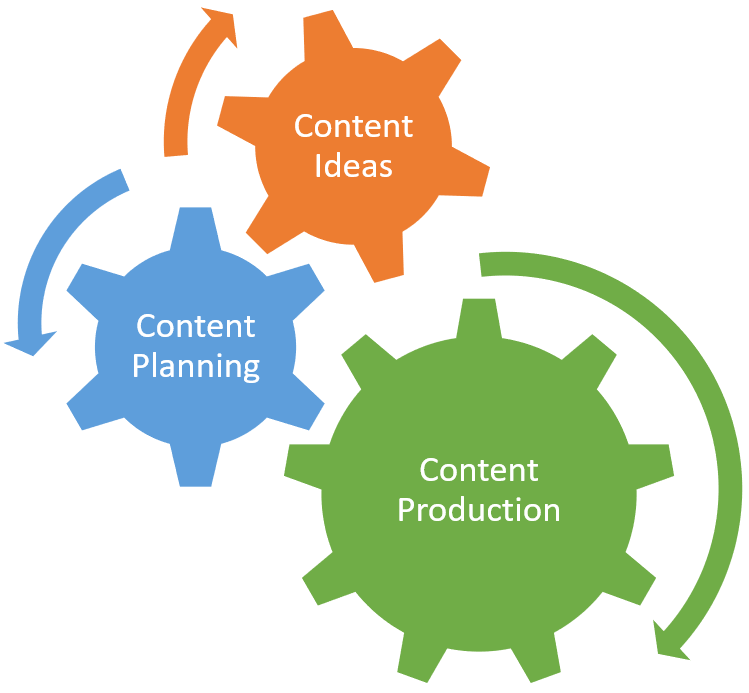
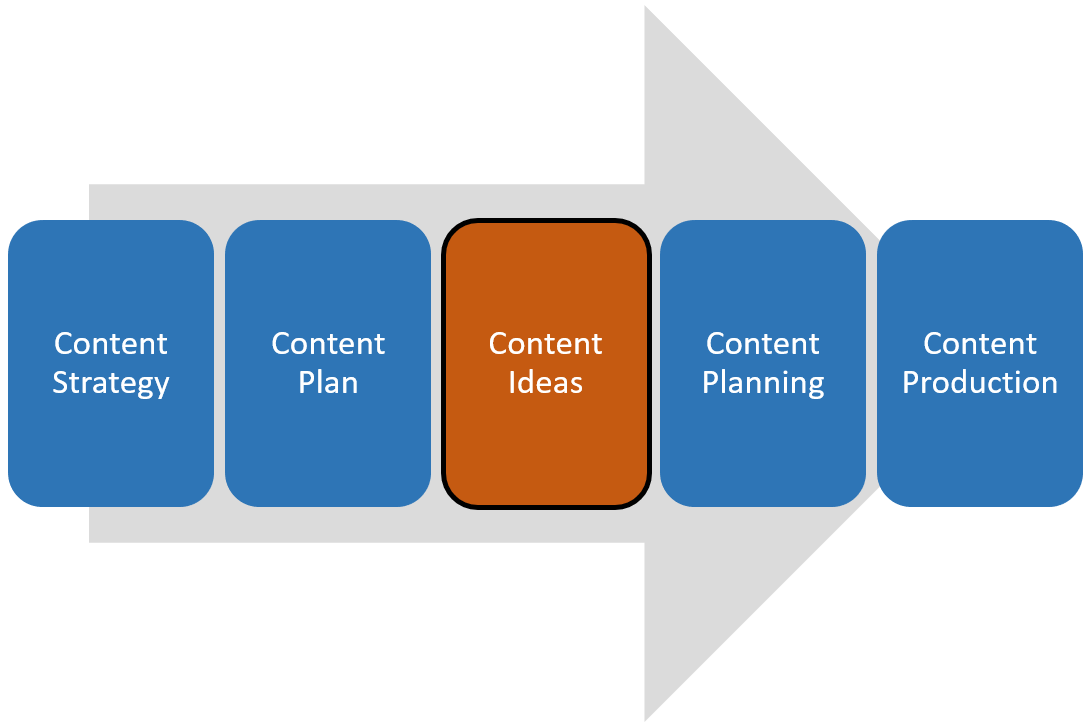
There’s no way around it…to have a successful digital presence, you will need lots of content!

Whether you plan to create this content in-house, outsource it, or a mix of both, having an effective system for generating, storing, organizing, and managing your content ideas will help your business immensely in areas like content planning and content production.

In this article, we’ll show you how to set up a basic, simple, and cost-effective system that will keep new ideas for content flowing regularly in your business.

***

A Simple System For Turning Content Ideas Into Published Content

Man writing ideas down in notepad.
Coming up with new ideas and publishing new content regularly will help to improve your online business results.

Fact: Businesses that publish new content regularly get better results online. 

The most effective way to manage the content in your business is to turn every content-related area into a process and then turn your content-related processes into systems.

This includes having a system for generating new content ideas.

Illustration of gears - Content Ideas - Content Planning - Content Production
Turn your content creation process into a system.

By focusing on managing systems, your business can improve its results and realize its goals and objectives.

When using content to grow your business, it’s important to think of the processes involved in generating, storing, organizing, and managing your content ideas as a system.

This will allow you and your content team to continually generate new ideas and easily store, organize, and manage these so they can be accessed, retrieved, and added at any time to your content planning and content production systems.

Where Content Ideas Fit In Your Content System

As explained in other lessons throughout our free content management course, ideally, every content-related activity in your business should flow from your content strategy.

Your content strategy is the blueprint that describes how your business will use content to achieve its overall strategic goals and objectives.

Your content plan is the document that specifies how your content team will execute the content strategy.

Once your business has created a content strategy and content plan, you can then begin to turn your content ideas into published content through your content planning and content production systems.

Process flow: Content Ideas - Content Planning - Content Production
Where your Content Ideas System fits in with other areas of your overall Content System.

Your Content Ideas System, then, connects your Content Plan to your Content Planning processes.

Your Content Ideas System, however also requires processes for generating, storing, organizing, and managing your content ideas.

Let’s have a look at these processes and how we turn these into a simple and practical system.

A System For Generating Content Ideas

Image: man and woman at a coffee shop.
Great content ideas can strike at any time!

There are many ways, methods, and techniques for generating new content ideas for your business.

If you don’t know where to start, check out this long list of content ideas and content topics we’ve created here: Content Ideas

To save you a massive amount of time, we have also created a comprehensive and 100% free content ideas course that you can subscribe to if you need help coming up with new ideas and topics for articles, blog posts, and newsletters.

All you have to do to start receiving our +120-part email course on how to generate endless content ideas delivered straight to your inbox is go here and signup.

With this process out of the way, let’s look at the next step.

A System For Storing, Organizing, And Managing Content Ideas

Image of woman working on a laptop.
How are you going to store, organize, and manage your content ideas?

Turning your content ideas into published content typically involves a lot of researching, planning, organizing, editing, and refining a bunch of notes, files, links, media content, etc.

All of these activities can get in the way of the creative process or require putting ideas on hold until they can be further developed.

Suppose you suddenly get an idea for a new article or blog post but you’re too busy to expand further on it or do something with it.

What do you do? Do you write it down on the nearest piece of paper you can find? Do you not write it down and hope that you will still remember it later?

Your business will struggle to improve its results and grow with content if your approach is to let ideas come to you spontaneously, work through them chaotically, and publish content only when you feel inspired or have the time to write.

Too many of your competitors are regularly publishing information online to make a “spontaneous and chaotic” approach effective.

So the first step is to have a simple, practical, and cost-effective way to effectively:

  1. Jot content ideas down.
  2. Store, organize, and manage these ideas.
  3. Outline and draft (i.e. flesh out) ideas into content, and,
  4. Have these ideas ready to publish.

For this example, we’ll set up a simple process like the one shown below using free/inexpensive tools and the WordPress CMS...

Chart: content idea organization system.
A simple and effective process for storing, organizing, and managing your content ideas.

For a comprehensive list of useful tools and apps that can help you research and organize your thoughts and ideas, see our Content Research Tools lesson.

1. Jotting Down Your Content Ideas

Image of man working on a laptop and writing on a notebook.
Got an idea? Jot it down!

You can be struck with a great idea for a new article, blog post, video, podcast, ebook, lead generation report, etc. anywhere, at any time.

This could happen while you’re in the shower, getting ready in the morning, going on a walk, shopping, standing in a queue, on your way to or from work, sitting in a meeting, watching TV, just before falling asleep…even while you are sleeping!

Knowing that this can happen, then, it’s important to be prepared.

When an idea suddenly comes to you, you need an easy tool that will let you quickly jot down your idea.

This can be an app on your phone that lets you create and save simple memos, a small writing pad that you carry in your purse, briefcase, or in your pocket, etc.

Whatever tool you choose to use just make sure that you keep it handy so you can record your ideas when inspiration strikes.

For example, years ago, I spoke with a business owner after a business networking event who didn’t have a website. When I asked him why he didn’t have a website, he replied that he doesn’t believe a website would help him grow his business.

I was intrigued by this answer, so I asked him to tell me more. He then told me that a website was just something businesses need for ‘credibility.’

This business owner couldn’t see how a website would help his business grow but believed that if he didn’t have a website, prospects would doubt the credibility of his business (or even whether the business existed).

As a non-technical website owner who has spent years helping businesses grow using WordPress websites, this naturally got me thinking about how I could educate other non-techies about the benefits of using a WordPress website to educate their prospects about their business and generate new business leads.

Knowing the importance of jotting down ideas as soon as these come into my head (instead of telling myself that I’ll “remember these” for later), I took out my phone while waiting for the lift to take me down to the car park, and fired up the ‘Memo’ app I have installed specifically to record new content ideas…

Image of phone with apps installed, including a Memo app.
You can use a memo app to record your content ideas.

I then quickly jotted down some rough ideas for an article on “how to use a website as more than just a credibility tool”…

Mobile phone with content ideas for blog articles.
When inspiration strikes, you need some way to record your content ideas immediately.

tip

Note: At this stage of the process, it doesn’t matter if you know the ‘5 ways to do XYZ’ or not … the important thing is to simply record the idea as soon as you can.

I certainly didn’t know what the ‘5 ways’ were going to be when I wrote the idea down. By the time the content is written it may very well end up being the ‘3 ways,’ or the ’19 ways,’ to do XYZ, or it may become something completely different altogether.

The end result is not important at this stage, only the process of recording the idea down. This should become a habit, so you need to have some type of tool or way to document your ideas.

2. Storing Your Content Ideas

After writing an idea down, the next step is to store it in a way that it can be easily found and retrieved when it’s time to expand on it further.

A phone app makes it easy to email the idea to yourself or to your content team, and, depending on which tools you use, even to add it directly into your content planning or production systems.

Phone screen with 'Share via' feature highlighted.
Email the idea to yourself, to your content team, or add it directly into your content workflow.

Work out with your content team a process for storing and adding ideas to your content workflow and make sure to document this process.

3. Organizing & Managing Your Content Ideas

At the time I jotted down the example idea being used here, I was also using a tool called TreePad to keep my ideas organized.

This tool is no longer available, but there are other excellent content organization tools you can use.

TreePad
I used TreePad (no longer available) but now there are newer and better content organization tools available.

Essentially, all you need is a tool that lets you create a hierarchical structure of folders where you can store text snippets, images, links, etc.

If you create different folders for each section of an article or ebook, for example, you can then easily rearrange or organize these sections by moving folders up, down, or nest these inside other folders.

With an organization tool, you can easily add, organize, prioritize, and keep track of unlimited new content ideas, and make these immediately accessible when required.

In my earlier example, after sending the content idea from my phone app to my email inbox, I then added it to a simple content production planner I created using nested folders…

A simple content production planner created using nested folders.
You can easily keep track of your content ideas using a simple content production planner created using nested folders.

As you can see from the above screenshot, this is nothing more than a folder I’ve created and labeled “Content Production” with new folders created for every new content idea.

A simple content production planner like this lets you easily:

  • Add content ideas with a rough working title (you can change it anytime)
  • Work on developing any idea you have stored further at any time it suits you.
  • Prioritize ideas in the content production schedule (just move folders up or down to prioritize items)
  • Add rough notes and bullet point sections, play with title ideas, etc.
  • Add and save research notes, URLs of videos, images, additional references, resource links, etc.
  • Archive the folder containing all of your notes for the content idea once you have completed and published it (just create an “Archive” folder and move completed projects into it.)
  • Delete the content idea folder if the idea turns out not to be worth pursuing further.

Once the idea has been safely stored and saved in your simple content planning system, you can get on with other things and come back to it anytime to work on the idea and develop it further.

Whenever you come across new information that would be useful to add or help expand on the idea, simply open the tool, paste in the content, save, and continue working on it later.

For a list of great tools you can use for this step, refer to the Content Research Tools section.

4. Outlining And Drafting Your Content Ideas

Image of woman blogging on WordPress
What tool will you use to flesh out your new content ideas?

An important part of your content ideas system is to set aside time on a regular basis to either work on coming up with new content ideas or to develop your content ideas further.

When the time comes to develop an idea further, you will want to retrieve your idea file from its stored place and select the item to work on next.

You can then create an outline with the main points your will cover in your content, and assemble all the information and research you have gathered into a draft article, blog post, video/audio script, etc.

During the outline creation and draft stage, don’t waste time worrying about things like formatting, styling, typefaces, font colors, font sizes, etc. These are unnecessary time-wasting distractions at this point.

The best way to create a draft of your content is to write it out using a plain text file. You can format this later.

Some tools you can use for this step of the process include:

Plain Text Editor

Windows text editor.
A plain text editor lets you create draft content without distractions.

Your computer comes with a built-in plain text editor like Notepad (Windows) or TextEdit (Apple). Using these free tools lets you focus entirely on what you want to say and create content quickly and without distractions.

Notetab

NoteTab Pro
NoteTab lets you work on multiple text files at once.

NoteTab is a plain text file editing tool that lets you work on multiple text files at once. This is like using your computer’s plain text file editor on steroids.

NoteTab is great for organizing your ideas during the initial draft phase. You can build your article in one open tab and paste in snippets of text like lists, quotes, research URLs, tags, etc. into other open tabs and perform a whole range of other functions while you work and assemble your content.

For more information about this tool, see this section: NoteTab – Text And HTML Editor

Word Processor

If you are more comfortable fleshing out your content ideas using a word processor application like MS Word or Google Docs, you can use these tools instead to create your outlines or drafts

Google Docs
Google Docs is a free word-processing tool.

If using a word processing tool, just keep in mind that all of the formatting options and features can become a distraction (remember, when working on content ideas, it’s best to focus on the message, not the formatting of the content, which is why we strongly suggest using a plain text editing tool.)

Also, some word-processing tools add hidden formatting code to the content which needs to be removed before publishing.

For example, when pasting content from Google Docs into WordPress, you will often see a bunch of hidden formatting code added to the content (switch to ‘Text’ mode in the content editor to see this).

Google Docs formatting code
Look out for hidden formatting code when copying and pasting content from word processors into your CMS.

Speaking of which…

WordPress

WordPress content editor
Jot down and flesh out your content ideas directly in WordPress.

If you’re familiar with using WordPress, you can simply jot down and flesh out your content ideas directly in the WordPress content editor and save these as draft posts.

This method works well if your website has other posts or pages that you plan to link to in your new content.

Working directly in WordPress also helps you flesh out your outline or draft content and get it closer to the initial draft stage.

You can also use the WordPress mobile app or post your content ideas to WordPress using email.

5. Publishing Your Ideas As Finished Content

After creating your article outline or draft, the next step is to move it into the content planning and content production stages with the view of getting it published.

If you are working on an article or blog post, for example, using WordPress lets you easily create a new post, paste in your draft content from a plain text file, and format it using built-in formatting tools.

WordPress classic content editor
The WordPress ‘classic’ editor has formatting tools that look similar to MS Word.

WordPress has two content editors:

The older editor (called the WordPress Classic Editor) lets you format text by clicking on menu buttons that are similar to using a word processing application like MS Word.

The newer editor (called the WordPress Block Editor) uses ‘blocks’ to add content. You then format your content using the tools and options available in each block.

Remember to save your new article or blog post as a draft in WordPress until you are done editing, formatting, and checking it for spelling or grammatical errors and are ready to publish it.

If you need help using WordPress, we recommend going through our WordPress User Manual tutorials.

If you need a grammar and spelling-checking tool, see the Content Editing Tools section of the course or check out the tool listed below.

Grammarly

Grammarly - Free Grammar Checking Software
Grammarly – Free Grammar Checking Software

Grammarly is a powerful grammar-checking tool for creating web content, reports, e-books, presentations, etc. You can install the free version of Grammarly on your web browser, Microsoft Word, etc.

After writing your content, run it through Grammarly and it will not only pick up all of your spelling and grammatical errors but also point out errors in your punctuation (e.g. wrong use of commas, double spacing between words, duplicated words, etc), poor sentence structure, style, etc.

As you scroll through each error, Grammarly shows you what’s wrong and gives you the option of automatically fixing errors with one click. You can also ignore the correction suggestions if you want and keep scrolling through to the next item.

The paid version of the software takes your content checking to a whole new level and lists advanced issues, suggests vocabulary enhancements, detects instances of plagiarism, etc.

For more information, go here: Grammarly – Free Grammar Checking Software

Managing Content Ideas – FAQs

Here are frequently asked questions about managing content ideas:

What is content management?

Content management is the process of organizing, creating, storing, and distributing content to meet strategic business goals. It involves planning, producing, editing, and publishing content across various channels.

Why is managing content ideas important?

Managing content ideas helps maintain a consistent flow of relevant and engaging content, ensures alignment with business objectives, and enhances audience engagement and retention.

How can I generate content ideas?

Utilize FAQs, customer feedback, industry trends, keyword research, competitor analysis, and content brainstorming sessions to generate diverse content ideas.

What is a content calendar, and why should I use one?

A content calendar is a schedule that outlines when and where content will be published. It helps maintain consistency, organize workflow, and ensure content aligns with strategic goals.

How do I categorize and organize content effectively?

Categorize content based on themes, topics, formats, and audience segments. Use tools like content management systems (CMS) to organize content assets efficiently.

What are some best practices for managing content ideas?

Regularly review and update content, repurpose existing content, collaborate with team members, track content performance metrics, and stay updated on industry trends.

Your Content Ideas System: Summary

Image: Finger poised on Enter key on laptop.
Having a content ideas system will help your business publish new content regularly.

To get results online with content, your business needs to publish content regularly.

This requires having a system for coming up with new content ideas on a regular basis, then storing, organizing, and managing these ideas.

This lesson provides a simple, inexpensive, and cost-effective system you can use to do this.

Here are the steps again:

  1. Jot your ideas down on a writing pad or phone memo app as soon as new ideas present themselves to you.
  2. Add your ideas to a content tool that lets you store, organize, prioritize, and add research notes and additional information.
  3. When you are ready to create an outline or draft of your article, blog post, or video/audio script, use a plain text editor like Notepad, TextEdit, or NoteTab to flesh out your content ideas with no distractions.
  4. After writing your draft content, create a new WordPress post or page (if using WordPress) and paste your content in, then format it using the WordPress Content Editor. Save it as a draft until you are ready to publish it.
  5. After you are done editing your content and checking it for spelling and grammatical errors (e.g. using a tool like Grammarly), you are ready to publish your content.

Resources

  • Free Content Ideas Course – Subscribe to this free and comprehensive course for endless new content ideas for your website, blog, or newsletter.

Next Step

We hope that you have found the above information useful. Now you have a simple and effective system for generating, storing, organizing, and managing your content ideas.

How To Store, Plan And Organize Your Content Ideas
Coming up with new content ideas and being able to store and organize these are all part of effective content management.

***

Images: Notebook, New Idea, Inspiration Strikes, Draft Content, Content Summary, Article Writing, Enter Key

Using Amazon S3

Learn how to set up and use Amazon S3 to store, manage, and serve content on your website.

 Using Amazon S3

This section covers how to set up and use Amazon S3 to store, manage, and serve content remotely on your website.

Using Amazon S3Amazon S3 is an affordable and almost limitless cloud storage solution that lets you store your files and large amounts of data, including images, media files, and website backups securely and embed these in your web content.
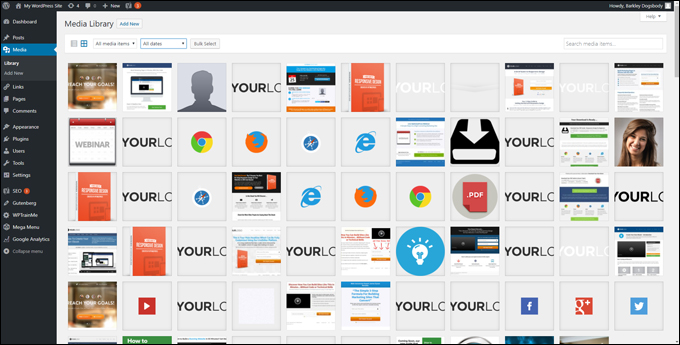
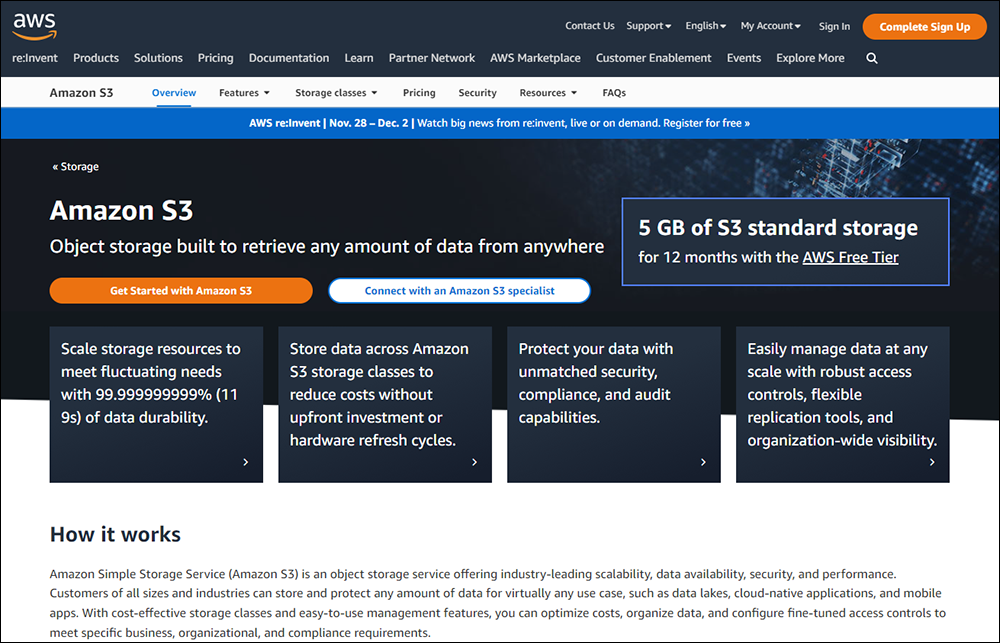
In this lesson, we provide an overview of the Amazon S3 service, show you how to set up an Amazon S3 account for your business, and how to upload files to S3 directories.

***

Why Store Your Site’s Content In The Cloud?

Hosting and streaming large media files on your website (e.g. videos) can be expensive and sometimes even complicated.

When it comes to storing files to be used as content on your website, you have a number of options.

For example, if you use WordPress as a CMS,  you can use the built-in WordPress Media Library to store and serve images, videos, audio, and downloadable files in your content.

WordPress Media Library

While the WordPress Media Library is a great tool for storing media files used in your content, these files are stored on your own server, and depending on your web hosting setup, these can take up excessive space and cause issues with site performance, or exceed your data or bandwidth allowance.

info

Note: In some cases, using the WordPress Media Library is necessary. For example, if you are adding featured images to posts or pages, or product images to a  WooCommerce-powered eCommerce store.

***

Another option is to upload and stream videos from a free video hosting site like YouTube, display images stored on Flickr, etc., and embed these into your content.

The problem with storing your web content files on free sites, however, is that you are not in control of your content. If, for example, the site changes its policies, this could have a significant effect on how your site can access your files and potentially even disrupt your entire business.

Given the above options and their respective challenges, a viable alternative is to serve content on your site that is stored and streamed from the cloud.

Many companies offer inexpensive cloud storage solutions that allow you to host and embed media, files, and documents into your website content.

Some of these solutions include Google Drive, DropBox, Amazon, and others.

Enter Amazon S3…

What Is Amazon S3?

Amazon Simple Storage Service (Amazon S3) is an affordable, secure, and reliable cloud storage solution service from Amazon Web Services (AWS) that you can use to store and retrieve any amount of data, at any time, from anywhere on the web.

Amazon S3 lets you share, distribute and download zip, PDF, audio, and video files, and stream videos on your site without consuming a large amount of bandwidth or straining your server’s resources.

Essentially, you’re using Amazon’s servers to store as much information as you want (videos, audio files, images, large files, etc.) at very little cost (you’ll pay only a few dollars per month for large amounts of data use), making this an ideal solution for using media content on your website.

The video below provides an overview of the Amazon S3 service:

Note: Amazon S3 is one of several applications that Amazon offers in its stable of products, so it’s important not to confuse Amazon S3 with Amazon AWS (i.e. the entire suite of services).

Benefits Of Using Amazon S3

Amazon S3 helps to address some of the biggest technical challenges many businesses face managing content on their websites, like site speed, security, and bandwidth cost.

Here are some of the benefits of using Amazon S3 to host your site’s content:

Improve Site Speed

When you host images, videos, and other heavy bandwidth items like large downloadable files on your own server, the more simultaneous traffic you have (i.e. many users visiting your site at the same time), the slower your pages load on your visitors’ browsers.

If you have spikes in traffic, this extra load can even crash your site.

One of the benefits of storing content remotely on the cloud is that uploading images, videos, and other large bandwidth-consuming files to Amazon S3 instead of your own server allows thousands of visitors to access your information without slowing down your site because the files are being delivered from Amazon’s servers, not yours.

Storing large-sized files or a large number of files in the cloud and streaming these in your content remotely can help to improve your site’s performance.

Host Large-Sized Files

Imagine having a product launch where lots of customers try to download a number of large zip files hosted on your server. Your server could crash, support tickets would start piling up and what should be a very happy day would quickly turn into a nightmare.

If you host your images, videos, and other downloadable files on Amazon S3, your visitors will not experience your site slowing down, buffering, or crashing due to excessive bandwidth consumption.

You could have 100, 1,000, or 10,000 people downloading your zip files simultaneously without any problems.

Save Money Streaming Your Content

Another benefit of using Amazon S3 is how much money you can save. Amazon S3 is an “online scalable (simple) storage service,” which means that it’s essentially a hard drive in cyberspace with unlimited storage – you only pay for what you use.

When Amazon launched S3 back in 2006 (2007 in Europe) they began by charging only 15 cents per gigabyte, and this price has been getting cheaper over time. Currently, it’s in the range of around 3 cents per Gb. This means better service and more savings for you.

Storing large-sized files or a large number of files in the cloud and streaming these in your content remotely can help to keep your web hosting costs down.

Save Time Managing Your Media Content

One of the many benefits and advantages of using a remote storage service like Amazon S3 to add media to your content instead of serving those files from the WordPress Media Library or a free media-hosting site like YouTube is the amount of time you can save managing your media content.

For example, let’s say that you decide to change an image that you have used multiple times throughout your site.

Instead of searching and replacing every instance of that image on your entire site, you can simply upload the new image file and overwrite the old file in your Amazon S3 account. All instances of that file will then automatically update on your site.

Image: connecting devices via the cloud.
There are many advantages to storing your website’s content files on the cloud.

Additionally, if you use WordPress, adding media files like images and videos to your content is as simple as copying and pasting the file’s link wherever you would like that file to display.

Info

All images used on this site (except for the featured images containing the titles of our course modules and lessons) are streamed from an Amazon S3 account.

How To Set Up An Amazon S3 Account

To set up an Amazon S3 account, go here.

Amazon AWS website - Amazon S3
Sign up for Amazon S3 on the Amazon AWS website.

We recommend going through the Pricing, FAQs , and S3 Service Level Agreement sections before creating your account.

AWS - Pricing information
Read the relevant sections of the AWS website before creating an account.

Tip

You can sign up for a free Amazon S3 account and get a generous amount of storage and 12 months free…

AWS Free tier
Create an Amazon S3 account for free.

This allows you to experience the service without having to pay until you exceed their trial quota or period…

Amazon S3 Storage - Free Tier
Amazon S3’s Free Tier gives you a generous amount of storage and 12 months free.

If this is your first time using an Amazon service, create a new account. Otherwise, sign in with your existing Root or IAM user account.

AWS Sign In
AWS Sign In

After logging in, go to your Dashboard section and click on Quick Links > My security credentials.

How To Set Up An Amazon S3 Account - AWS Dashboard
In the AWS Dashboard, click on My security credentials.

Inside the Your Security Credentials section, click on the Access keys tab.

AWS Dashboard- Your Security Credentials - Access keys
You’ll need access keys to set up your service.

In the “Access Credentials” section, you will find your Access Key ID code and Secret Access Key code. Click on “Show” to reveal your Secret Access Key code.

How To Set Up An Amazon S3 Account

You need both your Access Key ID code and Secret Access Key code to use the Amazon S3 service.

Copy both of these codes to a plain text file – make sure there are no spaces at the end of the code strings, or you will experience errors using the service.

How To Set Up An Amazon S3 Account

Important

Important: Never share your codes with anyone!

Save these codes for now on your hard drive (tip: don’t make the file name or location obvious). You will need these codes in the next step.

Note: If you need help creating directories (called “buckets”) to store your files or setting file permissions (so that other users can view, access, and download your files), we recommend watching the Amazon S3 video course before proceeding to the next step.

S3 Browser - Permissions Tab
You need to set file permissions for users to view or access files stored on Amazon S3.

Important

You do not have to enable permissions on your files if you don’t plan to share your files with other users or want to keep these files private (e.g. backup files).

How To Upload And Share Files On Amazon S3

After setting up your Amazon S3 account, you can upload files from your hard drive to your Amazon AWS S3 buckets. These files will be stored as an S3 object.

An object consists of the uploaded file and its metadata. You can upload any kind of file you like to an S3 bucket (e.g. images, videos, audio files, backups, data, etc.)

Amazon S3 Buckets screen
Amazon S3 stores your files inside data containers called buckets.

Tip

As uploading files to Amazon S3 can be a little technical, we recommend using the tool described below to transfer files between your computer and your Amazon S3 account.

s3 Browser

S3 Browser is a freeware tool for Windows users. You can use this tool to access, upload, and share files from your Amazon S3 account.

S3 Browser
S3 Browser

After downloading and installing the S3 Browser tool, you will need to add your S3 account details (see the previous section for details on how to set up an Amazon S3 account).

Click on ‘Add new account’…

S3 Browser - Add New Account
Add a new account in S3 Browser.

Enter your details:

  1. Account Name
  2. Access Key ID
  3. Secret Access Key

Click ‘Save changes’ to update your settings.

S3 Browser - Add new account
S3 Browser – Add new account

Once your account is set up, the S3 Browser interface lets you access your S3 account.

Access your S3 account files via the S3 Browser interface
Access your S3 account files via the S3 Browser interface.

S3 Browser provides a simple interface where you can perform tasks like set up, delete, and edit ‘buckets’ and folders, configure permissions, upload, download, and delete files and folders, and a whole lot more.

S3 Browser buckets screen.
You can do everything you need inside the S3 Browser buckets screen.

To upload files or folders, navigate to the bucket and folder you want to upload your files to (or create a new bucket or folder), then click on ‘Upload’ and select your option …

S3 Browser - Upload files or folders.
Upload files or folders.

Locate and select the files (or folders) to upload and click ‘Open’.

S3 Browser - select files.
Select the files to upload from your hard drive.

Your files will begin uploading to your S3 bucket on Amazon’s cloud server.

S3 Browser - Progress bar.
Your files will upload to your S3 bucket.

Tip

Consider upgrading to the S3 Browser PRO version for additional features, including faster uploading of files to your S3 account.

***

By default, anything uploaded to your Amazon S3 account will not be accessible to the public. You must set file permissions for uploaded items to make these visible or accessible if you plan to allow other users to view or download your files.

To set file permissions, select one or more files that you have uploaded.

Select Files
Select your files.

Tick the checkboxes shown in the screenshot below to configure basic access permissions for your files (i.e. display images or share files).

Set File Permissions
Set your file permissions.

After setting file permissions, click the ‘Apply changes’ button to set file permissions.

Click 'Apply changes' to set file permissions
Click ‘Apply changes’ to set your file permissions.

To copy your files’ URL(s) to your clipboard, click on ‘Copy’.

S3 Browser - Copy file URL
Copy your file URLs.

You can now paste the URL of your file wherever you need to use it.

For example, if using WordPress, you can add an image to your posts or pages using the WordPress Add Media tool.

Add images from Amazon S3 into your content
Add images from Amazon S3 to your content.

Tip

If you get an error (e.g. an image or video is not displaying), check that the file’s access permissions have been set by copying the URL and pasting it into your web browser.

If you get an error like the one shown below, it means that your file’s access permissions have not been set (or you have set up hotlink protection for your files on S3).

Error - Access permissions not set
You will get this error message if your access permissions are not set.

Open up S3 Browser, locate the file and click on the ‘Permissions’ tab.

File access permissions not set
The Read permissions for this file are not set. That’s why users can’t access (i.e. read) your file.

Make sure the permission checkboxes for your file are set as shown in the screenshot below.

File access permissions are now set
File access permissions are now set!

Of course, if you don’t want users to access your file(s), then leave permissions unchecked.

The image below shows you how to set general permissions for Amazon S3 files and copy the file’s URL to your clipboard.

Animated image showing how to set permissions for Amazon S3 files.
Setting permissions for Amazon S3 files.

For more help, information, and tutorials on using the S3 Browser tool, see the tool’s online help documentation and tutorials here:

Additional Amazon S3 Tools

In addition to the tools described above, here are some alternative tools and applications you can use to upload, transfer, share, and backup files using your Amazon S3 account:

S3 File Transfer Tools

  • Cloudberry Explorer – This is a freeware file manager for Amazon S3. Cloudberry Explorer provides a user interface to Amazon S3 accounts allowing accessing, moving, and managing files, buckets, and vaults across your local and cloud storage.
  • Cyberduck – This is a free 3rd party tool (User Interface) that connects your computer to your Amazon AWS account. Cyberduck is like an FTP client that works with PCs & Macs.

S3 File Backup Tools

The tools below allow you to back up your files and data securely to Amazon S3 and can be used as part of your Content Backup Strategy.

  • Snapshot Pro – Snapshot lets you set up automated safe and secure site files and content backups to S3 and other remote storage locations at a frequency that suits you best (e.g. monthly, weekly, daily, even hourly.)
  • S3Backup – This is a Windows desktop application that allows you to use the Amazon S3 service for remote backups and secure online file storage.

Congratulations! Now you know how to set up an Amazon S3 account to store your data offsite and how to use Amazon S3 to upload, store, and share your files online.

How To Use Amazon S3
Learn how to use Amazon S3 to store your web content.
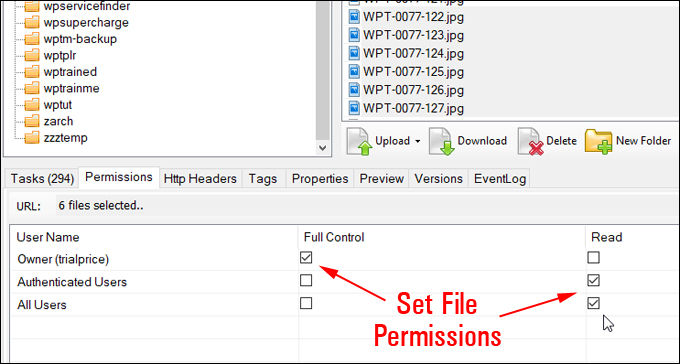
Related Tutorials

See the lessons below for additional information related to this tutorial on how to use Amazon S3:

Resources

  • How To Use Amazon S3 – A video course for beginners with over-the-shoulder video tutorials that show you how to use Amazon S3 quickly and easily.
  • Amazon S3 User Guide – Amazon Simple Storage Service guide for users.

***

Image: Cloud devices (iStock)

Retired Resources

A list of resources referred to in the course content that are either temporarily or permanently unavailable.

Retired Resources

This section lists resources referred to in the course content that are temporarily or permanently unavailable.

Retired ResourcesWe provide links to many useful tools, services, and resources throughout our course and the lessons.

As with all business and technology, some of these resources may be acquired by other businesses, merged with other technologies, temporarily put on hold, or permanently discontinued.

Unfortunately, we have no control over these external resources or the decisions made by their owners.

Note: Please feel free to contact us if you come across any links pointing to unavailable tools, services, or resources mentioned in the course. We will then aim to update the content and list these in the table below.

ResourceNotesStatusAlternative
Tracker.lyTracker.ly is currently not accepting new clients.TemporaryLinkTrackr
Motion ObjectsThis product appears to have been discontinued.PermanentFlexclip

***

Image: Old Book

What Effective Content Management Looks Like

Learn what effective content management looks like and how it can help to address most of the content-related problems in your business.

What Effective Content Management Looks Like

Here is a picture of what effective content management looks like and how it can help to address most of the content-related problems in your business.

Effective Content Management. Stock Photo: Man in office attire looking at laptop while celebrating with hands in the air and feet on the desk.In this article, we show you how the right picture of what an effective content management framework looks like can help you fix and eliminate most of the content-related problems in your business.

Note: This article is part of our Content Troubleshooting Guide.

***

Is Your Content Creating Discontent?

Is there a style of management that is ideally suited for managing content effectively in your business?

For example, in the participative style of management (also called the democratic leadership style), feedback, input, and participation from staff are sought in the decision-making process and team members/staff generally try and solve any issues themselves.

Would a participative style of management, then, lead to effective content management?

Consider this scenario:

Let’s say that you notice several articles on your company’s blog are addressing the same or a similar topic, and hence competing with each other for keyword ranking and traffic.

A participative (i.e. democratic-style) manager would probably respond by turning to the editor and saying something like: “you’re the editor…what do you suggest we do? How would you fix this?”

In most situations, encouraging staff members to come up with the solution to a problem by working it out amongst themselves is a great approach and typically works. Staff members are encouraged to think for themselves; they feel empowered when asked for their input; they feel valued for their contribution, and they also feel recognized for their expertise.

The manager also feels and looks good. The participative style of management allows them to quickly lob any issues back over the net and into their team’s court by posing problems as questions for the team to resolve, and this makes them one of “the good guys.”

Everyone feels good and everyone values each other.

That’s great, except for the fact that this style of leadership, which is used across many industries and organizations, doesn’t really help to solve any fundamental issues of content management caused by a lack of strategic planning and the failure to implement effective systems and processes.

For example, if your content isn’t “meeting all the metrics,” the issues may not be related to your team members’ skills, expertise, technical abilities, or their motivation, enthusiasm, and willingness to contribute and participate in helping the business succeed, but to a lack of planning and systems.

To understand this better, let’s go back to the example where you have found several articles essentially covering the same topic, hence potentially competing with each other for rankings and traffic, and let’s assume that the manager has asked the editor to come up with a solution.

For this discussion, let’s imagine that there are three articles involved:

  1. Article “A” is an old post written by a guest contributor back in the day when the company couldn’t afford its own team of staff writers. It’s a well-written post with a catchy title and a decent number of backlinks, and it gets a reasonable amount of traffic each month.
  2. Article “B” is about two years old and written by a staff writer who no longer works with the company. This post is also well-written, with a keyword-optimized post title. This article covers the topic in detail, has a decent number of backlinks, and gets reasonable monthly traffic.
  3. Article “C” is the most recent of all three articles. It was written by the current full-time writer and complies fully with Google’s latest content quality guidelines. As the article was only recently published, however, it’s kind of hard to assess how well it is performing in terms of search traffic and backlinks…we’ll have to wait and see!

Now, suppose that the editor goes back to their desk, reads through each article, and makes the decision to:

  • Rewrite article “A” and remove some of the content that doesn’t fit with the new article’s approach or angle,
  • Redirect article “B” to the newer article “C” (even though they are not exactly covering the same topics), then delete article “B”, and
  • Add links to related content in article “A” and article “C”.

Should the editor have done this?

The answer is … it depends!

Making decisions about what to do with existing content is not that simple.

For example, does the editor know how the articles were performing for certain keywords? What happens if you change the content in the article and traffic suddenly drops?

You wouldn’t know this unless there is a system in place to track changes to the content and monitor its performance before deciding to edit it.

If the newly-edited article doesn’t perform as well as was hoped, who is tracking which elements of the content were changed? Can the editor compare different versions of the article and restore it to how it was before being edited?

If you edit an article and remove certain content, how do you know that the deleted content wasn’t required to be there (e.g. through some form of paid or reciprocal content exchange or agreement?)

Screenshot of Slack conversation discussing removal of content from a blog post.
What happens when you remove content from an article that was supposed to be there through some prior agreement?

If you delete an article, what happens to the content that was currently linking to it? What will your site visitors experience when they click on links pointing to articles that no longer exist?

Also…what if the old article (containing outdated, irrelevant, or obsolete information) performs better than the new article? If there is a noticeable drop in traffic, how can you tell if it’s temporary or permanent and how long will you wait to find this out? How are you monitoring all this?

As you can see, unless the editor is also responsible for putting systems in place to track SEO and content performance, these are not necessarily editorial decisions.

But there are other areas to consider besides focusing only on SEO.

For example…why were there three articles covering similar topics, all potentially competing for the same keywords and traffic? Why wasn’t this picked up during the content planning stage?

And what criteria is the editor using to prioritize whether to keep, update, fix, or completely rewrite content in existing articles or make decisions on articles and blog posts with similar content? Who established those criteria and did they take into account how their decisions will impact other areas of the business?

Clearly, making the content production team responsible for “fixing” content-related issues is not necessarily the best approach, as it doesn’t address the cause of the issues.

Hence a participative style of management may not be “fixing” anything, especially if the same content-related problems keep occurring.

In other words, if your content is not delivering expected or hoped-for results (i.e. “meeting all the metrics”), the issue most likely has nothing to do with management styles or the lack of skills or expertise of team members, but with the fact that your organization may not have fully grasped the difference between the three levels of decision-making in a business as explained in the Content Management Mindset lesson.

So, let’s recap this concept briefly.

What Effective Content Management Looks Like

Take a look at the diagram below. It may look simplistic, but when you truly understand what it means, you will be able to identify, troubleshoot, and find solutions to fix almost all of the content-related problems in your business.

Every business has these three levels of decision-making:

Chart: The three levels of decision-making in a business.
Every business has three levels of business decision-making…even a one-person business!

While everyone in the business is responsible for helping the organization achieve its objectives and realize its vision, each of these levels plays a specific role in helping the business reach this outcome.

Chart: Executive, Managerial, and Tactical roles and their functions.
What each decision-making level does in an organization.

Executive-level roles are responsible for making “big-picture” decisions.

Managerial-level roles are responsible for figuring out the systems and processes that will deliver results that match the “big picture” set at the Executive level.

Tactical-level roles (also known as Technical-level roles) are responsible for following the systems and processes set at the Managerial level to achieve the results and objectives set at the Executive level.

So, what does this all mean and how can it help you troubleshoot and fix your content-related problems in areas like content planning, content production, content marketing, and content management?

Let’s take a look using an example.

Suppose your business decides to use content marketing methods like posting regular articles on its blog and social media, email marketing, paid advertising, etc. to promote itself and grow online.

Suppose too that, like many businesses, your company doesn’t have the budget to outsource every content-related role to a digital marketing agency or the financial resources to hire and build a team of content specialists to run everything in-house.

Let’s also say that your digital business setup includes the following:

  • A website with a blog.
  • Social media accounts on the main platforms.
  • An email service account.
  • A small budget to spend on content creation and advertising.
  • The people already hired to work in the business (including you).

So, this is what your business has to work with.

Next, they appoint you as their Content Manager and make you responsible for helping the business grow using “content” and getting results within your available budget and resources.

Now, let’s make things a little challenging but not so impossible that it would make you want to quit your new role.

Your content team is comprised of two other team members including you. We’ll call them Ash and Pat.

All three of you agree to share the responsibility of regularly writing and publishing content on the blog.

Pat has excellent design skills, so Pat will also look after social media.

Ash has a marketing background, so Ash will handle things like creating email campaigns, send email promotions, run newsletters, grow and maintain a list of subscribers, etc.

Your budget will be used for outsourcing your advertising campaigns to a professional agency.

Other people in your organization are also happy to offer assistance where required (e.g. reviewing content in their areas of expertise, suggesting new content topics, etc.)

Finally, you, Pat, and Ash agree to have a production team meeting once a week to discuss how the work is progressing. You also agree to meet regularly with the General Manager to provide updates and reports and to discuss any issues.

With this basic plan, you and your team begin the work of creating and publishing content.

Each week, you meet with your team. You all come up with new content ideas. You then assign article topics for Ash, Pat, and yourself and aim to get at least two new articles published every week, plus send an email roundup to your subscribers (Ash) and post social media updates (Pat).

Now, what happens if you experience issues with content production like:

  • Running out of content ideas?
  • Being unable to complete projects due to circumstances outside the control of your team?
  • Published content not performing as well as expected?

Well, if you understand the three levels of decision-making mentioned above, then you would have a starting point for troubleshooting and addressing these at the appropriate level.

For example:

Running Out Of Content Ideas

The content team (Tactical Level) is not responsible for making sure that the content production pipeline never runs dry.

The Managerial Level is responsible for creating the Content Plan and developing and implementing the systems and processes responsible for creating a self-sustaining content pipeline.

The Managerial Level, however, can’t create this content plan, unless and until the Executive Level has defined and created a Content Strategy for the business.

So, running out of content ideas is ultimately an issue that needs to be addressed at the Executive and/or Managerial Level.

tip

If your team needs new content ideas for your website, blog, or newsletter, subscribe to our FREE Infinite Content Ideas course.

Being Unable To Complete Projects Due To External Circumstances

If your articles or blog posts depend on new product features being released or services being available and there is a hold-up in product development, then the content team may have no choice but to put their projects on hold.

Again, this is not an issue that the content team (Tactical Level) is responsible for or can resolve. It has to be addressed and resolved at the Managerial Level or higher.

Published Content Not Performing Well

If your published articles or blog posts perform poorly, the issue may be your content team’s responsibility only if the editor has not provided the team with an adequately prepared content brief.

If the content brief is found to be adequate, then the problem may lie in a poorly-constructed Marketing Plan (Managerial Level) or Marketing Strategy (Executive Level).

So…why is your content team not responsible for solving any of the issues described above?

Well, if you understand the three levels of decision-making in a business, then you will see that:

Executive Level roles are responsible for setting a clear business vision and formulating a business strategy, a marketing strategy, defining an overall budget to cover the cost of hiring people to fill roles and invest in resources, etc.

Managerial Level roles are responsible for turning strategies into plans (e.g., a business plan, marketing plan, etc.) implementing documented systems and processes (e.g. for training and onboarding people into their roles, content production, content promotion, etc.), and making sure that guidelines and procedures are created for Tactical Level roles to follow (e.g. content briefs, branding and style guides, etc.)

Tactical Level roles are responsible for making sure they follow the systems and processes they are given to deliver the work as specified in the strategies, plans, and guidelines they have been given.

Think about it…

If you are asking a content writer to come up with content ideas and topics to write about so that your content pipeline doesn’t run dry, then you are effectively putting someone who doesn’t have the bigger picture of your business (i.e the business vision) in charge of defining your content strategy and creating your content plan.

It is only inevitable that this will lead to the issues described above (and those listed in the Content Troubleshooting Guide).

Setting Tactical-Level KPIs

If the Executive and the Managerial level roles have delivered what is truly required of them, then tactical-level roles like editors, content writers, media creators, etc. can simply plug into existing systems, follow established processes and procedures set out in documented strategies, plans, and guidelines, and deliver work to the standards and results expected by the business to meet its overall goals and objectives.

In this scenario, then, setting realistic and fair KPIs and benchmarks may include the following:

  1. Content Production – Is the business setting realistic workload targets and quotas? Are these being met and delivered on time?
  2. Work Quality – Is the work delivered meeting their brief? Are documented guidelines, procedures, and specifications being followed?
  3. Role Competency – How much of the completed work is being performed by the person responsible for that role? (e.g. with content writers, is the writer doing most of the work and submitting a draft that requires only editorial refining to advance to 2nd and final drafts, or do other people have to get involved and assume the writer’s workload to help get their content over the line?)
  4. Team Participation – Are team members willing to participate and contribute ideas and suggestions for improving processes, and take on additional tasks and responsibilities?

If executive and management-level roles do not provide tactical-level roles what is required, however, then assessing performance can end up being skewed, unrealistic, or unfair.

For example, content writers should NOT be penalized or assessed unfairly if:

  • Targets set by management are unrealistic.
  • Writers are expected to deliver X articles per week but there are regular holdups in product or business development so their articles can’t be completed on time.
  • There is no new content in the pipeline (as discussed, writers don’t create the content plan to meet strategic objectives, management is responsible for delivering this)
  • Writers are not given a well-researched and detailed content brief outlining objectives, specifications, or requirements.
  • Timely delivery needs additional roles involved in the content creation process (e.g. supplying testing data, videos, technical diagrams, code samples, performing technical checks, etc.) and these aren’t made available or supplied in a timely manner.
  • Writers have been given too many additional responsibilities other than writing because there are not enough resources available in the company to handle those.
  • There are other performance issues directly related to a lack of clear communication, documented guidelines, training, essential tools, resources, etc.
  • There are other factors outside the writer’s control.

Summary

Understanding the three levels of decision-making in a business will help you to identify, troubleshoot, and find solutions to fix almost all content-related problems and issues in your business.

Action Steps

Review this lesson: Content Management Mindset

Resources

References

***

Image: Successful Business

Keyboard Shortcuts

Save time using these ALT key keyboard code shortcuts to add international accents and symbols to your content.

Keyboard Shortcuts

Save time using these ALT key keyboard code shortcuts to add international accents and symbols to your content…

Do you need to add international accents or symbols to your content?

The ALT code keyboard shortcuts in this section will help you save time adding international characters and symbols to your content.

Copy and paste the shortcuts into your content or bookmark this page and share it with your content team.

***

ALT Key Code Shortcuts

Here is a list of commonly-used international ALT code accents.

tip

Keep the ALT key down while you type the number on your keyboard’s number keypad

Alt Codes Symbol Description
Alt 0224 à a grave
Alt 0225 á a acute
Alt 0226 â a circumflex
Alt 0227 ã a tilde
Alt 0228 ä a umlaut
Alt 0231 ç c cedilla
Alt 0232 è e grave
Alt 0233 é e acute
Alt 0234 ê e circumflex
Alt 0235 ë e umlaut
Alt 0236 ì i grave
Alt 0237 í i acute
Alt 0238 î i circumflex
Alt 0239 ï i umlaut
Alt 164 ñ n tilde
Alt 0242 ò o grave
Alt 0243 ó o acute
Alt 0244 ô o circumflex
Alt 0245 õ o tilde
Alt 0246 ö o umlaut
Alt 0154 š s caron
Alt 0249 ù u grave
Alt 0250 ú u acute
Alt 0251 û u circumflex
Alt 0252 ü u umlaut
Alt 0253 ý y acute
Alt 0255 ÿ y umlaut
Alt 0158 ž z caron

Upper Case ALT Key Accents

Alt Codes Symbol Description
Alt 0192 À A grave
Alt 0193 Á A acute
Alt 0194 Â A circumflex
Alt 0195 Ã A tilde
Alt 0196 Ä A umlaut
Alt 0199 Ç C cedilla
Alt 0200 È E grave
Alt 0201 É E acute
Alt 0202 Ê E circumflex
Alt 0203 Ë E umlaut
Alt 0204 Ì I grave
Alt 0205 Í I acute
Alt 0206 Î I circumflex
Alt 0207 Ï I umlaut
Alt 165 Ñ N tilde
Alt 0210 Ò O grave
Alt 0211 Ó O acute
Alt 0212 Ô O circumflex
Alt 0213 Õ O tilde
Alt 0214 Ö O umlaut
Alt 0138 Š S caron
Alt 0218 Ú U acute
Alt 0219 Û U circumflex
Alt 0220 Ü U umlaut
Alt 0217 Ù U grave
Alt 0221 Ý Y acute
Alt 0159 Ÿ Y umlaut
Alt 0142 Ž Z caron

ALT Key Symbols

Alt Codes Symbol Description
Alt + 0153 trademark symbol
Alt + 0169 © copyright symbol
Alt + 0174 ® registered trademark symbol
Alt + 0176 ° degree symbol
Alt + 0177 ± plus-minus symbol
Alt + 0182 paragraph
Alt + 0190 ¾ fractio­n, three-fourths
Alt + 0215 × multiplication sign
Alt + 0162 ¢ cent sign
Alt + 0161 ¡ upside down exclamation point
Alt + 0191 ¿ upside down question mark
Alt + 1 smiley face
Alt + 2 black smiley face
Alt + 3 heart
Alt + 4 diamond
Alt + 5 club
Alt + 6 spade
Alt + 7 bullet
Alt + 8 inverse bullet
Alt + 9 white circle
Alt + 10 inverse white circle
Alt + 11 male sign
Alt + 12 female sign
Alt + 13 eighth note
Alt + 14 beamed eighth note
Alt + 15 sun
Alt + 16 black right-pointing pointer
Alt + 17 black left-pointing pointer
Alt + 18 up/down arrow
Alt + 19 double exclamation mark
Alt + 20 paragraph symbol
Alt + 21 § section sign
Alt + 22 black rectangle
Alt + 23 up\down arrow
Alt + 24 up arrow
Alt + 25 down arrow
Alt + 26 right arrow
Alt + 27 left arrow
Alt + 28 right angle
Alt + 29 left/right arrow
Alt + 228 Σ auto sum
Alt + 251 square root
Alt + 236 infinity symbol

***

Return To The Main Tools And Resources Section

Image: Keyboard

***

Web Content Accessibility

Learn about the importance of making your web content more accessible and inclusive for all of your website’s users.

Web Content Accessibility

Learn about the importance of making your web content more accessible and inclusive for all of your website’s users.

Web Content Accessibility - Man reading braille in front of a computer.The web has become so central to our lives that many people around the world today spend hours each day on average looking at screens on their digital devices searching for information, for work, or for entertainment.

According to WHO, around 15% of the world’s population lives with some form of disability. So, it’s important to ensure that both your website and your content allow people with disabilities or impairments to access and benefit from the same kind of user experiences that people without disabilities enjoy.

Making your website and web content accessible not only has ethical and commercial justifications but in some countries, there are also legal implications for not complying, especially if you are a nonprofit organization.

In this lesson, we look at:

  • What Are Web Content Accessibility Guidelines?
  • Ways To Make Your Web Content Accessible

***

Before You Begin

Please review the sections below before starting this lesson:

What Are Web Content Accessibility Guidelines?

Web Content Accessibility Guidelines (WCAG) is an internationally recognized standard for making web content more accessible to people with disabilities. It was developed by the World Wide Web Consortium (W3C), an organization that works to develop web standards and technologies.

The importance of content accessibility cannot be overstated. With over 1 billion people living with disabilities worldwide, ensuring that web content is accessible to everyone is not only a moral imperative, but it also makes good business sense.

When web content is not accessible, it can exclude people with disabilities from accessing important information, services, and opportunities. This can lead to social isolation and discrimination, and can also result in lost business and revenue for companies that fail to make their content accessible.

On the other hand, when web content is made accessible, it benefits everyone. People with disabilities can fully participate in society and access the same information and opportunities as everyone else. It also helps businesses reach a wider audience and can improve search engine optimization (SEO).

WCAG covers a wide range of recommendations for making web content more accessible to a wider range of people with disabilities on desktops, laptops, tablets, mobile devices, wearable devices, and other web of things devices.

This includes accommodating people with blindness, low vision, and other vision impairments; deafness and hearing loss; limited movement and dexterity; speech disabilities; sensory disorders; cognitive and learning disabilities; and combinations of these.

There are three levels of conformance to WCAG: A, AA, and AAA.

  • Level A is the most basic level and covers the minimum requirements for accessibility.
  • Level AA is the next level and covers a higher level of accessibility.
  • Level AAA is the highest level and covers the highest level of accessibility.

Following the guidelines can make your web content more usable to users in general. In some countries and jurisdictions, website owners can also be fined or sued for discrimination if their websites are found to be non-accessible to all users.

Different WCAG Versions

Just as the web is continually evolving, so too will the Web Content Accessibility Guidelines.

WCAG 2.1 is the most recent and relevant accessibility standard. Website owners are advised to start with WCAG 2.0 when allocating resources then step up to WCAG 2.1 to help more people with disabilities and reduce their future legal risk

WCAG 3 is currently a work in progress and will aim to address various types of web content including static content, interactive content, visual and auditory media, and virtual and augmented reality. The guidelines also address related web tools such as user agents (browsers and assistive technologies), content management systems, authoring tools, and testing tools.

WCAG 3 also introduces a new color contrast guide, called Advanced Perceptual Contrast Algorithm (APCA), and aims to replace the older WCAG 2.0 method, while providing a wider range of recommendations for making web content more accessible.

WCAG – Four Principles

Note: The section below was sourced from this article: Understanding The Web Content Accessibility Guidelines 

WCAG is comprehensive and detailed, but difficult to understand quickly.

WCAG consists of four broad principles with recommendations that website owners must take practical steps to satisfy in order for their web content to be considered accessible:

  • Perceivable: Users must be able to perceive it in some way, using one or more of their senses.
  • Operable: Users must be able to control UI elements (e.g. buttons must be clickable in some way — mouse, keyboard, voice command, etc.).
  • Understandable: The content must be understandable to its users.
  • Robust: The content must be developed using well-adopted web standards that will work across different browsers, now and in the future.

Web Content Accessibility Goals And Objectives

As mentioned above, Web Content Accessibility Guidelines (WCAG) 2.1 provides a set of guidelines for making web content more accessible to individuals with disabilities organized into four principles.

These principles have the following goals and objectives:

  • Perceivable: Information and user interface components must be presentable to users in ways they can perceive.
    • Provide text alternatives for non-text content, such as images and audio.
    • Provide captions and other alternatives for multimedia.
  • Operable: User interface components and navigation must be operable.
    • Make all functionality available from a keyboard.
    • Provide users enough time to read and use the content.
  • Understandable: Information and the operation of the user interface must be understandable.
    • Make text content readable and understandable.
    • Make the site appear and operate in predictable ways.
  • Robust: Content must be robust enough that it can be interpreted reliably by a wide variety of user agents, including assistive technologies.
    • Maximize compatibility with current and future user agents, including assistive technologies.

Examples:

  • Adding alternative text to images and providing captions for videos to provide a more accessible experience for users with visual impairments.
  • Making sure that all functionality can be accessed via a keyboard for users who cannot use a mouse or other pointing device.
  • Providing clear and simple language and instructions for users with cognitive disabilities.
  • Ensuring that website code is structured in a way that can be interpreted by a wide range of devices, browsers, and assistive technologies.

Let’s look at some more ways to make your content accessible and inclusive.

Ways To Make Your Web Content Accessible

According to leading digital accessibility solutions provider eSSENTIAL Accessibility,

“WCAG covers an exhaustive list of digital elements that can create barriers for people with disabilities. The guidelines address common barriers that prevent people from using digital platforms. Barriers can be tricky because unless they directly affect you, you might have an extremely difficult time knowing they exist.”

Source: What is WCAG?

Each of the four principles listed earlier provides a range of guidelines for making your web content more accessible and ensuring it complies with regulations. Click on each of the links above to view these recommendations.

Some examples of content-related areas covered in the WCAG include:

  • Non-decorative images and images that serve a structural or navigation purpose must contain descriptive alternative text (alt-text), so visually impaired users can have an appropriate description of the image.
  • The on-page text must be realizable without disrupting how the page displays, so people with vision disabilities can magnify the content and have an easier time reading.
  • Pre-recorded and live video with audio content need to have captions for users who are deaf or hard of hearing.
  • Pre-recorded audio content files need to have a written transcript. This is also helpful for users who can’t turn on the sound or are in a noisy environment and want to listen to an audio file.
  • Form-entry tasks must not have time limits or must include an extended, lengthy time limit to accommodate people who need more time to fill out forms.
  • Elements that display across multiple web pages (e.g. navigation, headers, footers, sidebars, etc.) must consistently show in the same areas of the website so regardless of which page users are on, they will always know where to find these.
  • Users must be able to navigate your website without the use of a mouse. For example, users should be able to use the “tab” button on a keyboard to progress through any given page.
  • All web pages must use a proper heading-level structure to allow users with screen readers to navigate easily through the content.

Web Accessibility Evaluations Tools

There are website accessibility evaluation tools you can use to determine if your web content meets accessibility guidelines and automatically help you handle many accessibility barriers.

Web Accessibility Evaluation Tools List
There is a range of web accessibility evaluation tools available to ensure that your web content meets accessibility guidelines. Source: W3C

In addition to the list provided in the above link, see this page to determine what kind of tool you need and how it can assist you: Selecting Web Accessibility Evaluation Tools.

Digital Content Accessibility – FAQs

Here are frequently asked questions about digital content accessibility:

What is digital content accessibility?

Digital content accessibility ensures that digital resources (websites, tools, technologies) are usable by everyone, including people with disabilities. This involves the design and development of digital content that can be accessed, understood, and interacted with by users who may require assistive technologies or alternative formats.

Why is accessible digital content important?

Accessible digital content allows individuals with disabilities to have equal access to information and functionality. It benefits a wider audience, including older users and those in low-bandwidth environments, and is often required by law for public and certain private entities.

Is accessibility required by law?

In many countries, yes. Laws such as the Americans with Disabilities Act (ADA) in the U.S. and the Equality Act in the U.K. mandate accessibility for public sector bodies and businesses in certain contexts to prevent discrimination against individuals with disabilities.

What are the Web Content Accessibility Guidelines (WCAG)?

WCAG are part of a series of web accessibility guidelines published by the Web Accessibility Initiative (WAI) of the World Wide Web Consortium (W3C). They provide a framework for making web content more accessible, primarily to people with disabilities.

How can I make PDF documents accessible?

Creating accessible PDFs involves using tagged PDF features, ensuring text is selectable, providing alternative text for images, and using simple, structured layouts that assistive technologies can interpret.

What are the consequences of non-compliance with accessibility standards?

Non-compliance can lead to legal challenges, fines, and damage to an organization’s reputation. It also excludes a significant portion of potential users, affecting overall traffic and engagement.

How can accessibility influence digital marketing strategies?

Accessible content reaches a wider audience, improving engagement metrics and SEO performance. It also demonstrates corporate social responsibility and inclusiveness, enhancing brand perception.

Summary

Content accessibility is crucial for ensuring that everyone has equal access to information and opportunities online. WCAG provides a framework for making web content more accessible, and meeting these standards can benefit both individuals with disabilities and businesses.

Making your web content accessible not only makes your website more inclusive for all users and is a legal requirement in many countries, but it also helps to create a more inclusive and equal society.

This lesson provides an overview of the steps you need to take to make your web content accessible to all users.

Action Steps

Download the guides and checklists in the Resources section below and conduct a thorough audit of your web content to ensure that your website meets all web content accessibility guidelines

Resources

Visit our tools and resources section for additional courses, guides, and helpful tools and resources.

References

Next Lesson

***

Image: Man reading braille

Content Troubleshooting Guide

Use this content troubleshooting guide to help you identify and fix content-related issues in your business.

Content Troubleshooting Guide

Use this content troubleshooting guide to identify and fix content-related issues in your business.

Content Troubleshooting GuideThis troubleshooting guide will help you identify issues in your content that may be preventing your business from experiencing better results and presents fixes and solutions to improve your content management practices.

In this guide we’ll:

  1. Show you a picture of what content management done right looks like and how it addresses most content problems.
  2. Examine common areas where things can go wrong and present typical scenarios.
  3. Troubleshoot the main issues preventing your content from performing better, identify their causes, and look for solutions to correct and fix these.

tip

Refer to our content management glossary if you need help understanding some of the terms or concepts described in this section.

***

How To Use This Troubleshooting Guide

This guide is divided into sections listing the main content-related problems you may run into, with links to articles that expand on the possible causes and solutions to investigate.

We recommend starting with the section below, then coming back to this index page whenever you experience issues.

Let’s get started…

Knowing Where To Tap

 A boilermaker was hired to fix a huge steamship boiler system that had stopped working, causing the ship owner tens of thousands of dollars in productivity losses.

After listening to the ship’s engineer describe the problem and asking a few questions, he went to the boiler room, looked at the maze of twisting pipes, listened to the thump of the boiler and the hiss of the escaping steam for a few minutes, and felt some pipes with his hands. Then he hummed softly to himself, reached into his overalls, took out a small hammer, and tapped a bright red valve one time.

Immediately, the entire system began working perfectly, and the boilermaker went home.

When the ship owner received a bill for five thousand dollars, he became outraged and complained that the boilermaker hadn’t even been in the engine room for fifteen minutes and requested an itemized bill.

So, the boilermaker sent him the following itemized bill as requested:

invoice

The aim of this troubleshooting guide is to show you “where to tap” to fix content-related issues and problems preventing your business from achieving its goals and objectives.

info

As you work through this guide, keep in mind that issues experienced at one level are often directly affected by the lack of systems and processes on their preceding levels.

Content processes - animated graphic
Issues on one content level are often caused by a lack of systems and processes on the level that precedes it.

In practical terms, what this means is that if you experience content-related issues at the level of content production, content promotion, or content management, the underlying cause will probably be found to be related to issues at the content planning level.

In turn, issues at the content planning level are often caused by issues at the strategic level (i.e. a lack of a sound content strategy) and strategic-level issues are often caused by a lack of implementing foundational-level principles (i.e. business basics).

Content Troubleshooting Chart
Use this simple chart when diagnosing content-related issues in your business.

This content troubleshooting guide aims to help you identify which level may be causing your issues so you can implement long-term fixes.

Before going any further, make sure to also read these articles:

Content Troubleshooting Goals And Objectives

Most users engage with businesses online via their websites, so it’s important to focus on improving the effectiveness of your web content.
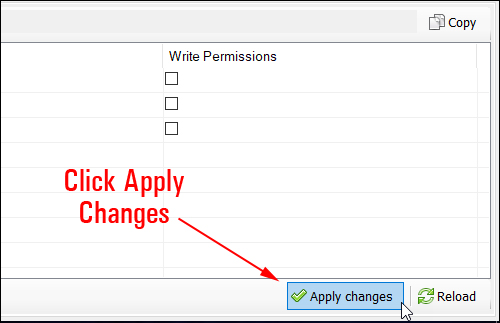
Common web content troubleshooting goals and objectives include:

  • Improving overall website performance: This goal aims to optimize your website’s loading times, reduce bounce rates, and increase user engagement. This can be achieved by implementing a content delivery network (CDN), compressing images, and minifying code.
  • Increasing search engine visibility: This goal focuses on improving your website’s search engine rankings in order to drive more organic traffic. This can be achieved by optimizing meta tags, creating high-quality content, and building backlinks.
  • Enhancing user experience: This goal aims to improve the overall usability and navigation of your website, making it easier for users to find what they are looking for. This can be achieved by creating a clear and consistent website structure, improving website navigation, and making sure all links are working.
  • Increasing social media engagement: This goal focuses on driving more engagement on social media platforms. This can be achieved by creating shareable content, running social media contests, and incorporating social media sharing buttons on your website.
  • Boosting conversions: This goal aims to increase the number of website visitors that convert into customers or leads. This can be achieved by creating compelling calls to action, optimizing landing pages, and A/B testing different elements of your website.
  • Increasing brand awareness: This goal focuses on building brand recognition and reputation. This can be achieved by creating a consistent brand voice, incorporating brand imagery, and regularly publishing high-quality content.
  • Improving analytics tracking: This goal aims to ensure accurate tracking of website analytics in order to gain insights into user behavior and improve performance. This can be achieved by setting up Google Analytics, setting up tracking codes, and regularly monitoring website metrics.
  • Improving mobile optimization: This goal focuses on optimizing your website for mobile devices in order to provide a better user experience for mobile users. This can be achieved by creating a mobile-responsive design, reducing page load times, and simplifying navigation.

Now that we have a clearer understanding of what the aim of troubleshooting content is, let’s take a look at the issues that can prevent you from achieving these goals and objectives and how to address these.

Content Strategy-Related Issues

This section will help you identify, troubleshoot, and correct issues with your content strategy.

Here are some of the main problems experienced at this level:

  • Lack Of A Content Strategy – Your business does not have a content strategy.
  • Lack Of Business Planning – Foundational steps have not been implemented
  • Lack Of Resources – Your business lacks the human and financial resources to implement the content methods specified in the content strategy.
  • Lack Of Direction – Your business may be creating content but it lacks a clear purpose and direction. This is reflected in poor results.

Let’s go briefly through each of these issues.

Lack Of A Content Strategy

The Executive Level is responsible for creating a documented content strategy for your business.

The lack of a well-defined content strategy is often the root cause of most of the content-related issues your business will experience.

Content Troubleshooting Guide Chart: A cycle of content-related business processes.
Your Content Strategy impacts all content-related areas of your business and is often the root cause of all other issues.

If your business lacks a content strategy, then the Executive level either:

  1. Doesn’t fully understand that it is their responsibility to develop the content strategy, or
  2. Hasn’t implemented the foundational steps that come before it (see next section below)

For help and information on the above, see this lesson: How To Create A Content Strategy.

Lack Of Business Planning

If your business lacks a content strategy, it’s most likely because other important foundational steps have not been implemented in the business beforehand.

Make sure that your business has implemented the processes listed in the chart below before developing a content strategy:

Content Troubleshooting Guide Chart 1: Business Basics
Your business needs to implement the basic business steps shown above before it can develop a Content Strategy.

For help and information on the above, see this lesson: Business Basics

Lack Of Resources

Your business strategy defines the overall budget of your business.

This budget determines the resources the business has available to invest in areas like hiring people for your content team and the budget it can allocate to different departments like sales, marketing, product development, etc.

The marketing strategy and marketing budget ultimately determine which content methods your business will use.

So, if your content strategy asks you to implement a specific content method (e.g. video marketing) but your team has insufficient human or financial resources to develop, employ, or promote this method effectively, then the solution is to either:

  1. Review and adjust the content strategy (e.g. set more realistic expectations), or
  2. Help your content team become more resourceful (e.g. learn to do the best you can to work within your limitations.)

For help and information in this area, see these lessons:

Lack Of Direction

A Content Strategy tells your content team where to focus its efforts and sets the destination to aim for. The Content Plan helps your team get there by specifying what to do to and how to get it done.

So, if your team is lacking direction (e.g. by asking questions like “what are we supposed to be working on now?” or “what are we going to be working on next?”) then it probably lacks a well-defined Content Plan.

As explained in the article What Effective Content Management Looks Like and the Content Management Mindset lesson, the Managerial Level is responsible for creating and delivering the Content Plan.

Before your business can create an effective Content Plan, however, the business has to have a clearly defined strategy as shown in the chart below.

Content Troubleshooting Guide Chart 2: Content Strategy
Your business needs a Content Strategy before it can develop an effective Content Plan.

As the Executive Level is responsible for creating the Content Strategy, both the Executive Level and the Managerial Level have to work together to develop the Content Plan.

For more information and help on the above, see these course modules:

Also, see this lesson: Troubleshooting Your Content Strategy

Content Planning-Related Issues

Before troubleshooting issues with Content Planning, make sure that systems and processes have been implemented in the preceding level (Content Strategy), and review the lessons and course modules below:

Your Content Plan is the practical “how to” implementation of your Content Strategy.

Effective content planning involves implementing systems and processes that will deliver better results in areas like Content Production and Content Promotion.

Unless processes are implemented to ensure that your content team only focuses on creating and promoting content that is aligned with the goals and objectives of your business, you will experience problems at the Content Planning level, such as:

  • Working in a constantly chaotic, disorganized, and crisis-driven environment; having no clear understanding of business goals or objectives (poor Planning Processes)
  • No clearly-defined areas of responsibility within the team leading to doubling up or missing important tasks and activities (poorly-defined Team Roles)
  • Missing important content events and opportunities (poorly managed or no Content Calendar)
  • Too much effort being spent on ineffective content planning or research (poorly defined Content Metrics)
  • Ignoring growing problems with existing content or sweeping these under the carpet (lack of scheduled Content Reviews)
  • Too much time being spent on content planning or research (lack of team member training or knowledge of using Content Planning & Research Tools)

It is important, then, to make sure that your Content Plan has implemented the processes listed in the chart below before moving into areas like Content Production and Content Promotion.

Content Troubleshooting Guide Chart 3: Content Plan
Content Planning issues affect your Content Production.

For more information and help in this area, see this course module: Content Planning

Also, see this lesson: Troubleshooting Your Content Plan

Content Production-Related Issues

Before troubleshooting issues with Content Production,  make sure that systems and processes have been implemented in the preceding levels (Content Strategy and Content Planning), and review the lessons and course modules below:

Implementing effective content production systems and processes will ensure that your business can consistently deliver content on time, targeted to the right users, in the right content types and formats.

Issues related to content production are often caused by the lack of systems or processes in areas such as:

  • Content Production Workflow – Different content types (e.g. articles, videos, ebooks, etc.) require different content production workflows. If you haven’t defined these different workflows, then you will run into workflow issues.
  • Workflow Documentation – Once you have defined the different types of content workflows your content team will focus on, it’s important to document these. A lack of documented workflows will cause many issues and problems in your content production.
  • Team Roles – Just as with content planning, unclear role responsibilities can lead to duplicated efforts and missed tasks and activities.
  • Content Calendar – Again, just as with content planning, a poorly managed (or no) content calendar can lead to missed opportunities and deadlines.
  • Production Team Meetings – Without a regular and structured team meeting schedule to discuss production issues, chaos ensues.
  • Content Production Tools – Are your team members aware of content production tools that can save them time and increase their productivity? Are they trained to use these tools competently and effectively?
Content Troubleshooting Guide Chart 4: Content Production
Content Production issues affect Content Promotion.

If your team is experiencing issues related to content production, such as:

  • Content Output Is Low/Content Pipeline Has Dried Up – Your team is struggling to come up with new content ideas.
  • Content Is Late – Your content is not being delivered on time; your content team is missing important delivery deadlines.
  • Content Is Below Standard – Your content is not meeting expected quality standards

Then see this section: Troubleshooting Content Production Problems

Additionally, if your team is:

  • Running Out Of Content Ideas
  • Unable To Complete Projects Due To External Circumstances
  • Publishing Content That Is Not Performing Well

Then see this article: What Effective Content Management Looks Like

For more information and help in this area, see this course module: Content Production

Content Promotion-Related Issues

Before troubleshooting issues with Content Promotion,  make sure that systems and processes have been implemented in the preceding levels (Content Strategy, Content Planning, and Content Production), and review the lessons and course modules below:

Implementing effective content promotion systems and processes will ensure that your business promotes content that strengthens its brand, performs well according to set metrics, delivers results that meet or exceed expectations, and that it can continue to improve and refine its processes.

Issues related to content promotion are often caused by the lack of systems or processes in areas such as:

  • Marketing Plan – The lack of an overall marketing plan results in not knowing when or which content to create or promote.
  • Content Marketing – The lack of a clear content marketing plan leads to focusing time and effort on content methods and activities that fail to meet your target audience’s needs and ultimately perform poorly.
  • Content Metrics – Not knowing which metrics to track and not tracking important metrics means that your business cannot measure results or improve its content performance.
  • Content SEO – To deliver optimal results, your content should be optimized for both humans and search engines. SEO-related issues include poor results in search engines or being penalized for failing to adhere to SEO guidelines.
  • Content Distribution – Not knowing which distribution channels or the right formats to use when sharing, publishing, and promoting your content leads to poor user engagement and poor results.
  • Content Promotion Tools – Not knowing about useful content promotion tools and services or how to effectively use these can lead to significant time and effort being spent on activities that could be automated or boosted to deliver better results such as wider reach, more engagement, higher conversion rates, etc.
Content Troubleshooting Guide Chart 5: Content Promotion
An effective Content Promotion system helps to reduce Content Management issues.

For more information and help in this area, see this course module: Content Promotion

Content Management-Related Issues

Before troubleshooting issues with Content Management, make sure that systems and processes have been implemented in the preceding levels (Content Strategy, Content Planning, Content Production, and Content Promotion), and review the lessons and course modules below:

Implementing effective content management systems and processes will ensure that your business can continue to grow, scale this growth, and help it achieve its goals and objectives to realize its vision.

Issues related to content management are often caused by the lack of systems or processes in areas such as:

  • Content Organization – A lack of organization at this level results in your content team spending too much time and effort looking for the information it needs to get things done. This creates delays and missed deadlines, and results in wasted opportunities, wasted time and resources, etc.
  • Content Documentation – A lack of documentation puts your business at risk and creates many issues, such as inconsistent standards, low-quality output, etc.
  • Content Tracking – Not having tracking systems in place to monitor, measure, analyze, and review data and performance means that your business is operating on guesswork and hence cannot improve its results.
  • Content Protection – A lack of content protection measures can result in copyright issues, unauthorized use of your content or content theft, etc.
  • Content Linking – A lack of an effective content-linking management strategy can lead to issues like broken links, links leading to error pages (poor user experience), having to manually search and replace outdated links throughout your website, etc.
  • Content Reviews – Not performing regular content reviews can lead to a growing body of content that is outdated, inaccurate, obsolete, or irrelevant to users, leading to poor user experience, loss of traffic or conversions, etc.
  • Content Backup Strategy – Not having a content backup strategy in place places your business at serious risk of losing some or all of its content should something unexpected happen (e.g. loss of server, security breaches, etc.)
  • Content Management Tools – Not knowing about useful content management tools and services or how to effectively use these can lead to significant time, effort, and resources being wasted trying to manage content and content-related processes that could be automated and better organized.
Content Troubleshooting Guide Chart 6: Content Management
Effective Content Management systems and processes will help your business achieve its goals and objectives.

For more information and help in this area, see this course module: Content Management

Outsourcing-Related Issues

When troubleshooting issues related to Outsourcing, make sure that systems and processes have been implemented in the preceding levels (Content Strategy, Content Planning, Content Production, Content Promotion, and Content Management), and review the course lesson below:

Essentially, your business should not outsource anything until it has the systems and processes to manage everything it plans to outsource.

Implementing effective systems and processes for outsourcing content-related areas and activities (e.g. Content Production, Content Promotion) will ensure that high-quality standards of service and delivery are maintained by your outsourced providers.

Without systems and processes to outsource effectively, your business is not outsourcing but abdicating its responsibility for managing its outsourced processes.

Issues related to outsourcing are often caused by the lack of systems or processes in areas such as:

  • Outsourcing Strategy – Your outsourcing strategy determines what areas of your business should be outsourced and why. Without a strategy, outsourcing is like a rudderless ship, aimless and without direction.
  • Outsourcing Plan – Your outsourcing plan defines how outsourced areas like Content Production or Content Promotion should be managed. Without an outsourcing plan, your business could be wasting valuable time and money instead of saving time and money.
  • Outsourcing Management – If your business is putting external providers in control of managing the systems and processes that the business should be managing, then it can’t control or improve the quality of the outsourced work.
  • Outsourced Hiring – A lack of outsourced hiring guidelines can result in spending time and money hiring people or services that can’t meet your business expectations.
  • Outsourcing Documentation – A lack of outsourcing documentation (e.g. guidelines, procedures, training, etc.)  can result in outsourcing work to people or services who can’t deliver work to meet the quality or standards that your business needs.
  • Quality Management – Without a process to track, measure, analyze, and review what it is outsourcing, your business can’t manage and improve the quality of the work being delivered.
Content Troubleshooting Guide Chart 7: Outsourcing System
Effective Content Outsourcing also helps your business achieve its goals and objectives.

For more information and help in this area, see this course lesson: Outsourcing

Content Troubleshooting – FAQs

Here are frequently asked questions about content troubleshooting:

What is content troubleshooting?

Content troubleshooting involves identifying and resolving issues with digital content, such as web pages, articles, or multimedia, to ensure they function properly and deliver the intended user experience. It includes diagnosing technical errors, addressing formatting issues, and resolving compatibility problems.

What are common issues in content troubleshooting?

Common issues include broken links, missing images or videos, formatting errors (e.g., text alignment or spacing), slow page loading times, and compatibility issues across different devices or browsers.

How do I troubleshoot broken links?

Use website auditing tools to identify broken links, then update or remove them accordingly. Regularly check and update internal and external links to maintain website integrity.

What tools can I use for content troubleshooting?

Tools like Google Search Console, Screaming Frog, and SEMrush can help identify technical issues and optimize content for better performance and user experience.

How can I troubleshoot slow page loading times?

Optimize images and videos, enable browser caching, use a content delivery network (CDN), and minimize HTTP requests to improve page speed.

What role does content management system (CMS) play in troubleshooting?

CMS platforms provide tools and functionalities to manage, edit, and troubleshoot content effectively. They streamline the process of identifying and resolving issues within digital content.

How do I troubleshoot formatting errors?

Review the HTML and CSS code for errors, ensure proper use of tags and styling, and test content across different devices and screen sizes to address formatting inconsistencies.

What steps can I take to troubleshoot compatibility issues?

Test content on various browsers, operating systems, and devices to identify compatibility issues. Use responsive design principles and CSS media queries to ensure content adapts well to different screen sizes.

Content Troubleshooting Articles

Refer to the articles below for additional content troubleshooting information:

Content Troubleshooting Guide

Content Troubleshooting Guide

Use this content troubleshooting guide to help you identify and fix content-related issues in your business.
The Challenges Of Managing Content Effectively

The Challenges Of Managing Content Effectively

Learn about the main challenges to managing content effectively and how to address these. 
Overcoming Content Challenges

Overcoming Content Challenges

A comprehensive guide to overcoming your content challenges and growing your business online.
What Effective Content Management Looks Like

What Effective Content Management Looks Like

Learn what effective content management looks like and how it can help to address most of the content-related problems in your business.
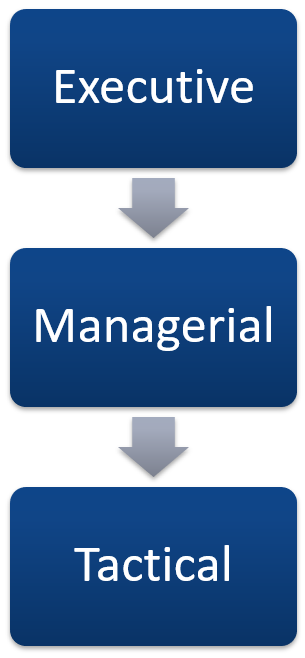
Troubleshooting Your Content Strategy

Troubleshooting Your Content Strategy

Troubleshoot common problems that can affect your content strategy.
Troubleshooting Your Content Plan

Troubleshooting Your Content Plan

Troubleshoot common issues in your content plan to improve your content strategy.

***

Image: Laptop

How To Prevent Content Hotlinking

Learn how to prevent unauthorized users from hotlinking to content hosted on your website. 

How To Prevent Content Hotlinking

Learn what hotlinking is and how to prevent unauthorized users from hotlinking to content hosted on your website. 

Prevent Hotlinking - Anonymous userHotlinking is when someone links directly to assets on your website, such as images, videos, or downloadable documents.
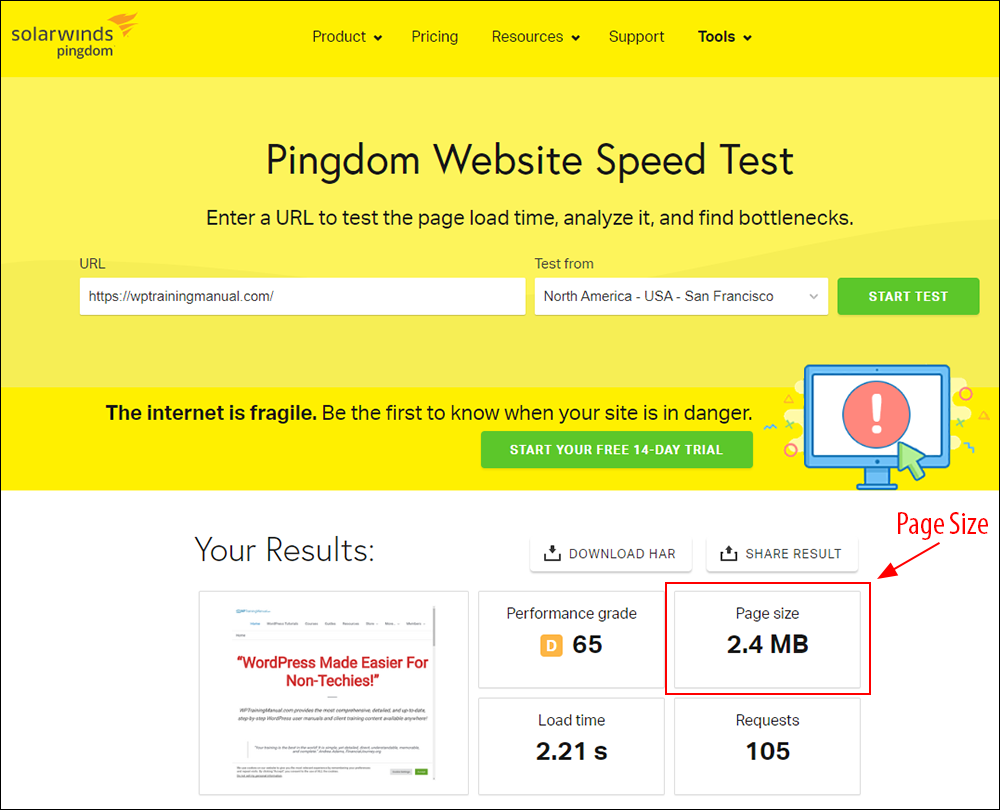
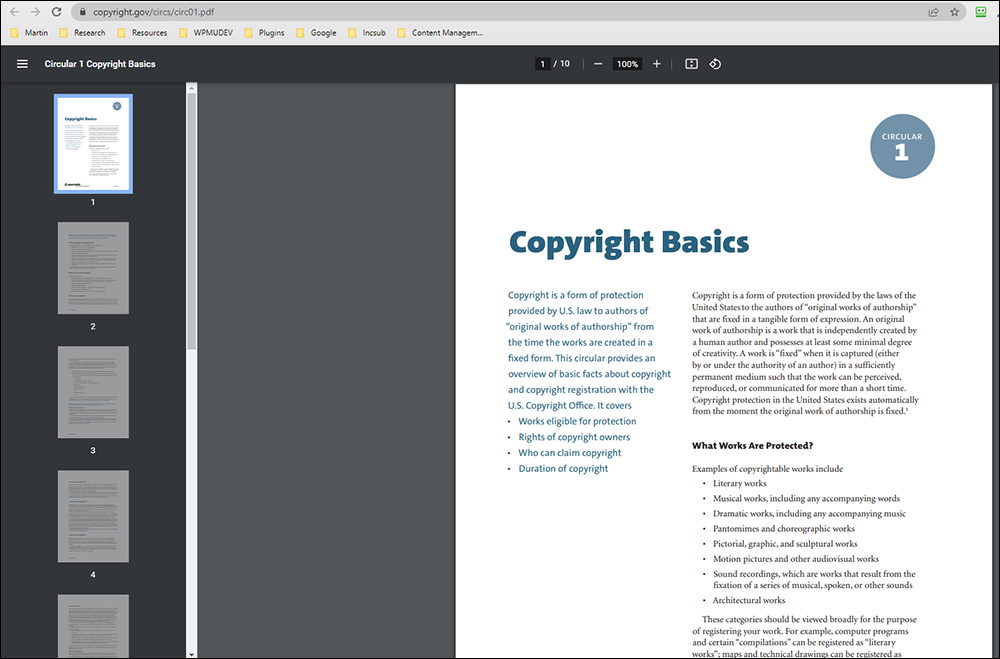
In this lesson, we cover the following:

  • Why Hotlinking Can Hurt your Business
  • Hotlinking Examples
  • Ways To Prevent Hotlinking
  • How To Prevent Image Hotlinking On AWS

Why Hotlinking Can Hurt Your Business

Hosting a website uses server resources to store your files and serve your content over the internet.

Disk space is the amount of data you can store on your web server.

Bandwidth is the amount of data your host allows you to transfer to and from your web server each month.

When someone embeds content from your site into their site using the direct file URL to your content, they are effectively stealing bandwidth, generating unnecessary traffic hits on your website, and consuming your hosting resources.

info

Publishing media-rich content increases the size of your web pages and requires more bandwidth to serve your files, images, etc. over the internet.

As a result of improved broadband speeds, websites are publishing more media-rich content and so web pages are getting larger every year.

According to research, the average web page is now around 1.5 MB. You can check the size of your web pages using a tool like Pingdom.

Pingdom Website Speed Test
Use a tool like Pingdom to check the size of your web pages.

So, for argument’s sake, let’s say that the average web page on your website is 2MB. If you have 1 GB of disk space, you can host 500 pages.

More importantly, serving your web pages over the internet will use up bandwidth. How much bandwidth your site uses depends on factors like the average size of your web pages, the number of visitors to your website, how many pages they, whether users can download files from your site, etc.

Although many hosting plans nowadays typically include generous amounts of disk space and bandwidth (which reduces the cost of using server resources), hotlinking to content on another site without the content owner’s permission can range from being considered a “rude” practice, to copyright infringement, to downright content theft that can seriously hurt a business.

The bottom line is that a website uses server disk space and bandwidth and this costs money. So, if you host an image or a video on your website and other people link to it from their website, then every time someone accesses that file on their website, your business is paying for it.

tip

If you experience a surge of traffic on your website, check your stats and server logs…someone may be hotlinking to content on your site.

Hotlinking Examples

Consider this…

In the Content Protection lesson, we talked about copyright and referenced the US Copyright Office’s Copyright Basics Guide in the content.

Screenshot of Copyright Basics Guide
The Copyright Basics Guide can be viewed on The United States Copyright Office website by clicking on this link. Click on the image to view an enlarged version of the image.

Clicking on the link above takes you directly to the PDF guide hosted on the US Copyright Office’s server, hence we are “hotlinking” to that file from this site.

The advantage of linking to the above resource, (which the US Copyright Office is hosting on their server), is that visitors clicking through to it from this site will see the latest version of the guide whenever updates are made to the document, whereas if we were to host the document, it would quickly become outdated, as we have no control over its content, nor the time or the resources to make sure that our hosted file is the latest and most up-to-date version of the document.

One of the disadvantages of linking directly to content hosted on other servers is that if the content owner removes their content, renames the link URL, transfers it to another location, or blocks the content from being accessed entirely (e.g. to prevent hotlinking), you end up with a bad link and poor user experience.

Let’s use another example…

When we looked at content protection tools, we included this video from Copyscape:

Although the above video was sourced from Copyscape’s website, it is actually hosted on YouTube.

So, we are “hotlinking” to YouTube’s servers. This is perfectly acceptable, however, as YouTube encourages people to embed and share videos hosted on their servers (and gives them the option of allowing or disallowing others from embedding or sharing their videos).

“Hotlinking” to the above video, then, isn’t costing the business disk space or bandwith, as YouTube is paying for it.

Now…let’s bring this discussion back to your business.

Suppose one of your web pages includes a bunch of images or a video. If someone copies and pastes the content from your web page on their site,  those images will be loaded from your website, which uses up your bandwidth, costing your business money.

This might be ok in some instances. For example, your business may want other sites to link to a downloadable resource that you regularly need to update (e.g. a PDF product catalog) or affiliate banner images.

If your business is not happy to pay for the cost of other people linking to your content from their site, however, then you need to look at ways to prevent hotlinking.

Ways To Prevent Hotlinking

When creating content for your website, it’s important to show the same consideration for other website owners as you would like them to show you and avoid hotlinking to assets hosted on other websites.

The simplest way is to host the assets on your own server. If you find an image on another website that you would like to use on your own website, upload the image to your server (or a file storage solution) and deliver it from there (make sure that you have permission to use the asset or the asset is part of a creative commons license, and give proper credit or attribution).

This also increases the asset’s delivery speed as the user’s browser won’t need to perform an additional DNS lookup.

Unfortunately, you have no control over whether other websites will show you the same consideration, so let’s look at solutions you can implement to help avoid or prevent hotlinking.

Prevent Hotlinking By Renaming Your Files

One of the simplest and most effective ways to prevent hotlinking is to simply rename your files or change the URL of your content (e.g. image).

This method is not recommended, however, as it could lead to pages on your own site having broken links if they link to the content.

If you do decide to use this method, however, then make sure to run a global search and replace on the URL, or use link management tools to redirect changed links.

Prevent Hotlinking With Plugins (WordPress Sites)

If your site is built using WordPress, there are WordPress plugins available to help prevent hotlinking.

For example, if you use WordPress and host videos on Amazon S3, you can manage and protect your content from unauthorized sharing or downloads using a plugin like S3 Media Maestro.

S3 Media Maestro
S3 Media Maestro protects your S3-hosted videos from being shared or downloaded without your permission.

Prevent Hotlinking By Editing your .htaccess File

Editing your .htaccess file can help to prevent the hotlinking of images on your website but it requires knowing how to edit files on your server.

For this reason, we recommend letting your webmaster, web developer, or web host handle this for you.

In some cases, you can use the .htaccess file to replace hotlinked images with an offensive image. This can help to deter other websites from hotlinking to your site.

Enable CDN Hotlinking Protection

Does your website use a Content Delivery Network (CDN)? If so, check their documentation. Many CDN services provide built-in hotlinking protection.

Restrict Hotlinking By Blocking Domains

Web hosting management applications like cPanel provides security tools with hotlink protection features that allow you to block specific domains from using your content.

cPanel Dashboard: Security tools - Hotlink Protection.
Webhosting management tools like cPanel provide Hotlink Protection security features.

If you have access to your hosting control panel, you can use this method to protect your website from hotlinking to content hosted on your own server.

Simply enable the feature and list all the URLs that are allowed to access your content. Make sure to include http://, http://www., https://, and https://www. versions of your domain.

Prevent hotlinking with cPanel - Hotlink Protection screen.
Enable hotlink protection and add a list of URLs that are allowed to access your content.

If you don’t have access to your web server management tools, then ask your webmaster (or web developer), or web host to configure these settings for you.

File A DMCA Notice

If you discover that a website is hotlinking to your content without your permission or license and this creates a serious issue for your business, you can try asking them to remove the content from their website.

If they ignore or refuse your requests to remove the hotlinks to your content, then you can try filing for DMCA protection against the offending website.

How To Prevent Image Hotlinking On AWS

Amazon Web Services (AWS) like Amazon S3 provide a cost-effective, scalable, and secure way to store and protect data remotely.

You can host images, videos, and downloadable files on Amazon S3’s cloud servers (instead of hosting them on your own server) and add the files to your website, so users can view or access the content.

If you use Amazon AWS to host content remotely, the tutorial below will show you how to protect your assets from hotlinking by creating a special file called an S3 Bucket Policy containing special code that will prevent the unauthorized use of images (or videos, downloadable PDFs, etc.) on your website.

First, we will show you how to use a free tool provided by Amazon called the AWS Policy Generator to create policies that control access to Amazon Web Services (AWS) products and resources, then we will show you how to upload this policy to the folder (called a bucket) where your images and other media are stored.

Step 1 – Create An S3 Bucket Policy

Go to the AWS Policy Generator page. You don’t have to be logged into your AWS account to access this tool.

AWS Policy Generator screen.
Prevent content hotlinking with the AWS Policy Generator.

In the AWS Policy Generator screen, go to the “Step 1: Select Policy Type” section, and select S3 Bucket Policy from the “Select Type of Policy” drop-down menu.

AWS Policy Generator - Select Type of Policy
Select S3 Bucket Policy from the drop-down menu,

For this policy, we want to deny access to our website images to any site other than our website (or the sites that we specifically nominate), so select Effect > Deny.

AWS Policy Generator - Add Statement(s) - Effect
Choose Deny in the Effect option.

In the Principal field, type an asterisk (*)

AWS Policy Generator - Add Statement(s) - Principal field
Type an asterisk into the Principal field.

From the Actions drop-down menu, select GetObject.

AWS Policy Generator - Add Statement(s) - Actions
Select GetObject in the Actions drop-down menu.

For the Amazon Resource Name (ARN) field, we need to enter the location of the bucket where we want to apply the policy.

For this example, we want to block access to all media stored in the bucket, so the string of text we will enter into this field must be in the following format (replace [BUCKETNAME] with your bucket’s name):

arn:aws:s3:::[BUCKETNAME]/*

To view the Amazon Resource Name (ARN) of your bucket, log into your AWS account, then select Storage > S3.

AWS account screen with S3 option highlighted.
Select Amazon Simple Storage Services (S3) from your AWS account screen.

Select the bucket whose content you want to protect and click on the Copy ARN button to copy the Amazon Resource Name to your clipboard.

AWS account: S3 Buckets screen
Select your bucket and click on Copy ARN.

Alternatively, you can click on the bucket name, then select the Properties tab. You should see the ARN displayed on the screen, as shown in the screenshot below.

Amazon S3 Bucket Properties tab.
You can also find your ARN in the Bucket Properties tab.

Copy and paste this ARN into the Amazon Resource Name (ARN) field and make sure to end a forward slash + asterisk (/*) at the end (see screenshot below)

AWS Policy Generator - Amazon Resource Name (ARN)
Paste your ARN into the Amazon Resource Name (ARN) field.

Next, click on the Add Conditions (Optional) link.

AWS Policy Generator - Add Conditions (Optional)
Click on the Add Conditions (Optional) link.

Do the following in this section:

  • Condition – Select StringNotLike from the drop-down menu.
  • Key – Select aws:Referer from the drop-down menu.
  • Value – In this field, enter the URL of the domain(s) you want to protect.
    • If giving access to a single domain only, enter both the “https://domain.tld” and “https://www.domain.tld” values, separated by a comma.
    • If giving access to multiple domains, repeat the same process as above for all the domains you wish to include in your Bucket Policy.

Click the Add Condition button when done.

AWS Policy Generator - Add Conditions (Optional) with options selected.
Fill in the fields as shown here and click on the Add Condition button.

The policy generator tool will display the Condition you have just added on the screen.

Note: If you want to add more domains to the policy, just enter these into the Value field and click the Add Condition button.

Next, click the Add Statement button.

AWS Policy Generator - Add Conditions (Optional) with Condition added.
After adding the Condition click on the Add Statement button.

The policy generator tool will display the Statement you have just added on the screen.

Click the Generate Policy button.

AWS Policy Generator - Step 3 Generate Policy ith button highlighted.
After adding the Statement click on the Generate Policy button.

The tool will generate the snippet of code you will need to add to your Bucket Policy field.

Select and copy all the content generated by the tool to your clipboard.

S3 Bucket Policy example.
Select and copy your S3 Bucket Policy text to your clipboard.

Step 2 – Add The Bucket Policy Code To Your Bucket

Return to your AWS dashboard and paste the content from your clipboard into the Bucket policy text area (in the Bucket’s Permissions tab).

Prevent hotlinking. Amazon S3 account area - Bucket policy text area.
Paste the contents of your clipboard into the Bucket policy text area.

If you use a tool like S3 Browser (a freeware Windows client for Amazon S3), you don’t even need to log into your Amazon AWS account.

Just open your S3 Browser tool, and select the bucket from the list…

Prevent hotlinking. S3 Browser screen with bucket selected.
Select your bucket in S3 Browser.

Right-click on the bucket name and select Edit Bucket Policy.

Prevent hotlinking with S3 Borwser - Edit Bucket Policy
Right-click and select Edit Bucket Policy…

Paste the bucket policy you created into the text area and click the Apply button.

Prevent hotlinking with S3 Browser - Bucket Policy Editor
Paste the content into S3 Browser’s Bucket Policy Editor.

After adding the policy to the bucket containing your site’s images, here’s how to test things to make sure that everything is working:

Go to your website, then select a section of your content on a page that contains images and copy the content to your clipboard.

Sample of content selected for copying
Test your policy by selecting content from your protected site and make sure to include images.

You will need access to a website on another domain (or ask someone with a website on another domain to help you).

Create a new article or blog post and paste the content you have copied from your website into the new site.

If you have generated and added the policy to your site correctly, no images should show up on the content pasted into the unauthorized domain.

Prevent hotlinking of content pasted on an unauthorized site with hotlink protected images.
Success…our hotlink-protected images are blocked from displaying on unauthorized sites!

An even simpler way to test things (especially if you can test things on a different domain name) is to simply copy the image address from your website and paste it into your web browser.

This should display an error message like the example shown below, instead of the image.

Prevent hotlinking. Access denied error message.
This is what users will see on their web browsers if they copy your hotlink-protected content.

Congratulations! Now you know how to prevent image hotlinking on your website if you use Amazon’s S3 service to store your website’s media.

Animated image showing content hosted on Amazon S3 with hotlinking-protection.
Protect your content hosted on Amazon S3 from being hotlinked with an S3 Bucket policy.

For more information, see this lesson: Using Amazon S3

Summary

Hotlinking can range anywhere from being considered a “rude” practice, to copyright infringement, to content theft that can hurt a business.

We have listed several ways to prevent other sites from hotlinking to your content.

Action Steps

If hotlinking becomes an issue for your business, consider implementing one or more of the hotlinking prevention methods presented in this lesson.

Resources

References

Next Lesson

***

Image: Anonymous User